Taconic RF-10 PCB electronic specifications

Taconic RF-10 PCB

The Taconic RF-10 is a circuit board that we can use with any computer for electronics design, like the MakerBot or 3D printer. It is an upgrade from the previous Taconic RF-9 released in 2014 and has had many improvements since then. This will show a picture of the Taconic RF-10 PCB board before and after printing. Additionally, it will show how we can use it as a 3D printer in place of the MakerBot.

Description

The Taconic RF-10 PCB is a PCB (printed circuit board) controller for their RF-10 control surface. This surface has a unique design to work with the computer. It allows a user to create interactive artworks and animations. With the characteristics of this hardware, such as its USB connectivity, it is the perfect tool for personal expression. The following article will go through various aspects of using Taconicโ€™s RF-10 PCB controller.

Taconic launched the Taconic RF-10 PCB in 1996. Its design is best when you use it in conjunction with the Apple Macintosh 8600/180 and 9600 series. But we can also use it with other computers via its USB connection. The RF-10 PCB is a joystick controller that allows users to manipulate shapes on the computer screen by positioning a cursor over them. Two large knobs with lights are part of the components to control the intensity of color values. This hardware also has an โ€œAutoTrigโ€ feature that allows users to automate specific actions, such as adding a shape to the screen. We can program this automation feature using the built-in software.

The RF-10 PCBโ€™s design uses a six-pin cable connector that outputs analog signals. RayMing PCB and Assembly recommend people to use special Macintosh video cables. These cables are pin-to-pin compatible with the RF-10 PCBโ€™s cable connector. For example, Apple part number 922-9041. We can find these cables on eBay, electronics supply stores, and other sources. When we connect the RF-10 PCB to a Macintosh 8600/180 computer or 9600 series, the โ€œAutoTrigโ€ feature will not work, especially if we switch off the Mac or put it into standby mode. We can also use the RF-10 PCBโ€™s cable connector as a pass-through to allow scanners to plug directly into the Macintosh.

Specifications

The Taconic RF-10 PCB works best with any computer compatible with Windows 10, 8, or 7 and Mac OS X Mountain Lion or Yosemite. It also requires an internet connection to install software or use the program. You can run the connection by an Ethernet cable, 2.5 USB cable, or a Wifi network. The Taconic RF-10 PCB has many features, such as tools for etching and soldering, a 3D printer, and a programmer for Arduino and Raspberry Pi projects.

How it works

We can easily turn the Taconic RF-10 PCB into a 3D printer. One can do this by adding a plastic extruder that moves in the X and Y direction and, with an object at the end, can get melted into filament. We melt the filament into different colors to use for printing. There is much open-source software you can use with the Taconic RF-10 PCB to design models for 3D printing. First, you have to make or download STL files and then open them with Slic3r, which will create G-code for the printer. G-code is the file type that moves in X and Y directions with an object at the end that melts into filament and makes the object get printed.

Benefits

You have many benefits when taking the Taconic RF-10 PCB and printing with it. You do not have to connect the 3D printer to a computer or go through any software to design as there is no software needed for this.

After the 3D printer finishes printing all the layers, it will be very sturdy and easily moved around for easy printing. The plastic extruder is easy to place on any machine that can move it back and forth from X and Y directions.

Excellent price/performance ratio:

The Taconic RF-10 PCB is around $20 for the board and free shipping. There are free software downloads that are also free to use on any Windows or Mac computer. A 3D printer can cost around $2000-$5000 depending on the size and quality. The 3D print quality is much better than the price.

Low X, Y, Z expansion:

The 3D printer does not need a computer or any software to operate, so it does not take up much space to store.

Excellent adhesion to smooth coppers:

You do not need to glue the 3D printer to the surface. One can easily replace the plastic extrude anywhere, and it will stick to any smooth surface.

High thermal conductivity for enhanced thermal management:

The plastic extruder heats molten plastic into different colors for printing. This makes the material make a better bond with the 3D printer.

Low 0.0025 loss tangent @ 10 GHz:

The plastic extruder has a wavelength of around 150 to 200 nm. It is around 0.25% loss tangent at 10 GHz. This is an acceptable percentage to print with and not too difficult to work with.

Tight DK tolerance (10.2 +/-0.3):

The Taconic RF-10 PCB has a tolerance for the dielectric constant of around 10.2 at +21 to -71 degrees Celsius. It is a fairly high-temperature range. A tight loss tangent and good thermal conductivity make it easy to work with and less likely to fail on the 3D printer.

Excellent dimensional stability:

With a temperature around 10.2 +/-0.3 and high thermal conductivity, if you cool down the object from high temperatures to a lower temperature, it will be easier to move on the 3D printer without becoming brittle or breaking apart. Excellent moisture resistance for high-pressure wash applications: You can wash the 3D printer with any water and still work correctly afterward. You do not need to dry it off before use, and it can still print correctly.

High DK for RF circuit size reduction:

The dielectric constant around 10.2 makes it easy to work with, especially radio frequency circuits. You can use it with a radio frequency circuit board with a low ESR and low loss tangent.

Low-temperature coefficient:

The Taconic RF-10 PCB has a temperature coefficient of 0.0039%/C at +30 to -30 degrees Celsius, which is acceptable for working with RF designs.

Applications

The Taconic RF-10 PCB can be helpful for electronics design and a 3D printer, whose original purpose was when Stratasys released it in 2014. It uses a 3D printer that moves back and forth with thin layers of material extruding from the nozzle. This creates any shape or form depending on the design.

Military and Aerospace Electronics

Taconic RF-10 PCB has many applications. One example of this is satellite components. We can use the Taconic RF-10 PCB with a printed circuit board to design the satellite components attached to the antenna. Suppose you take another 3D printer that uses a metal extruder and print it on separate layers. In that case, you can join these two layers together with soldering material to make the final product. Then you can use the Taconic RF-10 PCB to design the satellite components you will print on the composite material. Then you can print all your thermal management, EMC, and RF designs on these components.

Microstrip Patch Antennas

Another example of an application is using the Taconic RF-10 PCB with a 3D printer to create microstrip patch antennas. Microstrip patch antennas can be helpful in any electronics design. You can use the Taconic RF-10 PCB as either an input or output device for any radio frequency circuit board that needs designing with a microstrip antenna for wireless communication.

Satellite Components

Satellite components consist of metal, and many components help make the satellite functional. Many different printed circuit boards are helpful inside of a satellite. These boards have components that use the Taconic RF-10 PCB to conduct their circuitry. These components include transistors, resistors, capacitors, diodes, and many more. The metal also acts as shielding to prevent the satellite from getting damaged by radiation from the sun. The satellite also needs to transmit the data back to Earth which the command center controls. Antennas are helpfully attached to the Taconic RF-10 PCB printed circuit boards to transmit the data back.

Solar Power Systems

Solar power systems consist of many different parts, and they can be quite large in scale. There are a lot of electronics involved in a solar power system that we can print on the Taconic RF-10 PCB. This will allow you to print many different components onto one substrate, such as a single printed circuit board with all of its components.

The first component needed in any solar panel system is the first part of the sunray spectrum, which is around 0.5โ€“5 ฮผm wavelength light. We achieve this by using optical fiber from solar glass to a solar panel. The second component is the polycrystalline silicon cell. The polycrystalline silicon cell converts the sunlight into electricity. Solar panels have many different optical fibers attached to glass solar cells on circuit boards that use Taconic RF-10 PCB. According to the USGS, a very small amount of silicon is also helpful in the cells. It costs around $15 per kilogram.

Aircraft Collision Avoidance Systems

Aircraft collision avoidance systems consist of many components, such as radar and LIDAR, which use radars and lasers to detect targets and avoid collisions. A Taconic RF-10 PCB can design the circuits for these components.

Conclusion

The Taconic RF-10 PCB can help upgrade your MakerBot or 3D printer by adding a plastic extruder to it. We can easily add the plastic extruder by screwing a threaded rod into the end of the board and melting it. The Taconic RF-10 PCB has many features that make your 3D printer more powerful and easier to print objects.

Working principles of a touch sensor

touch screen sensor

IoT projects with Arduino boards are increasing in popularity. Most of these projects will need a sensor to detect a touch input or movement. Then, they do something with that input or trigger an event.

The human body has five senses: sight, hearing, touch, taste, and smell. Every visitor of the Internet will have heard of them. Machines also need to have the sense to be able to perform tasks.

Most of these sense elements are similar in a touch sensor. How does the human body perceive touch? What happens because of touch โ€“ and how is this perceived?

Skin receptors are nerve endings in the dermis, the middle skin layer. Some of these receptors perceive touch and pressure and others temperature.

The detection of touch by the human body is unique for each finger. This is because each finger touches differently and has different receptors. The receptors need different stimulation to perceive a specific object โ€“ so-called multi-modal perception.

Touch sensors depend on these principles:

touch sensor board

Principle 1: Tingling feeling

The human body has receptors that detect skin texture and touch pressure. When a finger contacts the surface (e.g., tabletop), the dermis on the finger pushes against the air layer. This pressure difference causes a small amount of electrical energy to move through nerves to the brain. The brain sees this as a tingling sensation.

Touch sensors use this principle:

When a finger touches a surface, the sensor detects this physical change. Then, it sends an output signal to control or monitor, depending on what action we desire.

Principle 2: Pressure

Most of the human body’s touch sensors react when applying pressure to the skin. In addition, the human body has some mechanical touch receptors.

Touch sensors use this principle:

A finger on a surface causes the sensor to activate and move inwards. It lets the finger touch it or resist its movement. If a finger touches hard enough, it can break through a surface (e.g., paper).

Principle 3: Temperature

Heat activates many receptors in the skin. It senses this with a technology called thermal sensing. It works like pressure sensors. But instead of pressure, there is heat. So the skin receptors can detect the temperature on a hot surface triggered by heat.

Touch sensors use this principle:

The body senses touch when it encounters a specific temperature. Then it changes its state of motion. Using a thermal sensor, the human body can detect heat on a surface.

Principle 4: Light

Light controls the distance of human body hair. That’s why a person gets goosebumps when touched by cold air or water. In addition, human skin has specific receptors that detect light. These are sensors for touch pressure and temperature. They send their signals to the brain through nerves in the same way as a tingling sensation in principle 1.

Touch sensors use this principle:

There is a sensing of the distance between two surfaces and changes when touched.

Principle 5: Hearing

Some skin receptors are sensitive to sound vibrations, but they detect touch. Also, the human body nerve endings react to pressure vibrations and temperature.

Touch sensors use this principle:

To sense touch, the human body converts sound vibrations into electrical signals. It then sends these to the brain through nerves.

Even if the human body’s senses don’t work as you think, it’s still possible for us to know how our fingers move. This happens even with technology that doesn’t perceive touch. For example, a phone can tell you which direction your finger is moving.

Touch sensors can detect many different types of touch using these principles.

What is a touch sensor?

This device detects whether a finger is touching or moving over it. It converts the touch of the skin into an electrical signal and sends this to a control board (e.g., Arduino). And that board then triggers an event or action, such as turning on/off an LED or sending data to the Cloud for storage. 

When you touch a sensor, a small amount of electrical energy passes through a metal strip and touches your skin. This small amount of current causes your skin to signal to your brain. It then interprets it as a tingling sensation. This tingling sensation is one of the five senses listed above and is often known as “pressure.”

We can make a touch sensor’s body from wood or plastic. Para-board sheets or plastic films can help create these bodies. We connect the sensors with wires, which go through various holes on both sides of the board.

How does a touch sensor work? 

Touch Sensors consist of a sensor and an actuator.

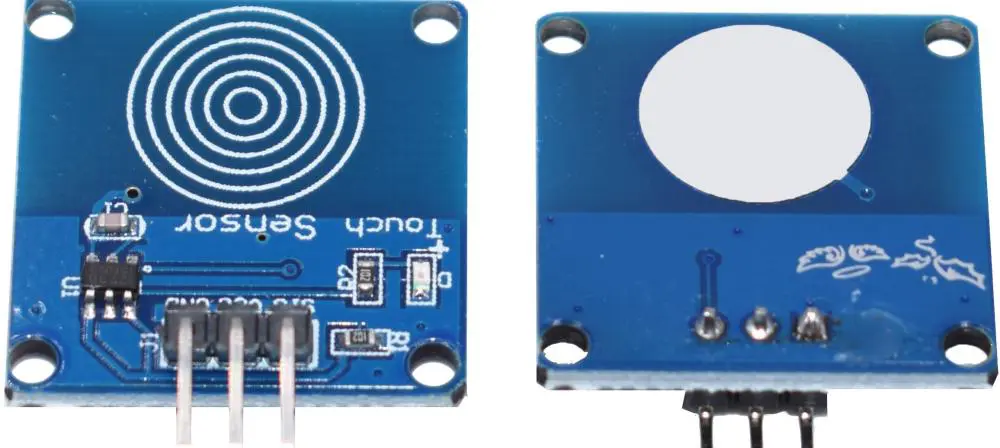
The ttp223 touch sensor is an electrically resistant material within the touch sensor that touches your skin. It converts that touch into an electrical signal. A metal film on the other side covers the resistance area, creating a touchpad. When we apply pressure to this pad, the electrical resistance indicates pressure. Next, we connect the metal film to digital pins (e.g., “2” in Arduino). Finally, we call the signal that the computer receives an analog output.

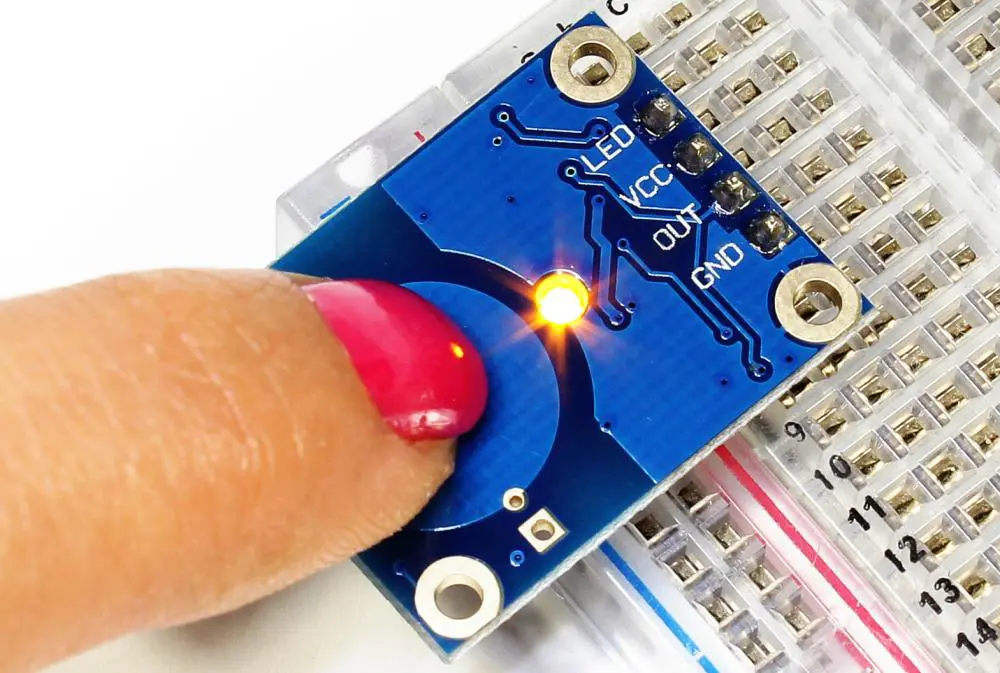
The actuator is the circuit that converts the signal into electric pulses. This can be a motor connected to a battery, which rotates when low input (e.g., “1”). The actuator can also be a light-emitting diode (LED), which turns on when there’s no input (e.g., “3”). Next, we connect the LED. Then we can use this to control devices such as an LED connected to a microcontroller. They include Arduino or PICAXE.

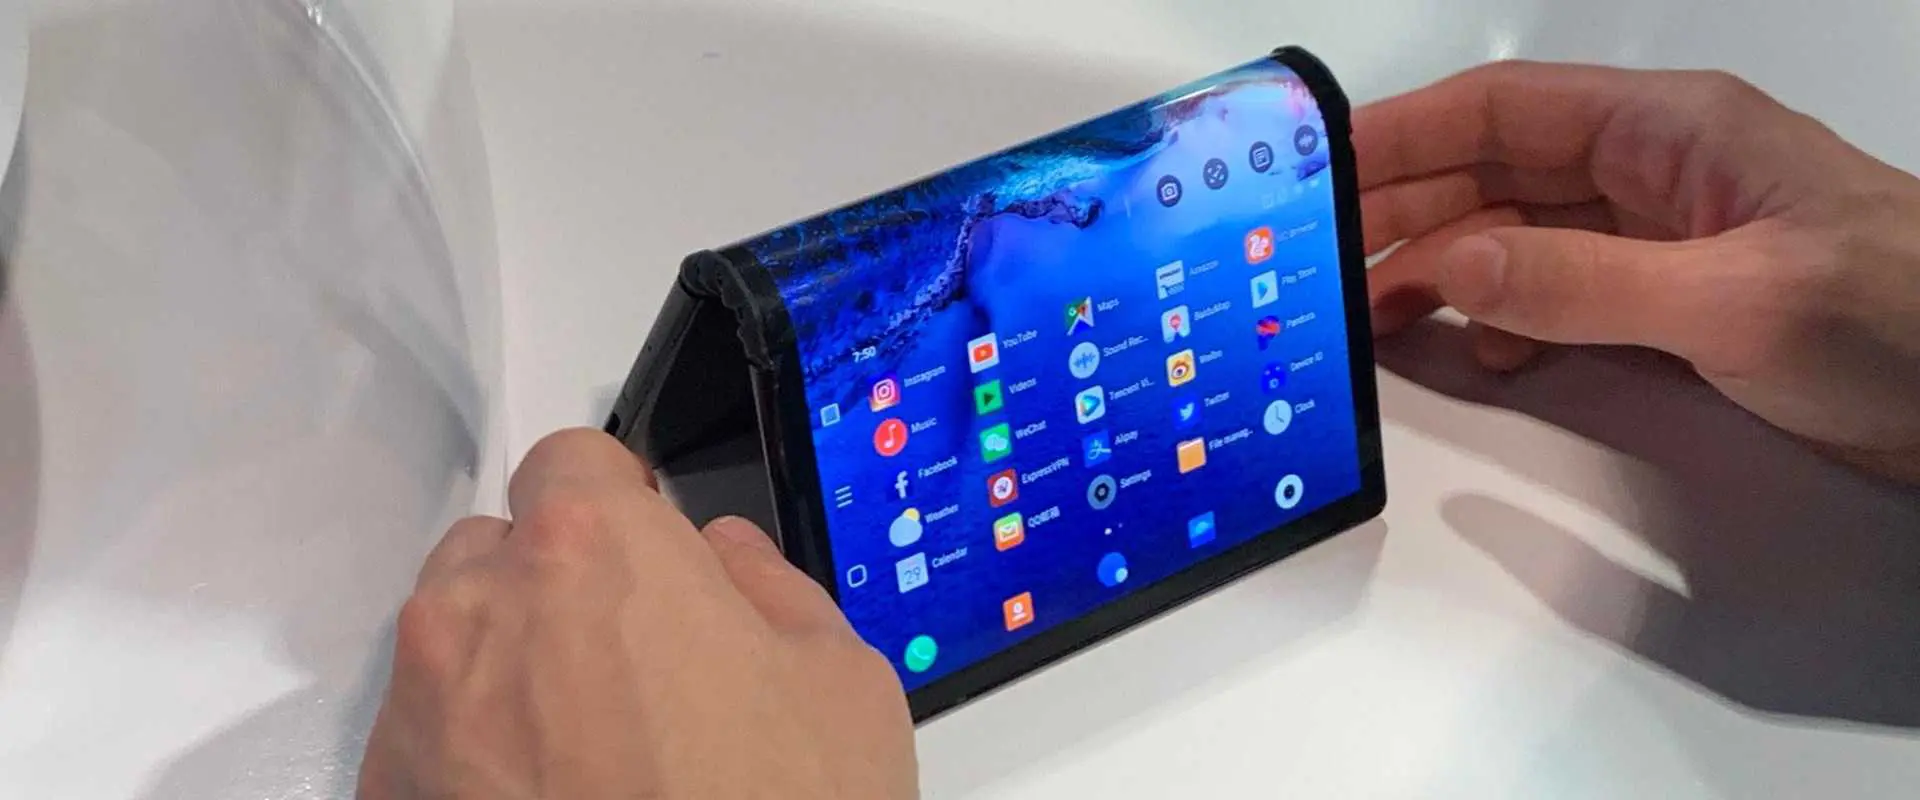
Using several joints and connectors makes it possible for sensors to create many different shapes. For example, we can bend a sensor with six joints into a “Z” shape. It allows you to touch different forms from both sides easily. Likewise, we can make a similar sensor into a square-shaped pad. They work with touch screen devices.

We create this sensor using a thick caulk gun to fill the joints with glue. The glue then hardens into a solid piece of plastic, and the joints are full of gold powder. We call this 3D printing. It is faster and more precise than traditional plastic manufacturing techniques.

A simpler method is to bond several joints together. It creates many sensors in different sizes and shapes.

Touch sensor applications

touch sensors arduino

There are many different applications for touch sensors.

1. Touch sensor in robotics

There are many ways for touch sensors to work in robotics. For example, we make some with different joints to change into different shapes and sizes. In addition, these sensors often work as obstacle detectors. This allows the robot to avoid colliding with walls or furniture.

2. Touch sensor in home appliances

We can use touch sensors to control different devices at home. For example, you can turn on a TV or change the volume using a sensor made of plastic film and elastic bands. This sensor can easily slide on your hand and uses light pressure to change states (e.g., brightness).

3. Smartphones

Some touch sensors consist of a single strip of temperature-sensitive paper. They sell for about $2. With this sensor, you can easily touch and see the temperature in your hand.

4. Touch surfaces for electronic devices

Touch surfaces for electronic devices have become very popular. They offer many methods of controlling the device hands-free. Devices can include game consoles like Xbox 360 Kinect and mobile phones.

5. Automotive technology

Specialty touch sensors are helpful in the latest innovations. They include gesture control, proximity, and haptic feedback. With the new technology, touch sensors can access information. They also operate electronic devices and even control a vehicle.

An Arduino touch sensor is just a pressure sensor. So, when you press on a keyboard, a pressure sensor converts your touch into an electrical signal. Then, it sends it to the computer or smartphone you’re using.

6. Touch sensor faucet in kitchens

We can install touch sensors to control certain water features. For example, touch sensors are on faucets or bathroom taps to turn on or off water flow by touching a sensor.

7. Touch sensor paint

Touch sensor paint is a kind of paint that can change its color when touched with something cold or hot. You can use this paint on walls, furniture, or accent pieces in your room.

8. Industrial applications

Industrial touch sensors are essential in factories and workshops to control different machines. For example, we can place sensors on equipment to turn it on or off when working with it.

Types of touch sensor

Touch sensors are special pressure sensors that can read both air and contact pressure.

Touch sensors are simple but very effective. They don’t need special hardware or sensors. They only need a metal film on one side and a touchpad on the other side. This is an easy and cheap solution that anyone can make.

Touch sensors are very popular in electronics. Most of these sensors use a thin plate of metal as the touchpad. They also use an elastic band to connect the two sides of the sensor. We use these sensors in projects requiring only a few resources. They include toys, household appliances, and remote control devices.

There’s a wide range of applications for touch sensors. It makes it possible to use them in almost any product or system.

1. Capacitive touch sensor

A cap touch sensor works by detecting the change in capacitance between the two sides of the sensor when there’s pressure on one side. The pressure causes a slight change in the electrical charge between two metal electrodes on each sensor side. So capacitive touch sensor measures touch depending on the amount of change in capacitance.

How do capacitive touch sensors work

a) We use two metal plates on each side of the sensor. These two plates connect to a microcontroller with a wire.

b) When the user touches one side of the sensor, there’s a slight change in conductance between the user and the sensor. It causes a difference in the electrical field.

c) A microcontroller picks up the change in capacitance and converts it into an input signal.

d) The output gives information on touch, pressure, and touch location.

Capacitive touch sensor applications

a. We can use capacitive touch sensors in many different touch applications. For example, we use it in touchpads and buttons where a switch activates when the finger touches the pad. This touchpad allows a person to use their finger instead of a stylus to control. You can also write on an electronic device such as a smartphone or computer.

b. We can also use a capacitive touch sensor to create a multi-touch surface. More than one person can use the device simultaneously. It will recognize every touch separately.

c. We can use a capacitive touch sensor in capacitive styluses. They detect the position of a finger or stylus when touching a conductive surface.

d. We also use capacitive touch sensors in capacitive proximity sensors. They tell if a certain object is in contact or near another object or surface.

Advantages of a capacitive touch sensor

a) Capacitive touch sensors are very simple.

b) Capacitive touch sensor is a very low-cost solution. As a result, we can use them in various applications and products.

c) Capacitive touch sensors need no extra hardware or power source to function.

d) Capacitive touch sensor doesn’t need extra material to work properly. Instead, it requires two metal plates and other materials. They include the rubber band, plastic film, paper, or conductive paint.

Disadvantages of a capacitive touch sensor

a) Capacitive touch sensor doesn’t have any memory. Therefore, we cannot use them to recognize pressure.

b) Capacitive touch sensors don’t have any unique sensing ability.

c) Capacitive touch sensor needs low voltage (4V or less). This high voltage is necessary because the microcontroller consumes the most current. After all, it’s very small and power-hungry.

2. Resistive touch sensor

A resistive touch sensor is a pressure sensor. It uses conductive rubber, silicone, or metal to create a touch-sensitive surface. When there’s pressure applied on one side of the surface, a change in resistance will occur between the two sides of the surface. We can measure and use the difference in resistance to track the pressure and position of the touch.

How do resistive touch sensors work

a) We place a conductive rubber sheet or metal electrode layers on each side of the pad or sheet. The rubber or metal layer connects to a microcontroller with a wire.

b) When we apply pressure on one side of the rubber sheet, the change in resistance will occur between the two sides of the sheet or electrode.

c) A microcontroller picks up and converts the change in resistance into an input signal.

d) The output gives information on touch, pressure, and touch location.

Types of resistive touch sensor applications

a. We use resistive touch sensors in any product where there’s a need to detect pressure. It uses this information to control or notify the user. For example, we can use it in capacitive touchpads where a switch will activate when the finger is touching the pad.

b. Resistive touch sensors are helpful in digital signage and RFID tags.

c. Resistive touch sensors are also used in smartwatches when the touch screen covers parts of the body that a user would typically cover.

Disadvantages of resistive touch sensor

a) Resistive touch sensor is not able to track movement accurately. However, we can detect or measure pressure even if the user is not touching the surface. So it’s useful only in several situations requiring accurate pressure and location detection.

b) Resistive touch sensor requires high-voltage (for example, 15V or more). This high voltage is necessary because the microcontroller consumes the most current. After all, it’s very small and power-hungry.

c) Resistive touch sensor needs a constant electrical power source to function correctly. Therefore, we cannot use it with batteries like other touch sensors.

d) Resistive touch sensors can damage easily. The rubber or conductive silicone layers will start to wear out if it’s overused. This will cause a significant drop in performance.

Difference between the resistive and capacitive touch sensor

Unlike capacitive touch sensors,

1. Resistive touch sensors don’t need special materials. They also do not need specific conductivity to work correctly. This means that we can use every material as a resistive touch surface.

2. Resistive touch sensor doesn’t need a power source to function. Instead, resistive touch sensors use the user’s body as a power source.

3. We can use resistive touch sensors in any product requiring a pressure-sensitive surface.

4. We can use resistive touch sensors in smartwatches to make the screen’s cover of rubber or conductive silicone.

5. Resistive touch sensors cannot track movement accurately. However, we can detect and measure pressure even if the user is not touching the surface. So it’s useful only in several situations requiring accurate pressure and location detection.

6. Resistive touch sensor requires high voltage (for example, 15V or more). This high voltage is necessary because the microcontroller consumes the most current. After all, it’s very small and power-hungry.

7. Resistive touch sensor needs a constant electrical power source to function correctly. Therefore, we cannot use it with batteries like other touch sensors. 

Infrared touch sensor

An infrared touch sensor is also called an IR touch sensor or an IR proximity sensor. It is a pressure-sensitive surface. It uses infrared light to detect objects’ presence, location, and movement. This sensor allows users to interact with physical objects without touching them.

IR Touch Sensor features

a) Infrared light can pass through thin layers to work in very thin objects.

b) Infrared touch sensors follow the human body’s infrared waves that follow nerves and muscles.

c) Infrared touch sensor does not need a power source to operate. Users can place their hands close to it to get desired results.

d) Human eyes do not easily detect infrared light. So, it’s helpful in controlled environments where users need to wear special glasses.

e) The infrared light from the sensor can detect objects at 30cm (11 inches).

Infrared touch sensor disadvantages

a) Infrared light is not visible to human eyes. So, it’s inconvenient to use in public places like airports and hospitals.

b) Infrared light cannot detect motion, but it can detect pressure and proximity. So it’s useful only if there’s an object with pressure-sensitive buttons. Examples include a TV remote control or gaming controller.

c) Infrared touch sensors are not able to track movement accurately.

d) Infrared sensor doesn’t detect objects with good accuracy. Users have to move their hands closer to the infrared touch sensor. Then their hands will activate the button or knob when they are in the range.

e) There are no pairs of infrared touch sensors designed to work together. So it isn’t easy to pair them together and get the desired results.

It’s impossible to use infrared touch sensors in smartwatches that need IR signals to work correctly.

 Difference between the infrared and capacitive touch sensor

a) Capacitive touch sensor follows a human body’s electric waves to detect objects accurately. Unlike infrared, capacitive sensors can detect pressure, movement, and location.

b) Infrared light cannot detect electrically conductive objects. But capacitive sensors can detect conductive objects.

c) These sensors donโ€™t require a power source to operate. But capacitive sensors require a power source to function correctly.

d) Infrared sensors don’t detect objects accurately. Instead, they follow the user’s nerves and muscles. Capacitive sensors use electric charges to detect objects with good accuracy.

e) Capacitive touch sensors cannot track movement accurately. Likewise, infrared touch sensors can’t track movement accurately.

Surface acoustic wave (SAW) touch sensor

A surface acoustic wave touch sensor, also called a SAW touch sensor or SAW proximity sensor, is a pressure-sensitive surface. It uses vibrations in sound waves to detect objects’ presence, location, and movement.

These proximity sensors are common because they require special materials. These materials include aluminum oxide or silicon nitride to work correctly. However, they are not suitable for mass production. They are hard to manufacture and expensive. Nevertheless, these proximity sensors are helpful in the aerospace industry and scientific research.

SAW Touch Sensor features

a) SAW touch sensors have high sensitivity to detect movement with good accuracy. For example, a surface acoustic wave touch sensor can detect the movement of a fly’s wing if the fly is touching the surface.

b) Different kinds of SAW touch sensors with different response times: 1ms and 50ms. Compared with the capacitive touch sensor, 50ms SAW touch sensors could detect movement and pressure better.

c) SAW touch sensors require high-voltage (for example, 15V or more). This high voltage is necessary because the microcontroller consumes the most current. After all, it’s very small and power-hungry.

d) SAW touch sensors are not able to track movement accurately.

e) SAW touch sensors could not detect objects with good accuracy. Users have to move their hands closer to the SAW touch sensor. Then their hands will activate the button or knob when they are in the range.

f) It’s impossible to use surface acoustic wave touch sensors in smartwatches that need IR signals to work correctly.

Advantages

a) SAW touch sensors are not easily damaged or destroyed. In addition, they are environmentally resistant because they consist of tough materials.

b) SAW touch sensors have a wide range of use in different environments like in aircraft, car dashboards, factory production lines, and labs.

c) SAW touch sensors could detect objects with high accuracy.

Disadvantages

a) Surface acoustic wave touch sensor is not using low-level signals. So it cannot detect small signs as accelerometer and proximity sensors do.

b) SAW touch sensors cannot detect non-conductive objects or objects with low conductivity.

c) Surface acoustic wave touch sensor requires high voltage to work correctly. Therefore, it’s not suitable for Bluetooth, NFC, and wireless devices. They require low power.

d) SAW touch sensors are not able to track movement accurately.

e) It’s impossible to use surface acoustic wave touch sensors in smartwatches that need IR signals to work correctly.

How Do Touch Sensors Work With Arduino?

Introduction

Touch sensors are devices that detect touch or contact by a finger, stylus or other object. They allow interacting with electronic systems in an intuitive, tactile way. With the Arduino platform, various types of touch sensors can be easily interfaced to create projects with touch input.

This article provides an overview of popular touch sensor technologies and how they can be wired up and programmed with Arduino to detect touch input in DIY projects.

Types of Touch Sensors

Some common types of touch sensors that can be used with Arduino are:

Resistive Touch Sensors

Consist of two thin conductive layers separated by an air gap. When pressure is applied, the layers touch conducting current that’s detected. Simple construction but prone to damage.

Capacitive Touch Sensors

Detects touch based on capacitance change of a copper pad when a finger comes close. No direct contact needed. More sensitive and durable than resistive types.

Piezoelectric Touch Sensors

Uses crystals that generate voltage when mechanically stressed. Detects touch pressure and force. Highly responsive with solid state construction.

Strain Gauge Touch Sensors

A strain gauge arrangement attached to a springy surface detects bending from touch pressure. Capable of highly sensitive force measurement.

Optical Touch Sensors

Use IR LED beams and detectors to detect touch position. Offers zero-force detection. Used in devices with glass interfaces.

Interfacing Resistive Touch Sensors

Resistive touch sensors consist of a thin metallic coating on the bottom and a flexible coating on top, separated by an air gap. When pressed, the two layers contact closing a circuit.

To wire a resistive touch sensor:

  • Connect one layer to +5V
  • Connect second layer to an input pin through a resistor
  • Touch makes layers contact, current flows through the resistor
  • Input pin reads a HIGH
  • No touch gives a LOW reading

The resistor determines sensitivity. Lower values make it more sensitive to light touches. 10k to 1M ohm is common.

Here is Arduino code to detect touch input:

const int touchPin = 3; // Touch connected to pin 3 void setup() { Serial.begin(9600); // Start serial monitor pinMode(touchPin, INPUT); // Configure pin as input } void loop() { int touchState = digitalRead(touchPin); // Read touch sensor if(touchState == HIGH) { Serial.println("Touched!"); } else { Serial.println("No touch"); } delay(100); // Small delay }

When touched, “Touched!” is printed on the serial monitor. Otherwise “No touch” is displayed. The reading is taken every 100 milliseconds.

Interfacing Capacitive Touch Sensors

Capacitive touch sensing uses human body capacitance to detect touch. An Arduino capacitive sensing library makes it easy to interface sensors.

The capacitiveSensor library provides:

  • capacitiveSensor() – Constructor to specify send and receive pins
  • capacitiveSensorRaw() – Gives raw sensor reading
  • capacitiveSensor() – Adjusted reading from 0 (no touch) to high values (touch)

A threshold on the reading differentiates between touch and no touch.

Sample code:

#include <CapacitiveSensor.h> int sensorPin = 4; // Sensor on pin 4 int threshold = 1000; // Threshold for touch detection CapacitiveSensor sensor = CapacitiveSensor(2, sensorPin); void setup() { Serial.begin(9600); } void loop() { long measurement = sensor.capacitiveSensorRaw(30); if(measurement > threshold) { Serial.println("Touched!"); } else { Serial.println("No touch"); } delay(50); }

The threshold value needs tuning for reliable touch detection. Higher values make it less sensitive.

Interfacing Piezoelectric Touch Sensors

Piezoelectric crystals generate a voltage when mechanically deformed by touch pressure.

To interface:

  • Connect one terminal directly to an analog input
  • Add a resistor from second terminal to ground
  • Apply input smoothing with capacitor

Arduino code:

const int sensorPin = A0; // Sensor on analog pin A0 void setup() { Serial.begin(9600); } void loop() { int sensorValue = analogRead(sensorPin); if(sensorValue > threshold) { Serial.println("Touched"); } else { Serial.println("No touch"); } delay(50); }

The analog reading ranges from no touch to full pressure touch. Setting a threshold performs touch detection.

Interfacing Optical Touch Sensors

Optical sensors use LEDs and phototransistors to detect finger interruption.

To connect:

  • LED connected to digital OUTPUT pin
  • Phototransistor to INPUT pin
  • Finger blocks LED light reaching phototransistor
  • Input pin reads LOW on touch

Arduino code:

const int ledPin = 13; const int sensorPin = 7; void setup() { pinMode(ledPin, OUTPUT); pinMode(sensorPin, INPUT); digitalWrite(ledPin, HIGH); //Turn on LED } void loop() { int touchState = digitalRead(sensorPin); if(touchState == LOW) { Serial.println("TOUCH!"); } else { Serial.println("No touch"); } delay(200); }

When light is blocked by touch, “TOUCH!” is printed indicating detection.

Advanced Touch Sensing with Arduino

More advanced techniques can be implemented in code for improved touch sensing:

Noise filtering – Add averaging of readings over a time period to reduce noise.

Hysteresis – Use two different thresholds during touch detected and no touch states to avoid jitter.

Auto-calibration – Automatically determine touch threshold by sampling no-touch readings on startup.

Multi-touch – Use multiple sensors to determine touch location and number of concurrent touches.

Gesture recognition – Detect common gestures like tap, swipe, pinch etc. based on touch patterns.

Machine learning – Collect training data to build ML models that classify touch inputs.

Applications of Touch Sensing with Arduino

Arduino-based touch sensing opens up many possibilities for innovative projects and products:

  • Interactive interfaces – Touch screens, displays, tablets, panels etc.
  • Smart home controls – Touch based lighting, appliance control panels.
  • Wearable/Fashion tech – Interactive clothing with touch sensors.
  • Musical instruments – Touch sensitive piano, guitar and other music systems.
  • Toys & Educational kits – Enabling interactive play through touch.
  • Industrial controls – Replace mechanical buttons with robust capacitive touch interfaces.
  • Assistive technology – Enabling and simplifying input for special needs users.

Conclusion

Various touch sensing principles can provide interactive input to Arduino projects. With capacitive touch capability inbuilt into new Arduino boards, it’s easier than ever to experiment with touch interfaces. Advanced software techniques improve touch detection reliability and allow multi-touch functionality. Touch sensing opens up Arduino for creating innovative, tangible interfaces between the physical and digital world.

Frequently Asked Questions

Here are some common questions about using touch sensors with Arduino:

Q: Which touch sensor is easiest to use with Arduino?

A: Capacitive touch sensors are easiest as they require minimal components and work without physical contact. Many new Arduino boards have capacitive sensing built-in.

Q: How do you connect a resistive touch screen to Arduino?

A: Connect top layer to power, bottom layer to an input pin through a resistor. When pressed, the layers contact closing the circuit, which Arduino detects as a HIGH.

Q: Can Arduino support multi-touch sensing?

A: Yes, by using multiple touch sensors and advanced software techniques like interpolation, Arduino can detect multiple concurrent touches.

Q: What materials can be used as capacitive touch sensors?

A: Any conductive material like copper tape, aluminum foil, stainless steel can act as a capacitive sensor when connected to Arduino. Even food items like bananas work!

Q: How sensitive is an Arduino capacitive touch sensor?

A: It can detect touch through 2-3 mm of plastic or glass as human body acts as the second capacitor plate. So it is quite sensitive.

What is a barometer sensor?

barometer sensor

Introduction to Barometer Sensors

A barometer sensor is an instrument that measures atmospheric pressure, which is the weight per unit area of the vertical column of air above a point on the earth. The barometric pressure at any given location varies continuously due to weather changes and altitude. Barometer sensors allow detection and measurement of these pressure variations.

Barometer sensors are one of the most widely used pressure sensors with applications across weather forecasting, altimeters, scientific research, aerospace systems, industrial processes, medical devices and more. This article provides an in-depth overview of barometer sensor technology, working principles, design considerations and applications.

Working Principle of Barometer Sensors

A barometer sensor works by detecting the force exerted by the atmosphere on a surface due to the weight of the overlying air column. This force gets translated into an electrical signal via different transduction mechanisms.

The main types of barometer sensors based on working principle are:

Aneroid Barometers

These use a flexible metal box called the aneroid cell. As atmospheric pressure changes, the cell expands and contracts which is linked mechanically to a needle that moves over a graduated scale. The most common designs are:

  • Bellows: Consists of corrugated metal disks riveted together to form a pleated, flexible enclosure.
  • Diaphragm: Uses a flattened capsule with a flexible, thin metal diaphragm.
  • Bourdon tube: Has an oval cross-section bent tube that tends to straighten out when pressurized.

While mechanically robust, friction limits measurement resolution and accuracy. Electronic transducers can be added to give digital output.

Manometer Barometers

Uses a U-shaped glass tube partially filled with liquid like mercury or coloured water. Atmospheric pressure pushes the liquid up the tube creating a height difference. The liquid’s height indicates the pressure and is read manually on a scale or automatically using float/optical sensors.

Provides high accuracy but requires careful levelling and temperature compensation. Mostly used for scientific applications due to mercury toxicity.

Capacitive Barometers

Uses a pressure sensitive diaphragm as one of the plates of a capacitor. Applied pressure deflects the diaphragm changing the capacitance, which is measured electronically and converted into a pressure reading.

MEMS barometers use micro-machined silicon diaphragms enabling miniaturized sensors with good sensitivity and low-power operation. Widely used in portable and wearable devices.

Piezoresistive Barometers

Employs a thin silicon diaphragm with piezoresistors implanted on its surface. Applied pressure strains the diaphragm causing the resistors to change values based on the piezoresistive effect. This change is detected electronically as a pressure variation.

MEMS piezoresistive sensors offer better temperature stability than capacitive types. Used for precision measurements.

Other Types

Some other less common types are potentiometric barometers using wound wire potentiometers, and thermal conductivity based Pirani gauges used primarily for vacuum pressure sensing.

Key Components of a Barometer Sensor

While barometer sensor designs can vary based on the sensing principle, they consist of some common components:

  • Pressure sensing element: Detects applied pressure via diaphragm, tube, aneroid cell etc. Choice depends on required performance and environment.
  • Transduction mechanism: Converts physical pressure signal into measurable electrical signal, such as capacitive change, piezoresistor change or mechanical linkage.
  • Signal conditioning circuit: Amplifies small electrical signal to usable voltage levels and applies temperature compensation as needed. Can include functions like linearization, filtering etc.
  • Output interface: Provides output in standard formats like analog voltage, digital interface protocols (SPI, I2C) etc. for interfacing with display, processor or data logger.
  • Calibration data: Sensor-specific data like sensitivity, offsets, temperature coefficients for software compensation. Stored on-chip or provided separately.
  • Packaging: Protects sensor from environment and allows pressure access via ports. Hermetic sealing used for robustness in harsh environments.
  • External components: Additional components like filters, regulators, RF protection can be added as per interface requirements.

Design Considerations for Barometer Sensors

Key parameters that influence barometer sensor selection and use:

Pressure range: Typical sensors measure 300 to 1200 mbar absolute pressure. Range limits depend on sensing element design. Wider ranges needed for altitude changes.

Resolution: Finer pressure differences that can be discriminated. Influences measurement accuracy. Sub-millibar resolution common.

Accuracy: Deviation of indicated pressure from true value including linearity, hysteresis and repeatability errors. Below 1% to 0.01% of full scale typical.

Response time: Time to sense a pressure change. Affected by sensor mechanical design. From less than 1 ms to few seconds.

Environment: Operating temperatures, humidity, vibration, shock etc. Influences choice of sensing element and packaging.

Power: Supply voltage levels, power consumption and modes (active, standby etc). Below 5V and few mW common for portable designs.

Output: Analog, digital (I2C, SPI etc) or frequency output. Digital preferred for electronic integration, analog for simple interfaces.

Size: MEMS sensors allow mm-scale sizes. Bigger sizes provide ruggedness for harsh environments.

Cost: MEMS sensors starting below $1 for consumer devices. High accuracy versions can be $100s.

Common Applications of Barometer Sensors

Weather Monitoring

  • Meteorology applications like forecasting, storm tracking using barometric pressure changes as an indicator of weather patterns.
  • Professional weather stations as well as consumer weather instruments.
  • Can detect altitude changes to predict fronts and atmospheric disturbances.

Altimeters

  • Used in aircraft, drones, rockets etc to determine altitude and vertical speed by measuring pressure changes during ascent/descent.
  • Skydivers use compact wrist altimeters. Hikers use barometric altimeters to measure elevation gain.
  • Radar altimeters complement barometric sensors in aircraft for low altitudes.

Personal Health

  • Smartwatches and fitness bands use MEMS sensors to provide elevation and climb data.
  • Diagnosing conditions like pulmonary edema which cause abnormal pressure changes.
  • Monitoring blood pressure trends.

Navigation Systems

  • Aircraft, missiles use corrected barometric readings for vertical positioning when GPS lacking.
  • Underwater depth gauges and groundwater/soil vapour analysis.

Industrial Processes

  • Vacuum, pressure and gas flow measurements in industrial production and research.
  • Leak testing, batch/fermentation monitoring, HVAC balancing etc.

Others

  • Atmospheric pressure correction of flow meters like mass flow meters.
  • Ground vehicles to gauge torque, engine vacuum.
  • Pressure-based water level sensors.
  • Vibration/acceleration compensation in inertial sensors.

Modern MEMS Barometer Technology

Microelectromechanical systems (MEMS) fabrication has enabled mass production of miniaturized, low cost, low power and highly reliable barometers. Modern MEMS barometers offer:

  • Chip-level monolithic integration of sensing element (capacitive/piezoresistive diaphragm) and analog/digital interface electronics for sensing and calibration.
  • Small adhesive-mountable packages (as small as 1.5 x 1.5 mm) ideal for wearables and mobile devices. Metal cans for robustness.
  • Analog (ratiometric, voltage) or digital (I2C/SPI) interfaces. Use of I2C allows networking multiple sensors.
  • Resolution down to 0.01 mbar with accuracy of 1 mbar. Ultra-fine & stable capacitive sensing elements.
  • Low power consumption, as low as 3 ฮผA quiescent current. Allow always-on background operation.
  • Inbuilt temperature compensation for drift-free operation over wide -40 to 85ยฐC industrial range.
  • Low-cost mass production, high integration and miniaturization ideal for consumer device integration.

Leading MEMS barometer product vendors include Bosch, NXP, STMicro, Infineon, TE Connectivity, Murata etc. Advanced functionality, form factors and cost advantage driving adoption across applications.

Conclusion

Barometer sensors are compact, low-cost devices that provide simple and accurate atmospheric pressure measurements. A variety of sensing principles and technologies exist, with MEMS being the most modern. From weather forecasting to fitness bands, barometer sensors find diverse applications through their ability to detect small pressure changes. Advances in MEMS are enabling next-generation barometers with higher accuracy and reliability for challenging industrial uses.

Frequently Asked Questions (FAQs) about Barometer Sensors

Here are some common questions about barometer sensors:

Q: How does a barometer sensor work?

A: It measures atmospheric pressure by detecting the force exerted by the air on a surface like a diaphragm or cell. This physical displacement is converted to an electrical signal via capacitive, piezoresistive or mechanical coupling.

Q: What are the different types of barometers?

A: Common types are aneroid, manometer, capacitive MEMS, piezoresistive MEMS barometers. Older designs used liquid column manometers, bourdon tubes or bellows.

Q: What is the typical measurement range?

A: Most barometers measure a range of 300 – 1200 mbar absolute pressure. Wider range sensors are available for altitude variations.

Q: How accurate are barometer sensors?

A: Basic sensors have 1% FS accuracy. High end sensors reach up to 0.01% FS accuracy. MEMS sensors commonly offer 1 mbar accuracy.

Q: What pressure units can barometer sensors measure?

A: They primarily measure in millibars or hectopascals (hPa). readings in psi, atmosphere, Torr, inches of mercury are also possible.

How to identify a suitable barometer sensor

People have had to adjust their home barometer sensors. This is to ensure accuracy with design changes over the years. The design of the sensor entails the type of mercury used. Mercury tends to evaporate and change in volume while using. Since we lose mercury over time, someone needs to recalibrate their home barometer. They do this by adding more liquid once a week or so on average.

Todayโ€™s compact sensors, such as our Barometric Pressure Gauge, are more accurate and easier to use. Also, they have a small footprint. It makes them the perfect choice for measuring barometric pressure inside your home. You can also use it in the garage, RV, boat, or even on a sailboat.

Since we seal their components, the sensor reading from the unit is more accurate. It will not change over time concerning air pressure.

Atmospheric pressure decreases with altitude or low pressure at higher altitudes. So, people who live higher than 3000 feet in elevation may want to take their current barometric pressure level when they travel.

These sensors are accurate and small enough to fit into a pocket or handbag.

They are available in various styles and colors. So we can use them in any place to check the barometric pressure. Also, they come with a handy carrying pouch to carry them without damaging them when not in use.

What is a barometer sensor?

We can use this device to measure the atmospheric pressure we live in. The measurement of the atmospheric pressure is quite specific. This device can ensure that you get accurate information about its status. So, the sensors are essential for home users. They use it to paint a more accurate weather picture of their surroundings.

For example, a person may have a barometer sensor installed in their home by the door or at another location. It helps them keep track of different meteorological conditions in their area. The sensor gives them unique information on the temperature and other weather conditions.

To know about this device, it is essential to understand the basics of a barometer. A barometer is a device that measures atmospheric pressure. The barometer used in our homes works on gas, i.e., air pressure. The atmospheric pressure inside our homes can change from one room to another within seconds. Therefore, it makes it essential for us to measure the pressure accurately.

The standard device used to measure atmospheric pressure is the barometer. The nature of this device is similar to an altimeter used in aircraft.

 How a barometric pressure sensor works in the older days

OLYMPUS DIGITAL CAMERA

The least expensive home barometer used in the older days depended on a simple liquid column and a sensitive scale. This design is still used today in some models.

The liquid we use depends on the type of barometer. Salt solution and water were the most typical liquids to use as it was easy to find.

The more sophisticated designs use mercury, which is more specific and easier to handle. It also provides accuracy when measuring changes in atmospheric pressure.

Mercury Barometer

The mercury-based barometerโ€™s design depends on a column of mercury. The atmospheric pressure displaces the surface level of mercury in a closed container as it increases or decreases. We use this movement to provide information on its status.

The container that held the mercury was a glass material. It is less likely to react with others used in its construction. The container was full of a nonreactive substance, such as wood chips or asbestos fibers.

It works through balancing a column of mercury. Then, the atmospheric pressure forces the liquid up. This movement provides information on its status.

The variations in the atmospheric pressure affect the surface level of micro-bubbles that dissolve in the liquid. As a result, the mercury column tends to remain level until it reaches a certain point. We have reached an equilibrium between the atmospheric pressure and the mercury column. The mercury column changes in shape as the atmospheric pressure changes. We use this change to provide information on its status.

More people than the other designs use the mercury-based barometer. This is because we can deploy it in a smaller space with better accuracy. However, we use a lot of specific chemicals to maintain this design. As a result, some people are likely to have health problems due to its use.

The water-based barometer used in the older days was also more complicated.

Aneroid Barometer

The design of the aneroid barometer depends on a mechanical-based gauge. It is small and attached to a spring. The gauge moves in response to changes in atmospheric pressure. They are then translated by the spring as information on its status. The height at which we measure the gauge moves by a scale located on its side.

The sensitivity of this design makes it easier to measure low-pressure conditions. This means that it can accurately predict weather patterns.

This design is more accurate in measuring atmospheric pressure than other designs. As a result, it can accurately predict weather conditions. So, it was commonly used in the old days by people who were more interested in the weather.

How an aneroid Barometer

1. It consists of hollow metal or plastic tube held by a metal rod attached to its other end.

2. We place it inside a plastic case that contains the dial and pointer.

3. A weight can balance the open end of the tube, and we connect this weight to a spring used to drive the pointer along.

We can make this design from metal. These are in sizes that can range from 0-10 kg for small homes to 1-20 kilograms for large homes.

The measurement of atmospheric pressure is possible only when we do not seal the barometer location. Sealing off the environment where we find the sensor would mean no changes in atmospheric pressure for it to react to. It results in an inaccurate reading.

This means that we must place the sensor outside an indoor area. It helps it to respond to changes in atmospheric pressure. It is usually positioned on a wall or near a window to receive adequate lighting from outdoors.

MEMS Barometric Pressure Sensor

This type of sensor is also known as an accelerometer. The MEMS works by measuring changes in atmospheric pressure. They provide information on its status.

We place the MEMS sensor, which includes a tiny weight, at the end of a microscopic cantilever beam. The atmospheric pressure causes the beam to change its shape. We use this movement to provide information on its status.

The construction materials for the MEMS barometric sensor have improved over time. As a result, they now provide more accurate results.

The sense of pressure that the sensor receives is proportional to atmospheric pressure. This means that the sensor can predict weather patterns. Hundreds of thousands of individuals have used it in recent times.

This design has improved from traditional designs. It can be more accurate than accurate compared to other designs. This means that the readings it produces are more detailed. It is more precise when compared with those produced by different sensors.

How MEMS Barometric Pressure Sensor works

1. Composed of an integrated circuit, MEMS provides information on its status.

2. Composed of an array of microelectromechanical sensors, these provide information on its status.

3. The sensor also uses a microcontroller to sense atmospheric pressure. It sends it to the display unit. You will see it as a gauge connected to the display unit.

We can also use this sensor in conjunction with other gadgets. They include cell phones and laptops. Of course, this depends on the characteristics and functions of these gadgets.

It is available in digital and analog versions, which differ in the signal they produce.

How modern barometric pressure sensors work

This is the most popular design among people who need to manage the atmospheric pressure in their homes. However, it is different from the older designs. It also depends on a microchip used to provide information on its status.

The microchip, which also houses a battery, works by measuring changes in atmospheric pressure. The microchip reacts to these changes and provides information on its status. We measure the audible sounds produced by this sensor by an oscilloscope. Also, we measure them for use by the microchip to determine the atmospheric pressure.

It does not use any liquid or chemicals and is easier to maintain than the older models. As a result, more people than other devices also use it.

The design depends on using a sensor capable of measuring atmospheric pressure. The sensor can depend on a barometer tube or a catalytic bead design. You may also attach them to an electronic circuit board. The newer models can provide higher accuracy than the older models. This is because they generate more accurate information on their status.

How to read barometric sensor readings

National weather agencies provide the readings from barometric pressure charts and maps. They are always available at local weather offices. These agencies will provide the most detailed information on the current weather conditions. It helps you have a better idea of your prospects. These agencies also provide detailed and precise information about extreme weather conditions. They will also give you their future probabilities.

The readings from barometric pressure sensors depend on the choice of the display unit. This means that you have to ensure that the display unit is compatible with the sensor before using it.

We can read these directly from the display unit when reading digital readings. The readings should be in numbers. It will change depending on the atmospheric pressure.

We will display the reading in millibars or hectopascals (which mean the same thing). Various individuals then use this to make accurate predictions about weather conditions.

It provides the reading in either number or percent. This will depend on the type of weather you are trying to predict. The display unit will also provide the degree of accuracy that individuals need.

There is a lot of controversy about barometric pressure sensors. One of these controversies is their inaccuracies and biases. However, individuals have learned more about them through the articles.

This type of sensor is improving to make it more accurate. This means that there is no controversy about its inaccuracies and biases. These sensors are usually very accurate. The only issue with them is their use in forecasting weather changes.

Hundreds of thousands of individuals can use this design. Furthermore, it has been improving in capacities for many years. This means that you should not consider these sensors unreliable or inaccurate.

Barometric Pressure Sensor Applications

The applications for barometric pressure sensors include weather forecasting. They can provide information on weather changes. But, this depends on the accuracy of the readings they can provide. These sensors are also used in homes to measure atmospheric pressures. They inform users about the state of their homes.

We do not use this design as much as in years past. However, it has already improved upon traditional designs. For example, they provide accurate readings about atmospheric pressures and weather changes.

1. Weather forecast and predictions

The ability of the sensor to predict weather changes makes it suitable for use in forecasting weather conditions. Businesses also use these sensors to provide their customers with weather reports. They offer essential reports to their future choices. These reports usually come in real-time. Many people can access them daily, depending on local conditions.

These reports also help people make better decisions about their plans. Many people have used these reports in recent years and have proven very accurate. The sensors used in these predictions provide information. They provide information on atmospheric pressure and changes in weather patterns. They are the two most important factors for weather forecasting. We usually mount these devices on top of structures that can reach thousands of feet into the air. They provide their readings at a height where we can see atmospheric pressure changes.

2. Smartphone applications

The smartphone applications used by individuals are also beneficial. These applications include weather apps. They can provide information about upcoming changes in weather patterns. This is useful to individuals who want to look at the incoming changes before planning their future events. Employers also use these devices to provide their workers with the best possible forecast of their future work plans.

It gives them a better chance of avoiding workplace accidents and difficulties. These applications will also provide information on accurate weather forecasts. They are instrumental in preventing workplace accidents. This type of application is quite helpful to the general public. They can use it to make themselves more aware of the changes going on around them without going outside. This kind of information is precious for individuals who are too busy to leave their homes but still want to make accurate plans for their future.

3. Car Engines

We can also use the car engines to read the level of atmospheric pressure. It provides helpful information regarding the changes in atmospheric pressure. Drivers can then use this information to ensure that their vehicle is ready for the changes before driving. Drivers can also use this information to prevent damages to their vehicles or accidents that could lead to injuries.

This type of application is quite helpful to drivers. It lets them make sure that their vehicles are working correctly before leaving their homes or workplaces.

Factors to consider when choosing a suitable barometric pressure sensor

Several factors to consider when selecting the best barometric pressure sensor include:

Pressure Precision:

The pressure precision of the barometric pressure sensor should be around a few percent. So it is the margin that you would like to leave between the acceptable and the unacceptable range of reading.

Accuracy:

This factor is also essential when selecting a barometric pressure sensor. It assures that it provides reliable readings which are accurate and not biased in any way.

Readings:

The readings of the sensors should be in numbers or percent. But it depends on how accurate you need your readings to be for specific uses.

Pressure and Temperature Range:

This is also essential when selecting a suitable barometric pressure sensor. The readings you need should be available at various pressures and temperatures. However, this depends on your specific needs.

The range of pressures you need should be within the acceptable range provided by the sensor. It helps your equipment work correctly without causing any problems with your equipment.

Power consumption:

The power consumption of the sensors is also essential. It will determine how long they will last daily. If the sensor consumes too much power, it will not last for a very long time, and you may need to replace it more often.

In cases where batteries are not available, you can use energy from an AC voltage source. This will power the sensors when we place them appropriately within your periodical weather concerns system.

Size of sensor:

The size of the sensor will depend on the type of equipment or device we will use. Therefore, you should consider the space you need to put the sensor in before buying one.

The mounting options available for these sensors should be helpful when we need to use them. In addition, they should be beneficial in various locations that may not have enough space.

Price:

The price of the barometric pressure sensor is also an essential factor to consider. It will determine how much you will spend on the device when you buy it. Cost-effective options are available for all customers. They include people who do not want to spend too much money. However, you should make sure that you buy the one within your budget. You do not incur any losses due to high maintenance or replacement costs.

Limitations of Barometer Sensor

Barometer sensors are helpful in many situations, but they can also have limitations. For example, the sensor will only provide the pressure of the air in the surrounding environment. It will not provide any other information about the surrounding air temperature. Some barometric pressure sensors are better at providing this information than others, depending on how we use them.

If the air temperature is below freezing, then the readings provided by the sensor will be inaccurate. You will have to determine this by making your observations.

Suppose you use a barometric pressure sensor to track your home or workplace air pressure changes. In that case, it is beneficial to show you any changes that may affect your security. The available pressure sensors provide accurate readings about the change in air pressure. This will give you the information you need to ensure that your buildings, vehicles, or other equipment are working correctly.

When working with barometric pressure sensors, there are also certain limitations to consider. For example, barometric sensors are sensitive to interference from electromagnetic frequencies. This is because of the changes in electromagnetic fields. Therefore, it results in false readings if they interfere with the measured values. Also, any sensor movement will likely affect the measurements that it is providing.

Examples of Barometer Sensor for you

1. Grove โ€“ Barometer Sensor (BMP280)

The Grove barometer sensor is the most used barometric pressure sensor. Many people all over the world use it. This device is available in various forms and sizes to use in many ways. In addition, the known devices can be either open or sealed. It means we can place them either inside or outside to provide accurate readings. Either way, this product provides accurate readings. They depend on a sensitive measuring mechanism. This gives you precise information about atmospheric pressure changes.

2. Grove โ€“ BME280 Temperature Humidity Barometer

This type of device is a state-of-the-art sensor equipped with a high level of technology. It makes it very easy for you to get accurate readings. Depending on your needs, we can use this product in different ways. They provide either temperature and humidity readings or barometric pressure. We can also use this device as a sensor in various other applications. It is not limited to providing accurate atmospheric pressure readings.

3. Grove โ€“ High Precision Barometric Pressure Sensor (DPS310)

If you are looking for a quality barometer to use in your weather forecast system, then this product is one of the most suitable options to consider. This device has a clear display so that you can easily read the data on its screen. In addition, the readings it provides are accurate. It means that you will never have to worry about incorrect readings.

This type of device is ideal for individuals who want to measure atmospheric pressure on the go. It does not need much time to build or set up.

Conclusion

Despite the popularity of these sensors, you should always ensure that you buy the best barometer. Buy a barometer that can match your needs. This will ensure that you get accurate and reliable readings. It then ensures that your weather forecast system is functioning correctly when needed.

Top 10 Consumer Electronics Companies in the World

Top 10 Consumer Electronics Companies

The world of Consumer Electronics is booming. It seems like new companies are joining the race for the best gadgets on the market every day. And you know what? It is working out well for them.

If todayโ€™s society is becoming more digital, why would anyone not need a digital device? But unfortunately, the answer is they donโ€™t.

One big issues that consumers face is the availability of so many different products. Most of them are from companies like Sony, Samsung, and Apple. There is also a wide variety of features and options for each product offered to stores. For example, smartphones can hold up to a million songs in their built-in memory. Also, tablets have the capability of running many applications at once. It can be challenging for consumers to know which one they should get. Again, there are many different options.

The History of Consumer Electronics Companies

The history of consumer electronics companies is both a long and complicated one. Several big firms in the industry have made their mark in different decades and years.

These firms have become significant players in the global consumer electronics industry. We attribute this to their unique innovations and influential nature.

Some of these firms have become a household name. Others are lesser-known companies that have provided a unique service for other companies.

Each of these firms has played an essential role in shaping the industry as we know it today. They allow consumers worldwide to access high-quality electronics at affordable prices.

Some of the major firms in the industry today include Sony Corporation, Apple, and Dell. All three of these companies have risen to prominence over time. However, Sony Corporation has led the way with existence since 1946 in the US.

These companies have innovated at a rapid pace over time. This allows them to emerge as industry leaders with sought-after brands worldwide.

More than 100 million devices powered by Sony products are in use throughout the world today. While Apple and Dell also have many products in high demand.

Sony Corporation has introduced several revolutionary innovations in its 63 years of existence. As a result, apple and Dell have become leading manufacturers and distributors of electronics today.

Top 10 Consumer Electronics Companies in the World

apple phone

What makes a company successful in consumer electronics? The answer may seem obvious, but itโ€™s not always as simple as you might think. It takes more than one type of skill to build a successful consumer electronics company. They are no doubt skilled in Software Development and Technology. But what about their Marketing and Operation? These are crucial components to have a well-functioning business.

The following is a list of the top 10 companies in consumer electronics. It will be interesting to see how they rank next year and where they will be five years from now.

1) Apple

iphone 13 pro

Without a doubt, Apple is dominating the market for Consumer Electronics. Their products are innovative, stylish, and attract consumers. But you should note that their success is not a recent phenomenon. Apple has been making computers since 1977. Their first computer was the Apple 1. It was a hobbyist product sold to computer hobbyists who built their computers. But then something changed. In 1984 Apple released the Macintosh. It was the first successful mass-produced computer with a graphical user interface.

The Mac was innovative and offered user-friendliness and ease of use. It had been lacking these features in other personal computers at the time. Apple advertised their new Mac with the memorable 1984 Super Bowl commercial. The commercial was successful in that it introduced the Mac to the public. It generated enough interest in people to want to try out this new computer. As a result, the Mac became successful. This caused Appleโ€™s sales to grow from $775 million in 1983 to $3.19 billion in four years.

Apple has reinvented itself many times. It adapted its products to fit market demands and consumer needs. As a result, their products are always ahead of their time with innovative designs. This keeps consumers looking for more from them. Moreover, apple is showing no signs of slowing down.

2) Microsoft Corporation

Microsoft Corporation is one of the big names in Consumer Electronics. They have already made a name for themselves in operating systems and software. But they are also branching into other fields to stay competitive. Their most well-known and successful product is Windows. It is an operating system that functions on a computer with software designed to work with them. Even though they designed their Operating System more for their personal computers. Further, they were so successful that they embraced all other kinds of computers. This allowed them to expand their market.

They remained more focused on their computer market until 1997. This was when they researched the possibility of making a game console. As a result, they developed and released the successful Xbox 360 in 2005. After that, Microsoft took on a new range of products. This includes a learning device for children called Kinect and the Microsoft Surface.

Microsoft is continuing to expand into other industries. For example, they are expanding into various fields of Consumer Electronics. They are also branching out into other areas to serve their customers better. As a result, the equipment they create becomes more advanced. This is because they provide innovation across the board.

3) Samsung Electronics

Samsung Electronics

Samsung Electronics is the largest electronics company in South Korea. It has been producing several successful products. Examples include home appliances, mobile phones, computers, and televisions. Their success lies within their ability to innovate. For example, Samsung is one of the top three TV manufacturers globally. It has proven successful in manufacturing and research, and development.

They focused on creating pleasing products and on creating friendly products. Samsung Electronics hire top designers to develop amazing-looking devices. These devices grab consumersโ€™ attention. Their unique designs and wow factor make them stand out from their competitors. This emphasizes electronics than design.

Their success is their ability to maintain a good relationship with their customers. As a result, they started the Samsung 5 Year Warranty program. It extended the warranty period on its products to five years. This is longer than any other electrical device manufacturer has offered. This decision depended on creating a better relationship between them and their customers. As a result, it increased sales and market share.

Samsung Electronics has also proven to be very successful in marketing its products. They do it in areas where other electronics companies have struggled. Also, they made the bold move of entering Western markets to expand their business. This is an accomplishment that most international companies cannot achieve.

4. Intel Corporation

The Intel Corporation comes out as multinational semiconductor chip maker in America. Santa Clara in California is their headquarters. It is among the largest semiconductor chip manufacturers in the world and highest valued when it comes to revenue. Additionally, Intel makes network interface controllers (NICs), motherboard chipsets, integrated circuits (ICs), and flash memory. But it is Intel flash memory subsidiary. The companyโ€™s name originated from the fact that it has intelligence inside. Its design between the IEEE logo and the numeral 5 looks like a smiley face.

Intel is moving into Consumer Electronics through their Intel Smart Connect product. This product enables laptops and netbooks to connect with household devices. It provides mobile devices with the ability to attach themselves to a computer using a USB cable. This allows one computer to do all the necessary computing. The key feature of this product is that it will do so through any wired or wireless connection.

Intel has also continued its aggressive marketing plan. They intend to increase their market share in Consumer Electronics. In 2012, Intel released an advertising campaign dubbed Innovation That Matters. It focused on using technology to improve lives and neglected technology misuse.

5. Huawei

Huawei

The success of Huawei in this division relies on its ability to keep ahead of the competition. They use cutting-edge new technologies. For example, it allows consumers to have wireless access throughout their homes or offices. They also create products that will last, if possible, to keep consumers coming back for more. Also, they are partnering with other companies to provide their Operating systems.

Their main goal is to push wireless technology forward by developing products. This will enable consumers to have wireless access throughout their homes or offices. As a result, Huawei has managed to branch out into the corporate market. It provides innovative products for businesses that want to connect.

6. Sony Corporation

Sony Corporation is a Japanese multinational conglomerate corporation based in Japan. It is one of the leading manufacturers of electronics, gaming, and services. Sony has also created innovative products that consumers want to buy. Sony started as a small business. They had a few people working together. With time, they became one of the largest consumer electronics companies. This is because they were able to create innovative products. They kept up with the latest market trends and kept consumers coming back for more.

Sony has made its way into the industry by partnering with other companies. With the partnership, they make PlayStation 3 games for them. This is a big step taken by a company that has never been in the gaming industry. They have also developed their line of TVs, DVD recorders, and DVD players sold worldwide. This shows success for Sony in its ability to expand into different markets.

Sonyโ€™s most recent innovations include the PS Move, PS Eye, and PS Vita. Their PlayStation Move game controller released on September 19, 2010. It has captured usersโ€™ attention across the globe. This allows users to control games through motion sensors rather than buttons. In addition, it makes their movements more realistic in games.

7. IBM

IBM made its way into the electronic business market by developing hardware. They also sell hardware and software products that consumers worldwide use. Their primary focus is to provide better technologies for business users worldwide. IBM is a technology pioneer who developed the first commercial computer. The IBM PC became one of the most successful computer models in history. IBM made it into the Consumer Electronics market by improving their customer relationships. They also provide innovation and new products that will appeal to consumers.

##

IBM has also made its way into several other sectors. Examples include retail, healthcare, education, and government. They do this by providing innovative technologies that benefit these industries. One of their most recent innovations includes IBM Watson. IBM Research tried to solve human problems through natural language processing. They have also developed a supercomputer to beat chess champion Garry Kasparov. Also, IBM has succeeded by providing innovative technologies using cutting edge technology.

8. Sony Ericsson

Sony Ericssonโ€™s primary focus is to provide consumers with electronic products. They aim to keep up with the latest technological advances. So, they have managed to branch out into other markets such as gaming and mobile phones. Here, their experience in electronics production will benefit them in the future. For example, they have pushed the boundaries of mobile phone technology. They were among the first companies to provide 3G phones. They also produce some of the most popular gaming cell phones available today.

Sony Ericsson is branching out into different markets such as automotive and industrial. Their primary focus has remained the same for many years. They intend to provide innovative products that will benefit users around the globe. Sony Ericsson is using its leadership position to get into new markets.

9. Panasonic

Panasonic has been developing innovative technologies for a century. As a result, they are one of the most innovative companies globally. This is because they have pushed the boundaries of technology. Also, Panasonic focused on providing innovative products to consumers around the globe. As a result, they have developed various products that people can use in their homes and offices.

Panasonic has also created several different industries with its innovations. They make critical contributions to the energy industry and automotive industry. Panasonicโ€™s most recent innovation is television screens based on organic light-emitting diodes. They have become trendy in consumer electronics that are out in both large and small TVs. Panasonic has been able to keep up with the latest market trends. As a result, they provide products that consumers want to buy.

10. HTC Corporation

This innovative company has taken on the challenge of research and development. They produce innovative products to meet specific consumer needs. As a result, they have made their way into the consumer electronics market. They create unique products that will appeal to an array of consumers. Their success is because they are adopting technology currently used by customers. As a result, there is a huge demand for better quality products at lower prices.

HTC is manufacturing and innovative products. They include smartphones, media players, and tablets for use with mobile broadband networks. This keeps their customers happy with their experience using HTC products.

HTC has also established a position by partnering with Google. They intend to provide mobile devices based on Googleโ€™s Android operating system. Their partnership with Google has allowed them to remain at the top of the market.

Themes disrupting the consumer electronics industry

consumer electronics industry

This industry is quite an interesting one. With a lot going on and new technologies coming, getting lost in the latest advancements is easy.

The consumer electronics industry is in a constant state of evolution and revolution. Devoid any new ideas, the industry would be dull without all these improvements. The most notable trend over the past few years is the rapid growth of smart appliances. We can attribute this to the increasing connectedness of homes. Unfortunately, this leaves us with more stuff than we know what to do with.

3D Printing

Another trend boosting the consumer electronics industry is 3D printing. It is a process of making physical objects by printing thin cross-sections in layers. As a result, one can now print almost any shape they desire, including toys and chocolate!

As these printers become more affordable, they will assist in mass production. Examples include automobile manufacturing and jewelry. As a result, they will revolutionize the world of manufacturing as we know it. This gives consumers more choice over products that before could be handmade.

Geopolitics

The importance of these economic factors has been evident in the past few years. For example, the US economy is one of the strongest around. But its growth rate has recently been much slower than what it used to be at the turn of the century. This has prompted companies alike to search for fresh opportunities in other markets. For example, they are exploring China and India. This is because these countries have experienced economic growth over time.

Conversational platforms

Consumers are becoming more involved in social media. Companies like Facebook and Twitter have emerged. They provide them with better communication ways. They can now even provide positive feedback about products and services. This will encourage future sales. Also, Apple has recently released Siri as a voice interface for its popular iPhone 4S. This allows users to speak with the device using natural language commands. Before, it was only available on search engines such as Google.

Artificial intelligence

It provides solutions to many tasks that robots cannot perform. As a result, this technology is a significant trend. It is a vital tool in medical and defense contexts.

A simple example is a robot designed for the home. We can program it to clean floors and empty waste bins on its own. Similar solutions are coming to manufacturing environments and airport security checkpoints. The robotic solutions could detect if an object left unattended is dangerous or not.

Internet of things

The Internet of things or the Internet of Everything is a concept developed in recent years. It works through cloud computing and mobile devices. Consumers can now use their smartphones to control household appliances. This technology also allows them to connect on social networks. It provides an opportunity for brands to gain more insights from their customers.

Consumerism and new markets

Consumerism is a term used to describe a pattern of buying behavior. Here, individuals tend to buy more goods and services than they need. As a result, marketers are increasing the number of products they sell to consumers. In addition, they are targeting those more comfortable with technology, such as the Baby Boomers. As these consumers continue to age, their buying habits are also likely to change over time. This encourages new companies to enter the industry to serve them better.

Virtual & Augmented reality

Marketers are using both technologies to provide more exciting promotional campaigns for brands. Such include 3D and 4D experiences for moviegoers.

For example, it is already possible to order food and products delivered through an AR app. The experience has the same feeling as seeing a real house. Although the image is not real, one can hear and see characters acting around you.

Augmented reality and virtual reality are part of the main display market. For instance, they attract consumers outside stores. They also use it for advertising at specific locations within them.

Ecosystems

The most common ecosystems in the consumer electronics industry are mobile phones. Here, each component forms an important role. For example, the phoneโ€™s operating system is the interface. It enables people to use the device by using touchscreens or virtual keyboards. Other ecosystems include home automation products. They have such as smart TVs and other devices that connect offline. In addition, they use different communication networks such as Wi-Fi, Bluetooth, or RFID.

Automated home

An automated home uses machines to perform tasks around the house. Enterprises have used it to reduce costs. But they maintain the same quality control over their products or services.

These systems are  helpful in video surveillance and security areas. They can detect problems. They also provide solutions by engaging with users.

Internet TV

This TV service allows users to browse different channels and watch videos online. It is an alternative to traditional television viewing. This usually offers bars of information divided into different categories.

The main advantages of Internet TV over traditional media are:

  • Presence of hundreds or even thousands of channels that we can view at any time
  • Possibility to search through keywords to specific subjects to find new shows

Robotics

Robotics is a branch of technology related to the design and manufacturing of robots. They are programmable machines that we can use for various tasks.

As before mentioned, we also use robotics in businesses. They perform tasks usually done by humans, reducing costs by cutting employment numbers.

The consumer electronics industry has recently embraced robotics. They use domestic robots such as Roomba, a vacuum cleaner developed. These are devices designed for people who do not have time to clean their homes themselves. Also, these robots have become popular in adjacent marketplaces. For example, the US and China, where we see benefits in time, labor, and cost savings.

Conclusion

The consumer electronics market is a growing industry. It continues to grow by leaps and bounds. As a result, more and more people demand high-quality technology products.

This is an industry that has seen the emergence of many firms over time. Many of them are becoming household names worldwide due to their superior products.

The consumer electronics industry has a long and complex history. Many influential forces have shaped over the years. But these firms and individuals are among the pioneers. They have contributed much to shaping the world as we know it today.

The success of these firms is because they have innovated at a rapid pace over time. This allows them to emerge as leaders with sought-after brands around the world.

Also, these companies have made valuable contributions to their respective industries. This is because they have been around for a long time.

How to identify and select good Arduino distance sensors

Arduino distance sensor

Nowadays, we use measurement systems in our everyday life. They consist of objects that detect physical distances. Motor vehicles like cars, buses, and trucks have these devices. They include radars and cameras.

We use distance sensors as objects in our surroundings in various applications. For example, we use them in the medical field. They measure the distance to an organ or a part of the human body. They are also helpful for industrial purposes like inspection and quality control.

What is a distance sensor?

It is an electronic component that measures the distance from a physical object. The most common such sensors are photocells, light-level, and capacitance. Others include photo-resistive sensors and inductive and ultrasonic metal sensing elements. Still, there are also other types of these sensors.

Arduino can detect the distance of objects, light level, and tilt in your house. The sensors are suitable for use with Arduino.

Photocells

A photocell is an electronic sensor that converts the intensity of light falling on it into a voltage. For this type of sensor to work, you must shine a light through the lens at a specific angle. Therefore, its output is high when bright light falls on it and 0V when a dark object (such as your hand) blocks the light.

The photocells used with Arduino are of two types: digital and analog. The digital photocell outputs 5V if the light is on. Otherwise, it outputs 0V. Analog photocells output a value proportional to the intensity of light falling on them. So, you will have to use an ADC chip to read their value.

Digital photocells are very cheap, but they donโ€™t respond well to changes in light. However, they are helpful when you want to measure different lighting levels.

Light level sensors

These sensors are also known as phototransistors. They can detect the amount of light falling on them. The output of these sensors is proportional to the intensity of light falling on them. So you can use it to find out if your home is lit or not. You can use it with or without an ADC chip.

Capacitance sensors

They can measure the distance between two objects. For example, they can measure the height of a wall or the distance between the floor and your hand.

Conductive capacitive sensors

These sensors are widely helpful in robotics. Their principle of operation depends on measuring the distance between objects. The closer the object, the more electricity it conducts.

Capacitive sensors are very accurate, and you can use them to measure small movements. They are also relatively cheap. The most common type of capacitive sensor is the โ€œalligator clip.โ€

Digital capacitive sensors

These sensors can detect the distance between two objects (your hand and the floor). We can use them to play games or even create security systems in your home because they work on a principle like proximity detectors.

Photo-resistive resistors

Photo-resistive resistors are very sensitive devices that measure objectsโ€™ distance. They measure the resistance offered by an object to light. They work in the same way as a photocell, with the only difference being that they donโ€™t respond to light at all. 

There are two types of photo-resistive resistors: surface and printed. The surface ones are only suitable for industrial applications. However, you can use the printed ones in your home.

To use the surface photo-resistive resistors with Arduino, you will need to use an ADC chip.

The printed photo-resistive resistors can be more accurate than a digital camera because they donโ€™t rely on analog circuits. They also have a better range.

How to identify a good Arduino distance sensor

Photocells, light-level sensors, capacitance sensors are not suitable for use with Arduino. They require a power source to operate.

Another group of distance sensors does not require a power source. They are helpful in robotics, and we call them digital distance sensors. All of them have an internal analog-digital converter (ADC). The ADC is a device that performs the analog-to-digital conversion. We connect it to two analog inputs, where the difference between them represents the digital value of the value that it produces. In simple cases, after reading an analog input, we can use the ADC for digital input to decide what action to take concerning the object that detected it.

There are many different types of digital distance sensors available from RayMing PCB & Assembly. They differ in their accuracy, maximum range, and price. Also, they function differently from one another. Therefore, it is essential to select the appropriate one for your application.

We can classify the digital distance sensors into two main groups: active and passive.

Active sensors measure distances with infrared or visible light beams, which they emit themselves. We use them for measurement with up to 100 meters of distance, and their price is about $10 or more. They also consume a lot of power (you will need a 9V battery for each sensor). You will need an additional Arduino library to read the signal from these sensors.

We only use active sensors in robotics applications. The light beams can cause problems detecting objects in your house or workshop. For example, mirrors and other shiny objects could reflect the beams.

Difference between an analog and a digital type of distance sensors

Arduino distance sensor Design

Analog types of sensors work by measuring the amount of light that falls on them. They have a resistive layer (photo-resistive). It produces a variable voltage proportional to the intensity of light falling on it. We perform the analog-digital conversion using an ADC chip.

In contrast, digital sensors have no resistive layer. Instead, they measure the time required for a pulse to go from one point to another. They use circuitry that generates square pulses of very high voltage for a short time. It also measures the time between two such pulses using an ADC chip.

In simple terms, the active digital sensor is a small light source that sends out a light pulse. It also measures the time taken for the reflection of this pulse to come back. A passive digital sensor measures the time required for an external light source to reach it.

How to select an appropriate type of Arduino distance sensor for your application

When you are selecting a distance sensor for a robot, you need to consider several things:

Visibility:

You will need a distance sensor that can detect objects, not in the range of visible light. For example, you can use opaque windows, doors, and mirrors. But you donโ€™t want to use an infrared sensor. It could start working when someone enters the room. Also, it could even cause damage to the personโ€™s retina.

Accuracy:

Suppose you need to track the distance of something moving, e.g., a car or a robot. You need an accurate sensor because its target could be moving at different speeds. Therefore, the sensor cannot measure each time that the distance changes. Instead, select an analog type of sensor (for example, photocell). You will have to recalibrate it each time the target moves further ahead or backward. But this method is unreliable.

Range:

You also need to consider the sensor range if you buy one for your robot. For example, you will need to make sure that it can detect your target object at 100 meters.

Easy installation:

Suppose it is easy to install and configure the distance sensor in your application. This will be easier for the users who need to operate the robot.

Price:

The price of the sensor is also important. If you are keen on a particular type of sensor, Google it and compare the prices.

You should know that many other distance sensors arenโ€™t suitable for use with Arduino. For example, proximity sensors, radar sensors, and ultrasonic sensors.

Types of sensors that we can use with an AVR microcontroller like Arduino

There are many different types of sensors that we can use with Arduino. They are active and passive digital distance sensors, like those discussed above. There are also analog and digital magnetic, infrared and ultrasonic distance sensors.

The sensor you need to choose depends on the application you want it to perform.

1. Ultrasonic Sensor

An ultrasonic sensor is a sensor that generates high-frequency sound waves and uses them to determine the distance of objects. It is the most popular type of sensor among hobbyists because it is inexpensive to use and works reliably.

How Does An Ultrasonic Sensor Work?

Ultrasonic sensors work on the concept that all objects have a specific, characteristic frequency. For example, walking on water creates waves that are very different from those created by throwing a rock into the same water. The ultrasonic sensor looks at the two different waves, compares them, and determines their distance.

An ultrasonic sensor measures distance with a few tones sent out by the sensor. They then detect how long it takes for the sound wave to return. The time depends on the distance of an object from the sensor. Each wave travels at a speed proportional to its wavelength, i.e., it is proportional to its length. Thus, the time required for each wave to return is proportional to its distance from the sensor.

It is important to note that an ultrasonic sensor measures the time for each wave to return. The same applies to all sensors based on distance. For example, infrared sensors measure an objectโ€™s time from reaching a certain point to returning.

Ultrasonic sensors generate another tone and detect its frequency when they find an object in their field of view.

Key applications of Ultrasonic Sensors

The main application of an ultrasonic sensor is in robotics. We can use it for a wide range of applications:

a. Distance Measurement:

The most common application of ultrasonic sensors is measuring distance, especially in robotics. For example, they can count the number of people entering a door or calculate how a car moves. They can also measure the volume of liquid or the number of bugs or animals contained in a container.

b. Robotic Sensors:

We can use Ultrasonic sensors as the basis for many different robotic sensors. For example, an ultrasonic sensor can measure the distance from a tank, function as a knock sensor, or create a virtual wall.

c. Smart cars:

There are ultrasonic sensors onboard a smart car to detect distance in the form of vibration. They can look out for objects that block the carโ€™s path or obstacles surrounding it.

d. Unmanned Aerial Vehicles (UAV) / Drones:

UAVs are more commonly known as unmanned aerial vehicles (UAVs) or drones. We can use them for various applications like aerial photography and rescue operations. Infrared and ultrasonic sensors are the most common sensors on UAVs.

Ultrasonic sensors are becoming increasingly popular in robotics. We can use them to sense distance without the need for sight. They work even when it is dark outside or when a material blocks their view (for example, an opaque wall).

Advantages of Ultrasonic Sensors

1. Multiple interface options for pairing with a microcontroller

Since we can wire ultrasonic sensors directly onto a microcontrollerโ€™s pins, you can connect them to the I/O lines of an AVR. You can use either the built-in interface of the chip or you can use one of the many open-source libraries. They enable you to interface with distance sensors Arduino in UART and SPI serial formats.

2. Tend to consume lower current/power

As they work on the principle of distance measurement, ultrasonic sensors run very little. Thus, they tend to consume lower current and power than other sensors. The lower power consumption makes it possible for the ultrasonic sensor to work in numerous applications.

3. Works well in dim places

Ultrasonic sensors work well even in low-light conditions. For example, they can keep track of a door in a house that doesnโ€™t have proper lighting in its surroundings. Thus, ultrasonic sensors are ideal for applications that require operations even when it is dark or where there is a lot of smoke or dust.

4. Not affected by object color and transparency

Ultrasonic sensors are not affected by the color and transparency of objects. As a result, they can detect distance from water and liquids and an opaque material like a wall.

Disadvantages of Ultrasonic Sensors

1. Limited detection range

Ultrasonic sensors are not suitable for applications that need a long detection range. They have limited capabilities. For example, we cannot detect objects beyond 16 ft away.

2. Low resolution and slow refresh rate

The resolution of an ultrasonic sensor is very low. As a result, it is impossible to detect very small objects like insects or particles.

3. Unable to measure the distance of objects that have extreme textures

Ultrasonic sensors cannot detect the distance of objects that have an extreme texture. For example, it is impossible to determine a brick wallโ€™s distance with a high-pitched brick texture.

2. Infrared Distance Sensors

Infrared distance sensors are also popular among hobbyists. They can sense distance and temperature.

How Does An Infrared Distance Sensor Work?


high accuracy
ย distance sensor

An infrared distance sensor is a light emitter and a light detector. It sends out invisible lightwave signals and detects the wavelength reflected. This process is similar to how sound travels. The infrared sensors work on a wide range of wavelengths. It is unlike ultrasonic sensors, which use tone-based sensing.

A common setup of an infrared sensor involves two LEDs and one phototransistor. A fixed distance separates the two LEDs on the sensor. The first LED is the transmitter, i.e., it emits invisible light, and the second LED is the receiver or detector. It reflects the light received from the transmitter.

We can best explain the way that infrared sensors work as follows:

1. It generates Infrared waves from the transmitter LED and travels towards the receiver LED.

2. The Receiver LED hits the infrared waves, which bounce back and hit another phototransistor.

3. The second phototransistor generates an electrical signal. The signal corresponds to the amount of reflected light by the receiver LED.

4. We connected the second phototransistor to the receiver LED and switched. It turns on when the sensor receives light.

5. The 4th line of the sensorโ€™s circuit is a 0-5V analog signal. Depending on the type of sensor you are using, you can rad the signal using the VCC and GND pins of the microcontroller.

6. The voltage of this signal helps control the transmit LED or readout distance measurements using another method.

Applications of Infrared Distance sensors:

a. Monitoring and control applications: Infrared distance sensors can control automatic doors and machinery. They are suitable for home automation applications. They monitor household appliances such as air conditioners, fans, water heaters, etc.

Extensive use of infrared sensors in security systems is also common.

b. Security systems: Infrared distance sensors can detect a moving object and signal to an alarm or motion detection system.

c. Distance measurement: They can measure the Arduino distance between two sensors and the temperature of an object. Infrared sensors can help determine the position of a moving object.

d. TVs, computers, laptops: We use them in TVs and computers to track the position of remote controls. They also play a role in detecting a personโ€™s finger movement on laptopsโ€™ touchpads or keyboards to help navigate the cursor.

What Are The Advantages Of Infrared Distance Sensors

1. Small form factor

Infrared distance sensors are small and compact, making them ideal for use in robotics. We can also use them in toys like toy helicopters to determine the position of an object or two blocks.

2. Applicable for daytime and nighttime usages

We can use infrared distance sensors in the daytime and nighttime usages. They can control toys and other applications involving light, sound, or touch.

3. Secured communication through a line of sight

Since infrared distance sensors work through light, they are secure. Therefore, we can use them to communicate over a distance. This is unlike ultrasonic sensors, which can hack into a system.

4. Can measure the distance of objects that have complex surfaces

Infrared distance sensors can detect the distance of objects that have complex surfaces. This is because infrared waves can easily pass through certain materials like water, glass, and wood. The ultrasonic sensors are not as capable in this respect. We cannot use them to detect the distance of these materials.

Disadvantages Of Infrared Distance Sensors:

1. Limited range of measurement

Infrared distance sensors have a limited range of measurement. They canโ€™t measure the distance from an object far away.

2. Affected by environmental conditions and hard objects

The infrared distance sensors are non-destructive. Environmental conditions and hard objects can affect them. These sensors will not work well in places with smoke or dust.

3. Laser Distance Sensors: LIDAR

LIDAR, an acronym for LIGHT DEPTH ARRAYS, stands for light detection and ranging. Essentially, it entails sending out a series of radiant waves and measuring the time these waves have to come back to the emitter. The speed at which the waves travel depends on their wavelength. We can consider this wavelength a ray reflected off an object for detection by the LIDAR system.

How Do Laser Distance Sensors Operate?

Laser distance sensors work on the principle of triangulation. As per this principle, if we know three points or three angles, we can arrive at another point using trigonometry rules. The three points are the emitter, the receiver, and the object or area of interest. The method of triangulation used by Arduino short distance laser sensors involves sending out a laser beam. It sends them in different directions at different angles. Then, it waits for the sensor to measure back its position using a device known as a pair of mirrors. This device acts as a light meter. Afterward, it is possible to calculate the distance between these three points.

Where Do Laser Distance Sensors Work?

Laser distance sensors work in many areas like:

a. Environmental Monitoring

We can use laser distance sensors to monitor the condition of the environment. They can also monitor pollution levels, especially in polluted cities like Delhi.

b. Distance Measurement

We can use laser distance sensors to measure the distance between a point and an object. For example, a car manufacturer can use this technology to perform quality control of its vehicles. In this case, we can measure the distance between two parts of the car using lasers.

c. Machine Control and Safety

We can use laser distance sensors to control machines and machinery. It can also measure the distance between two objects. This case sends a laser beam at a particular angle. We measure the return signal using a pair of mirrors. This information allows it to calculate the distance between the emitter and receiver objects.

d. Robotics Imaging & Environmental Detection

Laser distance sensors can monitor machinery or machinery. It then identifies objects in the environment like animals or people. For example, they can improve the safety of robots by tracking their positions.

Advantages of Laser distance sensors

Laser distance sensors have some advantages like:

a. Applicable for usage in the day and night

Laser distance sensors can measure the distance accurately, even day and night. They can control machinery and machinery.

b. Small wavelengths as compared to sonar and radar

Laser distance sensors have a small wavelength. They are effective in water, air, and even minerals.

c. Fast update rate

Laser distance sensors can measure the distance between two objects. It has a high and fast update rate. They are suitable for fast-moving objects.

d. Ability to measure 3D structures

Laser distance sensors can measure the distance between two objects from different angles. It can also measure 3D structures. For example, they can measure the distance of an object from three to four different angles. This means that they can determine the shape of an object by using these measurements.

d. High measurement range and accuracy

Laser distance sensors can measure the distance between two objects from a high range. They have a high degree of accuracy in measuring the distance between an object and a point. It is ideal in determining what distance do Arduino sensors start seeing signal degradation.

Disadvantages of Laser distance sensors

a. Higher cost of operation

Laser distance sensors are more expensive than other sensors in the market. They are also more expensive to maintain and throw out errors when their components get old.

b. Harmful to the naked eye

The laser beams from laser distance sensors can harm the eyeโ€™s indirect exposure. The eyes have to blink or close shut if exposed to these beams.

4. LED Time-Of-Flight Distance Sensors

Time-of-flight sensors are available in the form of an LED. They measure the time taken for the light to return to its emitter. This method involves sending out a long-wavelength pulsed laser at a known distance. It then measures the time taken for this light to come back. The speed at which this light travel depends on its wavelength. Devices that use Time-of-flight sensors are time-of-flight sensors or TOF sensors. These sensors are helpful in imaging, machine control, robotics, and environmental monitoring.

When Do We Use Time-Of-Flight Sensors?

Time-of-flight sensors are helpful for many purposes like:

a. Drones

A drone is a small unmanned aircraft that can create aerial images. A Time-of-Flight sensor can send a laser beam and measure back the time taken for this beam to come back. We refer to this type of sensor as a Time-of-flight sensor or TOF sensor. It can also work in machine control and robotics.

b. People counting in large areas

Time-of-flight sensors can count the number of people in a particular area. They operate on the same principle as surveillance cameras. They send out a laser beam reflected after hitting an object. The sensor then measures back the time taken for this beam to return to its initial position. Then it calculates the length of this distance using trigonometry.

c. Robotics

Time-of-flight sensors can track the presence of people in a particular area. They can also help robots identify objects like animals or people. It can then help them avoid crashing into these objects.

d. Machine vision

Time-of-flight sensors can identify the lines of a machine. For example, they can detect cracks on a machine, which makes it unsafe for use.

e. Environmental monitoring

Time-of-flight sensors can measure the distance between two points. They can also monitor the pollution level in places like polluted cities like Delhi.

f. Industrial applications

Time-of-flight sensors can work in industrial applications like hazardous material sensors. It can detect the presence of toxic gases or dust in air streams. They are also used in agricultural applications like crops or soil moisture to track their levels. Finally, they can measure the distance between two objects.

Benefits of Time-of-Flight Sensors

Time-of-flight sensors can measure the distance between two objects from a high range like 0.2meter to 50 meters. They also have a high degree of accuracy in measuring the distance between an object and a point. Their resolution is good. They can effectively differentiate between one object and another. They use different frequencies to operate them.

Disadvantages of Time-of-Flight Sensors

Time-of-flight sensors cost more than other sensors in the market. They fail to work when used in places with no line of sight. It makes them unsuitable for certain applications like tracking objects in the water.

Conclusion

Arduino distance sensors have been a part of many remote home automation systems. But they are also helpful in various other applications. If you have found this article helpful, share it with your friends to let them know about it.

Connecting Arduino to distance sensors is very simple, like connecting Arduino to the other components. Arduino libraries also include different distance sensors. They include ultrasonic, u-blox, and Opto distance sensors. So these sensors are suitable for communicating with other devices using Bluetooth and Wi-Fi.

Achronix Speedster7t FPGA Vs. Achronix Speedster22i HDT FPGA

Achronix fpga

Introduction

FPGAs (Field Programmable Gate Arrays) are crucial components in advanced high-performance and compute-intensive systems used for AI, networking, data centers, aerospace, defense, and more. Choosing the right FPGA often depends on factors like logic density, performance, power efficiency, features, and cost.

This article compares two popular FPGA families from Achronix Semiconductor – the Speedster7t and the newer Speedster22i HD. We will explore the architecture, capabilities, and applications of these FPGAs to understand how they differ and which works best for your requirements.

Overview of Achronix Speedster FPGAs

Achronix Semiconductor is a pioneering company focused on high-performance FPGAs for advanced computing markets. Their Speedster FPGA family is optimized for data acceleration applications with very high throughput and bandwidth needs.

Some key aspects of Achronix FPGAs:

  • Utilize a 2D network-on-chip (NoC) architecture
  • Have high-density and high-speed SerDes interfaces
  • Include hard PCIe blocks, DDR memory controllers
  • Feature high-bandwidth GDDR6 memory interfaces
  • Offer dedicated AI engines and ML processors
  • Provide leading-edge process nodes down to 7nm

The Speedster7t and Speedster22i HD represent two generations of Achronix FPGAs aimed at high-end applications.

Achronix Speedster7t FPGA

Achronix FPGA

The Speedster7t family was the first generation of FPGAs built on the innovative 2D network-on-chip fabric by Achronix. Key highlights:

Process Node: 16nm FinFET

Logic Cells: Up to 1.5 million cells

Memory: Up to 68Mb embedded RAM, 2GB external GDDR6

Interfaces: 36 – 400GbE ports, 16 – 32GB/s SerDes lanes

AI Engines: 4 – 16 INT8 AIE processors

Performance: Up to 33 TMACs AI performance

Power: Typically <75W envelope

As a 16nm FinFET product, the Speedster7t series focuses on providing a balanced set of features including high density, SerDes interfaces, and built-in AI acceleration at an optimal power envelope.

Achronix Speedster22i HD FPGA

The Speedster22i HD is the latest generation from Achronix built using the advanced 7nm process node. It pushes the performance and density envelope further. Key features:

Process: 7nm FinFET

Logic Cells: Up to 4.5 million cells

Memory: Up to 576Mb RAM, 8GB GDDR6

Interfaces: 112 400GbE ports, 64 32Gb/s SerDes lanes

AI Engines: Up to 128 INT8 AIE cores

Performance: Up to 1 PetaMACs AI performance

Power: Up to 300W envelope

The Speedster22i HDT leverages the 7nm node to significantly boost logic capacity, bandwidth, AI performance and DSP capabilities for cutting-edge applications. The higher power envelope allows leveraging the density and speeds.

Head-to-Head Comparison

Here is a direct side-by-side comparison of the major specifications and capabilities of the two FPGAs:

ParameterSpeedster7t FPGASpeedster22i HDT FPGA
Process16nm FinFET7nm FinFET
Logic CellsUp to 1.5 MUp to 4.5 M
Embedded RAMUp to 68 MbUp to 576 Mb
External Memory2GB GDDR68GB GDDR6
DSP Slices25,200132,000
AI Engines4-16 INT8 coresUp to 128 INT8 cores
AI Performance33 TMACs1 PetaMACs
SerDes16-36 @ 32Gb/s64 @ 32Gb/s
Ethernet Ports36x 400GbE112x 400GbE
Transceivers48 – 400GbE112 – 400GbE
Typical Power< 75WUp to 300W

Key Differences

Based on the above comparison, we can summarize the main differences between the two FPGAs:

  • Density – The Speedster22i HDT offers 3X higher logic capacity and 8X more embedded memory compared to the Speedster7t.
  • Performance – The 7nm Speedster22i provides over 30X higher AI performance with up to 128 INT8 AIE cores vs just 16 cores in Speedster7t.
  • Memory – Speedster22i has 8GB of cutting-edge GDDR6 memory compared to 2GB in previous generation.
  • Interfaces – Speedster22i doubles the number of 32Gb/s SerDes lanes and triples the 400GbE transceiver count.
  • Bandwidth – With over 3X more DSP slices and higher memory bandwidth, Speedster22i enables much higher overall system bandwidth.
  • Power – The Speedster22i lacks power efficiency with up to 300W envelope, 4X more than the Speedster7t.
  • Cost – Being a newer high-end 7nm product, the Speedster22i lineup carries a higher cost over the older 16nm Speedster7t.

Recommended Use Cases

Based on their capabilities, here are some ideal use cases for the FPGAs:

Achronix Speedster7t โ€“ Mainstream data center accelerators, network cards, industrial automation, defense systems, testing/prototyping of FPGA designs.

Achronix Speedster22i โ€“ Advanced AI acceleration, machine learning training, high-frequency trading, genome sequencing, aerospace computing, high-end networking, military systems.

The Speedster22i HDT is better suited for cutting-edge applications needing maximum performance and bandwidth in sectors like AI, cloud computing, networking, and high-end computing. The Speedster7t provides a more optimized solution for cost-sensitive or mid-range applications across defense, automation, 5G systems.

Conclusion

The Achronix Speedster22i HD FPGA offers significantly higher density, performance, bandwidth, and memory compared to the previous generation Speedster7t FPGAs. The 7nm process allows packing in more logic, memory, DSP blocks, and AI engines into the Speedster22i while improving energy efficiency. It represents the bleeding-edge of capabilities for accelerating challenging workloads like AI-inference.

On the other hand, the Speedster7t still powers a wide range of mainstream applications with its proven architecture. For systems with tighter power budgets or lower compute needs, the Speedster7t likely represents the cost-optimized option. Understanding these key differences allows selecting the right Achronix Speedster FPGA for your specific application and performance requirements.

Frequently Asked Questions

What process nodes are used to manufacture these FPGAs?

The Speedster7t uses a 16nm FinFET process while the Speedster22i leverages a more advanced 7nm FinFET node to provide a significant density and performance boost.

How do the embedded RAM and external memory resources compare?

The Speedster22i HD has almost 10X more embedded RAM at 576Mb vs 68Mb in Speedster7t. It also offers 8GB of cutting-edge GDDR6 external memory compared to just 2GB GDDR6 in the previous FPGA.

What machine learning capabilities are included in the FPGAs?

Both FPGAs contain dedicated AI Engines (AIE) for accelerating neural network inferencing workloads. The Speedster22i integrates up to 128 INT8 AIE cores delivering up to 1 PetaMACs of AI performance – over 30X more than the Speedster7t.

How many high-speed SerDes lanes are available in each of the FPGAs?

The Speedster7t offers between 16-36 lanes of 32Gbps SerDes while the Speedster22i doubles this number to 64 lanes of 32Gbps SerDes. This provides much higher aggregate bandwidth.

What is the maximum power consumption for the two FPGAs?

The Speedster7t typically consumes less than 75W making it suitable for mainstream and low power applications. In comparison, the Speedster22i can consume up to 300W to deliver maximum performance, so it is targeted at data center and HPC type workloads.

How to use a pH sensor with Arduino?

Arduino PH sensor

Introduction

Measuring the pH value of liquids is important for many applications such as checking water quality, monitoring chemical processes, agriculture, food processing, and more. pH sensors allow you to precisely measure the acidity or alkalinity levels of a solution. These sensors can be easily interfaced with Arduino boards to create DIY pH meters or data loggers. This comprehensive guide will teach you all about pH sensors and how to connect them to Arduino for taking pH measurements.

What is pH and Why Measure it?

pH stands for ‘potential hydrogen’ and is a measure of the hydrogen ion concentration in a solution. It indicates how acidic or basic a liquid is on a scale from 0 to 14. Pure water has a neutral pH of 7. Acidic solutions have a lower pH while bases have a higher pH.

Measuring pH is important for:

  • Checking water quality for drinking, aquariums, swimming pools.
  • Monitoring chemical processes and reactions.
  • Agriculture and gardening applications.
  • Food processing and cooking.
  • Environmental studies.
  • Science experiments.

Accurately monitoring pH allows maintaining safe levels and identifying any hazardous changes.

How pH Sensors Work

pH sensors work by measuring the electron activity in a solution and generating a voltage proportional to the pH. This voltage signal can then be conditioned, amplified, and converted to a digital value for processing by a microcontroller.

The sensing part of a pH probe consists of a glass electrode and a reference electrode. The glass electrode develops an electrical potential proportional to the hydrogen ion activity as given by the Nernst equation. This potential is measured against the stable potential of the reference electrode.

Common types of pH sensors include:

  • Glass electrode sensors
  • ISFET (Ion Selective Field Effect Transistor) based sensors
  • Antimony electrode sensors

Out of these, glass electrode pH sensors are the most popular and commonly used with Arduino.

Parts Required

To interface a pH sensor with Arduino, you will need the following components:

  • Arduino Board (Uno, Nano, Mega etc)
  • pH Sensor (with BNC connector)
  • BNC to Banana plug adapter
  • pH Probe (glass electrode type)
  • Op-amp IC (LM358/LM741)
  • 10kฮฉ resistor
  • Jumper wires

Optionally, you can also add:

  • LCD/OLED display
  • SD card module for data logging
  • Isolator circuit for safety

Circuit Diagram

The basic circuit diagram for connecting a pH sensor to Arduino is shown below:

The pH probe generates a very small voltage (in mV range) proportional to the hydrogen ion concentration. This needs to be amplified to scale it to the 0-5V range of the Arduino analog inputs.

An op-amp IC like LM358 can provide the necessary amplification or buffering. The 10k resistor helps set the gain to about 200X to amplify the 0-1000mV sensor range to 0-5V DC range for the Arduino.

The Arduino can then read this amplified pH voltage on one of its analog input pins to measure the pH of the solution.

Connecting the Hardware

Follow these steps to connect the pH sensor hardware with Arduino:

  1. Connect the pH probe to the BNC to Banana plug adapter.
  2. Connect the adapter ground (-) jack to the Arduino GND pin.
  3. Connect the adapter signal (+) jack to the non-inverting input of the op-amp IC.
  4. Install a 10kฮฉ resistor between the op-amp output and inverting input. This sets the gain for amplification.
  5. Wire the op-amp output to an analog input pin on the Arduino such as A0.
  6. Power the op-amp IC if needed by connecting the power and ground pins to 5V and GND respectively.
  7. Optionally, you can add an LCD display, SD module, etc to the available Arduino pins.
  8. Insert the pH probe in the solution to be tested.

This completes the sensor interfacing circuitry. Make sure all connections are secure before powering up the Arduino board.

Calibrating the Sensor

Before taking pH measurements, the sensor needs to be properly calibrated. Calibration eliminates any inherent offsets in the probe and sets the measurement scale accurately.

Calibration involves immersing the sensor in calibration solutions of known pH like 4.0, 7.0 and 10.0 and adjusting the voltages/readings accordingly.

Here are the steps to calibrate the pH sensor:

  1. Allow the sensor to stabilize in a pH 7.0 solution for 30 minutes.
  2. Take a voltage reading with the sensor immersed in the pH 7.0 buffer and note it down.
  3. Rinse the probe with clean water and place it in the pH 4.0 calibration solution.
  4. Measure and note down the sensor voltage at pH 4 after it stabilizes.
  5. Repeat the same process with the pH 10 calibration solution.
  6. Use these 3 points to create a calibration curve for converting voltage to pH values.
  7. The Arduino sketch can use this function to return accurate pH readings.
  8. Periodically recalibrate the sensor every few weeks for best accuracy.

Arduino Sketch

The Arduino software needs to read the analog voltage, map it to a pH value based on the calibration curve, and display/log the results.

Here is a sample Arduino sketch to do this:

//pH Sensor Arduino Code const int phPin = A0; //pH sensor connected to analog pin A0 float phValue; //to hold pH value void setup() { Serial.begin(9600); //calibrate pH meter function calibrateSensor(); } void loop() { phValue = readpH(); //read pH value Serial.print("pH: "); Serial.println(phValue); delay(1000); } //Function to calibrate sensor void calibrateSensor() { //calibration codes //store calibration points //map voltages to pH values } //Function to read pH float readpH(){ //read analog voltage //map voltage to pH based on calibration return ph; //return pH value }

Modify the calibration logic and reference voltage to pH mapping based on your specific sensor calibration. This will give you accurate real-time pH measurements that can be displayed or datalogged.

Displaying the Output

To display the pH value on an LCD module, simply print the phValue to the LCD in the loop() function:

lcd.setCursor(0,0); lcd.print("pH: "); lcd.print(phValue);

You can also display pH graphically on OLED displays.

Data Logging to SD Card

For datalogging applications, the pH readings can be appended to a CSV file on an SD card module attached to Arduino:

File dataFile = SD.open("phdata.csv", FILE_WRITE); if (dataFile) { dataFile.print(phValue); dataFile.println(","); dataFile.close(); }

This will continuously log the pH measurements to the SD card for later analysis.

Applications and Examples

The Arduino based pH sensor setup can be utilized for:

  • Aquarium or swimming pool pH monitoring
  • Checking water quality and alkalinity
  • Hydroponics monitoring
  • Measuring pH of juices, drinks
  • Environmental water analysis
  • Science experiments and projects

By using specialty pH probes, the sensor can also measure pH in non-aqueous solutions like fats, oils, solvents etc.

Conclusion

Measuring pH is important for a wide range of chemical processes and applications. By interfacing a pH electrode probe to an Arduino through a suitable amplification circuit, you can build your own DIY pH meter. With proper calibration, these Arduino pH sensors can provide reasonably accurate pH measurements for your needs. The pH data can also be displayed, charted, or datalogged using Arduino. Overall, Arduino provides a simple yet powerful way to incorporate pH testing ability into your projects.

Frequently Asked Questions

What is the typical output range of a pH sensor?

Most pH sensors have an output voltage range of around -400mV to 400mV or -1500mV to 1500mV corresponding to the 0-14 pH scale. This small mV range voltage needs to be amplified to the 0-5V range for Arduino analog inputs.

Do I need a special pH probe for Arduino?

No, you can use any standard laboratory pH probe with BNC connector. Just get a BNC to banana plug adapter to match its pins to the breadboard. There are also special waterproof Arduino compatible pH probes available.

What solutions are used for calibrating a pH meter?

Calibration is done using standard buffer solutions like ph 4, ph 7 and ph 10. Precision buffer solutions that provide exact ph values for calibration are also available. Choose calibration buffers close to your expected measurement range.

Can I interface other chemical sensors to Arduino?

Yes, Arduino can interface to many types of electrochemical sensors apart from pH, including CO2, dissolved oxygen, nitrogen, and more. Similar circuits with amplifiers and calibration are needed to adapt their signals for Arduino.

How often should the pH meter be calibrated?

pH sensors need to be recalibrated every 1-2 weeks to maintain accuracy. Frequent calibration compensates for ageing effects of the glass electrode membrane over time. Calibrate more often for very precise measurements.

How to build an Arduino PH sensor

We all know PH is an essential thing for drinking water. If you don’t take care of this crucial ingredient, you might ruin your entire meal in a matter of seconds. This article will teach you how to build an Arduino Ph sensor as a beginner project for someone who doesn’t know what they’re doing.

What is an Arduino?

We can regard an Arduino as a ‘microcontroller.’ This means that it is a tiny computer that you can use for electronic projects (and for much more). It can act as the main component in a huge amount of projects. By combining multiple projects, you can make something even greater.

We do this project using the Arduino Uno and the Arduino 1.0.2 IDE (integrated development environment).

These are the components we will be using:

– Arduino Uno ($30)

– Arduino Starter Kit ($80)

– Ph probe ($50)

Before you get started, make sure you set up the Arduino kit by following the instructions that came with it. This takes approximately 1 hour and 30 minutes to do. However, if you’re in a hurry, it’s possible to do this in 20 minutes by following this tutorial.

What is pH?

pH is a measure of the acidity or alkalinity of an aqueous solution.

The pH scale is logarithmic, and it measures the negative base ten logarithms of the activity of hydrogen ions in a solution.

The pH scale is from 0 to 14, with seven being neutral, less than seven acidic, and greater than seven is alkaline.

Every solution has a pH that a simple electrode can measure. For example, lemon juice has a pH of 2-3, and vinegar has a pH range from 4-6. Clean water may have a pH between 6.5 and 8, depending on the area you live.

A downside to this value is that it’s not used for precise recipes when cooking.

A pH level of 7 is considered neutral, any lower and it becomes increasingly acidic, any higher and it becomes progressively alkaline.

A probe

A probe is an electronic device that allows you to measure the amount of voltage or current flowing through a circuit. For example, we will be using a Ph probe when measuring PH. This sensor lets us know if the water contains acids or bases.

The PH probe has two wires:  one red and one black. The blue wire connects to 5V, and the black wire connects to the Ground(GND). The Red wire is what you use to measure the PH. It’s a very sensitive probe that can measure the pH value. You connect it to the Arduino, and in a concise period, it will tell you if the solution has an acidic or basic value.

pH Sensor for Arduino

There are many different models of Ph Sensor for Arduino. Unfortunately, many of them appear similar. But, if you want to do a good job and make sure your sensor will last for a long time, you should go with one from Rayming PCB & Assembly and get this one.

You can connect the sensor to the Arduino board using two wires. Once the connection is complete, you can start testing the sensor. You should do this by using a small piece of bread. The amount of sugar in bread is close to human skin, so it is easy to see how the sensor will react.

One can adjust the Ph probe to any other values as well. You need to tell it which value you want, and it will give it back to you (the value). You can do this by using a simple piece of bread.

Testing the sensor after connecting it to the Arduino is essential before using other solutions. You should always let the sensor rest for around 24 hours to stabilize and work properly. You will have to do this again when you connect it to a new circuit later.

The Ph probe requires between 3.5V and 5V to read the solution’s pH value properly. Therefore, to monitor the pH level of your Arduino project, you will need to use a voltage regulator or a voltage divider.

This project will use two transistors and two resistors to get the proper readings from different circuits or sensors. For example, if you want to measure the temperature on your Arduino board, you can get that information with a thermistor. However, the readings for both temperatures and pH depend on the circuit’s current level and, therefore, on the value used in your soil ph sensor Arduino.

Components and supplies

To build this little project, you will need to gather a few components and supplies. Here is the list:

  1. Acrylic sheet (plexiglass)
  2. Jumper wires
  3. Resistor 1k ohm
  4. Resistor 220 ohm
  5. Mini breadboard
  6. 158x90x60mm enclosure
  7. 20×4 LCD Module
  8. Atlas Scientific Consumer Grade pH Probe
  9. Atlas Scientific Gravity Analog pH Sensor
  10. Arduino UNO
  11. Arduino IDE

Safety

Before you start building your sensor, make sure to read these instructions carefully. Your project will not be waterproof. Ensure that you place the device on a flat, safe surface.

 When moving or storing your Arduino circuit, always unplug the sensor from the Arduino to make sure it doesn’t short-circuit on something.

If you are unsure about this project, don’t hesitate to ask someone about electronics and programming. You will learn more, and your project and knowledge will grow bigger.

Other than that, almost everything is as simple as a ‘Plug and Play’ installation. If anything fails to work correctly, try restarting the Arduino IDE. If it still doesn’t work, check all the connections again to ensure there aren’t any loose wires touching other components or parts of the circuit.

Step 1: Prepare the housing

You can choose to make the Arduino board a stand-alone device so that you don’t need an enclosure. But, we think it’s better to use an enclosure because it gives you a safer way to store your sensor or Arduino board in the future. But, of course, you could also use the box that comes with your Arduino kit.

First, you will have to cut out two holes for the LCD module, the mobile phone camera, and the micro SD card slot.

You should place the LCD on the bottom of the enclosure. Make sure you leave enough room for the mobile phone camera and micro SD card slot.

Supply a hole at the right size for the LCD screen, and make a hole on the back of your enclosure so that you can place a screw to fix it in place.

Place your finished product on top of another piece of acrylic sheet or plexiglass that is slightly larger than your enclosure. Then, cut it to the same size as a saw. Once you finish both pieces, drill two holes for the mobile phone camera and one for the micro SD card slot.

 Don’t worry if you mess up while making these holes. You can always take your enclosure apart and fix all these problems. Do this by using a drill bit that is slightly smaller than your cord and then cut all of these holes with a rotary tool, or you can use a saw if you want to make smoother cuts.

Step 2: Install electronics in the housing

Install three components, two transistors, and one resistor for the Arduino pH sensor. Here is a quick explanation of these components:

1) First, we will install the 220-ohm resistor from the LCD module side so that you can use an external power source. You also want to connect this to your Arduino board’s positive (red) side.

2) Next, connect the LCD module’s ground to the Arduino board’s ground.

3) To install the two transistors, you will use a breadboard. First, make sure that you place the transistor in each circuit correctly.

4) You will also have to add an extra ground wire between the transistors and the breadboard since they don’t share a common ground with the Arduino board. Finally, connect the transistor and resistor to GND on the Arduino board.

5) You can now install the Ph probe by using jumper wires.

The Ph probe should be installed like the picture above to connect the wires to your Arduino board. The GND wire should be connected to one of the Arduino’s pins and should go in between both transistors to be grounded.

You can wire the other wire (from the Ph probe) directly with one of the transistors (the transistor without an extra ground wire).

Finally, you can install the LCD module using two wires. You need to connect one pin to the Arduino board and the other to the transistor that shares a ground with the Arduino. You can use a breadboard for this if you want, but it is much easier just by connecting both circuits directly.

Step 3: Wire the electronics together

You have already installed all the components in your housing, and now you have to connect them. For this step, make sure you follow the circuit diagram I created for this project. This diagram will find details about every component’s location and where you should connect it to.

Just connect the parts that are highlighted in green using jumper wires. You can bend the wires to make them fit in between the housing and your Arduino board without causing any harm to them or their circuit.

Now you should be able to plug and play! Feel free to try out all of your sensors’ different settings and see how it works.

Step 4: Complete the assembly

Industrial pH sensor Arduino

Once you have your Arduino pH circuit assembled, you can now place your sensor in a safe environment to see how well it works. However, you don’t want to put it in the water yet because you haven’t installed the software to let your sensor know its pH level.

You can control the water temperature by sliding the potentiometer while controlling the voltage by holding down the “set” button.

Step 5: Load the code Onto Arduino UNO

You can download the Arduino code for the project from here. It’s a sketch that you can use to control your sensor.

You will have to install and run the Arduino IDE on your computer. You will also have it on your mobile phone for setting up, uploading, and testing sensors in the future.

Once you have finished installing everything, open up your Arduino IDE on your computer, select ‘File/Open and select the code you downloaded from our page.

 The code contains the description of each sensor on the Arduino board, and you can easily change it to suit your needs.

Now connect your Arduino UNO to your computer with a USB cord and then click on ‘File/Upload’ this will send the code to your sensor so that you can start testing it out.

Click ‘Tools/serial monitor’ This will open up a terminal in which you can test your sensor! Type “M50” in the terminal to heat the water at 50 degrees Celsius.

After that, check out the display, and you will notice that the LCD screen is currently on, and it says: “Temp 1.0” on top of it.

If you type “M10” in your terminal, you will notice that the temperature is now 10 degrees Celsius hotter, and the LCD screen will now say “Temp 2.0”.

Then type “M20” to see that the temperature has risen to 20 degrees Celsius.

Finally, we can test our pH sensor and see how well this sensor works! Type “pH” in the terminal, and the LCD screen will say “2.0”.

That’s how you can use this Arduino pH sensor to monitor the levels of your environment.

Step 6: Calibrate the sensor

You can calibrate this sensor so that it will be able to tell the exact pH level that is in your environment. For this part, you will need two common solutions in a range of 1-14 pH. In this case, we used a solution at five and another at 10.

Our solution at five pH was pink, and our solution at ten pH was purple. So we mixed these two solutions, and our sensor read “7”. Which means you calibrated the sensor at 7.

You can do this step multiple times to see how well your sensor calibrates and reads the pH level in your environment.

Step 7: Use your DIY pH sensor With Arduino!

After calibrating the sensor, you can use it with Arduino electronics. Here is a code snippet that you can use to see how well your sensor works:

This code will turn on (red LED on) the LED connected to your LED strip (VCC) and display “Temp” on the LCD screen. You can change these values in the sketch to suit your needs!

Now again, open up your Arduino IDE and upload this sketch onto your Arduino board.

This will allow your pH sensor to bridge your sensors and Arduino board. With this, you can control many different sensors from one device!

Now take this same code, but change the text and change it so that it says “pH” instead of “Temp.”

Then connect your pH source (a five pH) to your Arduino board. Then download a sketch from here. This will let your Arduino board be able to read your pH sensor!

Notice that when you download and upload the program, the LED light will turn blue and red when it recognizes that the sensor and Arduino need a connection.

Now type “pH” into your terminal, and you should see this screen:

That’s how easy it is to use this DIY pH sensor from Arduino electronics. You can now use it as a simple probe for your other sensors in our project.

Testing Arduino pH Tester

It is essential to test the pH sensor in different environments to ensure that it will perform well. In this part, I will show you how we tested out the pH sensor in a few different environments. This would allow you to know that the sensor is doing what it is supposed to do.

Here’s how we tested it out:

Testing pH sensor in the air

We tested the pH sensor in an open environment. First, we used a clear jar and filled it up with distilled water so that there was no conductivity of the water, and we stirred for about 30 seconds. Next, we put a piece of pH paper on top of the solution and connected an Arduino board using a USB cable.

Then, we took the sensor apart and connected it to our lab equipment. We tested the voltage output from the sensor, compared it to a known value, and found that there was about 0.1 volts difference between both of them. We then compared the results to the pH table online and found that the readings were correct!

Testing pH sensor in hard water

We used distilled water again to have no water conductivity in the jar. Next, we used a hard water solution and poured it into the jar. We then put some pH paper on top of the water and connected the other end to our Arduino board. Then we took our pH sensor apart, stripped off its casing, and put it into the hard water solution. From there, we tested both outputs from the Arduino and lab equipment.

To our surprise, both of them were about 0.02-volt difference which is acceptable for our sensor since it is an analog voltage output device. Unfortunately, we tested one previous version of the pH sensor in hard water, and it didn’t give us a reliable result, so we needed to replace it with this one since it is more precise.

Testing pH sensor in saltwater

We used the same setup again, but we used a saltwater solution, about 0.4 volts difference from our analog output device. Both outputs were still within an acceptable range, and we tested both of them using a previous version of the pH sensor in saltwater, and it also gave us similar results.

Common errors when building an Arduino PH sensor

There are a few common errors that we can find when building this Arduino pH sensor from scratch. Here are some of them:

java.lang.StackOverflowError

This error happens when the code you are trying to upload doesn’t work properly. This might be because you did not implement some of your library’s functions in your sketch. To fix this problem, comment out unnecessary codes and compile and upload again.

Sketch Too Large for FLASH Memory

If your sketch is too large for the flash memory, you might get this error message, which means your sketch is too big to fit in the flash memory. To fix this problem, comment out unnecessary codes and compile and upload again. If it still doesn’t work, you can use another Arduino IDE instead of using the default one that comes with Arduino boards.

When you compile your code and upload it on your Arduino board, you might get the “Unsatisfied Link Error” message box. This means that there is a library that you need to add to the Arduino IDE before trying to compile and upload again. But, of course, you can always go to this page and download this library into your Arduino IDE to use it in your project.

Sketch Uploads Successfully, but Nothing Happens on Board

This error happens when you try to upload a sketch, but nothing happens on your board. This might be because there is something wrong with the code you are trying to upload. First, try removing all the comments from your file and then re-compile it again. If that doesn’t work, you could use this other Arduino board instead.

Serial Port Already in Use

When you upload sketches onto your Arduino board, you might get a message box telling you that “Serial port is already in use.” This might be because your IDE tried to upload on a serial port and failed because it was not connected. To fix this, try to restart your Arduino IDE by closing it and re-open the IDE.

Launch4j Error

Sometimes, when you compile your code, a Java error comes up and tells you that the Launch4j cannot run. This is because your Arduino board is not detected by your computer since there might be a problem with the serial connection between your computer and the Arduino board. Connect your Arduino board with a new USB cable to fix this problem.

Invalid Device Signature Error

This error happens when you try to connect an Arduino board to your computer, but your Arduino board doesn’t appear in the list of recognized devices. To fix this, remove the IDE, and after you reboot your computer and then re-plug it into the USB port, this should help.

The code doesn’t start on Power Reset

Sometimes, the code you put into your Arduino IDE doesn’t work when you compile it. This might be because you need to put in the PIN before starting. To fix this problem, comment out the “Serial. begin()” line by putting a “#” at the beginning of that line and then upload the program onto your board again.

Board not in sync

Your board may be out of sync with the Arduino IDE. If you can’t upload any sketch onto your board, try resetting and restarting it by disconnecting the power and reconnecting it to a new USB cable. This should sync it up to Arduino IDE to upload sketches onto your board.

Arduino Board not Recognized

This might be because your Arduino board is not compatible with this type of hardware. If you have an Arduino Uno that you cannot use, you might consider finding a different one.

Conclusion

Finally, we have finished our first pH sensor Arduino project. We started by looking at the basic parts that we will need for this project: an Arduino Uno and a pH sensor. After reading about how these sensors work, we decided to use the DS18B20, easy to find and cheap. Fortunately, most of the parts we used were available on Amazon, so there was no need to look everywhere to get what we needed.

After building our pH sensor, we tested both possible scenarios using hard and saltwater. We found that both outputs were still within an acceptable range from the common range of pH values. Both values were around seven and below eight, which means our sensor gave us a correct output.

Finally, we learned about some common errors and how to fix them for your Arduino project.

Difference between Accelerometer and Gyroscope

Accelerometer and Gyroscope

Consumer electronics are growing faster each year. As a result, people have become more aware of how technology can assist them. One popular device that has been on the rise is an accelerometer and gyroscope. Microelectromechanical systems (MEMS) are becoming the critical element of these devices. They give the user a new way to interface with their device. They also detect the device’s motion and interact with it in new ways.

These devices are helpful for the consumer and industrial markets. They include the automotive and aerospace industries. Here, MEMS can sense motion in automobiles, ships, and aircraft. We can also use these sensors to sense speed and directions. It will increase the overall efficiency of these products. MEMS are helpful in airbag control units, side-impact airbags, and seat occupancy detectors. We also use them in smart cruise controllers in the automotive industry. An accelerometer and gyroscope are also beneficial in video game consoles. It is an example of consumer electronics. A microchip processes the information provided by this device before sending it to the console or a gaming platform.

What is an Accelerometer?

An accelerometer is a device used to detect the acceleration of a free-falling object. It consists of a mass, spring, and linkage. They suspended the mass from the linkage that one can replace from its rest position. If the object is accelerating vertically, the suspended mass will move opposite. The displacement of this mass measures how much acceleration the object is undergoing.

The accelerometer functions by detecting the acceleration of an object. We can use an accelerometer in many different applications. It is usually used by nature because some organisms use it to detect gravity or the earth’s gravity. Some scientific institutions use them to measure rotation rates and cosmic acceleration. Some forces cause these devices to work. They include Gyroscopes, Inertial Vector Indicators (IVI), MEMS, and Magnetometers.

How it works

accelerometer and gyroscopeย arduino

An object is free-falling, and it is descending due to gravity. After a certain time, the object will reach a certain speed (this depends on the object’s weight). The acceleration due to gravity will be equal to g. A physical force then acts on the mass, causing it to decelerate. An accelerometer observes the deceleration. It measures the change of momentum caused by this forceโ€”this force changes when an accelerating force acts on it.

Piezoelectric effect:

An accelerometer also works with the effect of the piezoelectric effect. A crystal with bound atoms will create an electrical charge when you compress it. If you compress it, it will generate a voltage. The connection of this device will then cause it to work as an accelerometer.

Magneto-resistive effect:

An accelerometer is also composed of a magneto-resistive effect. It senses a small magnetic field. So, it detects the acceleration caused by magnetic forces.

Change in Capacitance:

In specific applications, an accelerometer works by measuring changes in capacitance. Thus experiencing a change in capacitance when it is free-falling. 2 capacitive plates are present. A coil and a capacitor connect them. The device observes the change in capacitance. We can use it to determine that an object is falling.

MEMS Accelerometers

Accelerometers depend on other operating principles. We use them in consumer electronics, automotive, and aerospace industries.

The accelerometer is one of the most popular MEMS devices. We can use it to detect vibration, shock, and small changes in the direction of an object. It is also a very efficient device since it requires little power when used. Therefore, you can leave it on for a long without draining the device’s batteries.

Microelectromechanical systems (MEMS) are the key element of accelerometers. They measure acceleration, rotation, and vibration. We measure the acceleration by the change in position of a proof mass. The proof mass is along with a resonant structure.

The most widely used type of accelerometer is the capacitive electromechanical sensor. Therefore, we also refer to it as an accelerometer.

Accelerometers are usually composed of a sensor chip and an integrated circuit. It has capacitors, inductors, and resonators (tuned circuits with resonant frequencies).

The sensor chip can be traditional CMOS, silicon-based CMOS technology, or other processes.

The device uses the effects of the piezoelectric effect to measure acceleration. The device observes the change in capacitance.

Applications of Accelerometers

We use accelerometers in a variety of applications, including:

1. Compass/Map applications:

In GPS navigation systems, Rayming PCB & Assembly use accelerometers to detect if the device is in motion. It will also detect which direction it is moving in. Through axis-based sensing, phones and tablets can determine their orientation and direction.

2. Tilt sensing:

Using a gyroscope, we can use an accelerometer to detect a device’s orientation. For example, iPhone uses an accelerometer and gyroscope. First, it detects when the user rotates the phone from portrait to landscape mode. Then, it changes applications accordingly.

3. Earthquake detection:

We use accelerometers to detect an earthquake. It also determines the magnitude of its movement.

4. Fall sensing:

We use accelerometers in advanced personal protection systems. They detect a fall and trigger life-saving technologies, for example, airbags and seat belts.

5. Medical devices:

We use accelerometers to detect a momentary speed of blood circulation. It also delivers critical information about the status of a patient. Artificial body parts, such as heart valves and hips, also have accelerometers. They help detect movement around the prosthesis.

6. Fitness trackers/wearables:

Accelerometers detect physical activity. This can detect if the user is walking, running, or biking.

7. Games and applications:

We use accelerometers to detect subtle movements during a gameโ€”for instance, the response time of a joystick controller.

8. In-car applications:

Accelerometers detect if the driver loses control of the vehicle. It then triggers an appropriate safety response.

What is a Gyroscope?

A gyroscope is a device that uses its natural inertia to measure the rate of rotation of an object. We consider it a mechanical effect. We use gyroscopes in geophysics space research and various electronics applications.

How it works

A gyroscope consists of two main parts:

A pair of weighted rings called gyroscopes

An angular rate sensor (usually called a magnetometer), which we do not use.

It works through the precession effect when a gyroscope rotates around one of its axes. It cannot detect the rotation angle when it is in an equilibrium position. But after its rotation, it will point up to the axis on which you placed it.

In this case, an inertial force acts upon the gyroscope. Since the angular momentum remains constant, extra kinetic energy will go with this motion. This force will make the gyroscope go backward. However, since nothing happens to the gyroscope, we call this the precession. Another precession effect is that a gyroscope will resist any change in its angular momentum until you apply torque.

The rotation rate of an inertial frame can measure the rate at which an object rotates in an accelerating frame. It does this through Einstein’s equivalence principle or Newton’s first law of motion.

Applications

We mainly use gyroscopes for navigation, flight control, and navigation in space exploration. However, they are also helpful for medical devices. An example is heart monitors and other medical equipment. Nuclear magnetic resonance (NMR) spectrometers also use gyroscopes to detect movement.

MEMS Gyroscope

The MEMS Gyroscope is also known as a Microelectronics-Mechanical System (MEMS) gyroscope. We use the MEMS engine in smartphones and cameras.

We use Gyroscopes in smartphones to enable image stabilization. It helps capture clear images while recording videos.

We also use it in drones that use MEMS technology. Even when the drone is not under direct human control, they enable flight control.

MEMS Gyroscopes are small miniaturized sensors. They use silicon chips, MEMS, and advanced processing technologies to achieve high precision. We use them in various applications, including gyroscopes, cameras, and navigation systems.

Applications of Gyroscope

In the past, we used MEMS gyroscopes in missions navigation systems. However, the application is expanding. Some of the notable ones include:

1. Consumer electronics through MEMS gyroscopes:

The demand for MEMS is rising in consumer electronics, particularly smartphones and tablets.

This is because most smartphones and tablets today come with a 3-axis gyroscope.

Gyroscopes can detect if a device is moving too much. For example, it would trigger an airbag system in an accident. If it detects a hard fall on the ground, it will call emergency responders using GPS.

2. Inertial guidance systems

Inertial guidance systems are essential in missiles, rockets, spacecraft, and UAVs.

The inertial guidance system can determine position and orientation in space.

3. Airplanes through MEMS gyroscopes:

A 3-axis MEMS module serves as an essential component. It enables the roll axis of a fly-by-wire (FBW) flight control system. This technology makes flying a jet at supersonic speeds possible for pilots.

4. Stability in vehicles, motorcycles, ships:

MEMS gyroscopes can determine the vehicle’s lateral and longitudinal stability characteristics. We can use it to assess the condition of the vehicle’s chassis. We also use stability in automobiles. For example, it determines if the car loses balance or is unstable while traveling on a curvy road.

5. Space stations:

MEMS gyroscopes and accelerometers help determine the space station’s orientation, speed, and direction.

How to choose an Accelerometer

gyroscope and accelerometer combination

Accelerometers help in motion capture systems, game controllers, and Kinect. They all can measure changes in motion. We do this by the accelerometer measuring the changes in acceleration caused by forces applied on a device.

Accelerometers can measure acceleration caused by gravity, which we can also use to detect gravity. The accelerometer can also measure static forces like downwards force or upwards force. But it cannot detect dynamic forces like movement and movement over time. So to find a good one, you need to consider the following:

1. Range:

Accelerometers can measure acceleration up to 5000 Gs. So if you want to measure accelerations with high precision, it is better to go with the accelerometer with a high range. They include an accelerometer with a range of 2 Gs or above.

2. Interface:

We can connect accelerometers through digital or analog. But to get the best performance, it is better to go with the accelerometer that uses a digital interface.

3. Sensitivity:

The sensitivity of an accelerometer is the amount of vertical force it can measure per the change in acceleration. Unfortunately, it is also associated with low sensitivity. So you will not measure it accurately if you are accelerating at a constant rate.

4. Axes:

There are two types of accelerometers, namely two or three axes.

The most common type of accelerometer that is in use today is the one that has only one axis. It looks like a mini 3-axis accelerometer. If you want to measure acceleration with high precision, you should go for the miniaturized 3-axis accelerometer. However, this type of accelerometer can be available on only a few devices. They are challenging to manufacture.

5. Power:

The mass of the device and the size of the circuit board will affect its performance sensitivity and power consumption. So before you go for any accelerometer, you must consider these factors.

6. Usage:

It is also essential to understand how to use the accelerometer in the device.

7. Cost:

Before deciding on an accelerometer to use in your project, you must also consider the cost. You should know that you can use Richter or tilt switches instead of accelerometers. This is when you want to measure acceleration on a small budget.

Types of Accelerometer

a. Grove โ€“ 3-Axis Digital Accelerometer ยฑ16g Ultra-low Power (BMA400)

This is a product of the BMA400 sensor from Analog Devices. The Grove -3-Axis Accelerometer BMA400 is an ultra-low-powered digital accelerometer. We use it in robotics and medical devices.

b. ADXL 3-Axis Accelerometers series

There are three different series of accelerometers based on BMA200.

The ADXL3-03 is a low-power, high-performance 3-axis analog accelerometer. It is available in 1G and 4G options.

Most people believe the ADXL3 -05 is the most accurate class at ยฑ5 ยตg. In addition, it provides increment and decrement detections. It has a resolution of ยฑ2 ยตg per step throughout the full operating range.

How to choose a Gyroscope

Gyroscopes help in devices such as vehicles, cameras, and drones. We use them to help improve a device’s stability and measure speed.

Gyroscopes help reduce rollover accidents and provide more accurate speed readings.

You must choose your gyroscope wisely because not everyone has the same requirements. So there is no one size fits all gyroscope. This makes it even more difficult for you if you have no prior background knowledge about them.

These are the factors to consider when choosing a suitable gyroscope:

Range:

Gyroscopes can measure angular velocity up to 2000 degrees per second. So you need to choose one with a high range, such as a gyroscope with a range of 2000 degrees per second or above.

Range affects the amount of information you can get from the gyroscope. So you should choose one which has the highest range possible for your project.

Digital vs. Analog:

Digital gyroscopes are more expensive than analog ones. But they are easier to interface with and provide more accurate results. So to get good performance, you should choose an analog gyroscope over a digital one.

Conversion Ratio:

The conversion ratio of an analog gyroscope refers to the accuracy of the speed measured in degrees per second. An accurate speed measure is much preferable to an inaccurate one. So choose a gyroscope that has the highest possible conversion ratio. The parameters that govern the accuracy of a gyroscope are range, convert rate and temperature coefficient. So you will have to consider them when choosing one for your project.

Number of Axes:

Two gyroscopes are single and dual axes. A single-axis gyroscope is suitable for measuring angular velocity around a single axis. We can use it for applications such as stabilization. On the other hand, a dual-axis gyroscope is essential in navigation or flight control. So choosing a dual-axis one over the single-axis type is better.

Power:

Gyroscopes consume a lot of power. So you should choose a gyroscope with the lowest possible power consumption if you want to measure angular velocity but don’t have the money to go for a high-end gyroscope. Ten mW is much better than 0.5 mW.

Usage:

We use gyroscopes in many devices. They include drones, satellites, and flight control systems. Before choosing a gyroscope for your project, you must check the device’s requirements.

Cost:

You can save a lot of money by choosing an inexpensive gyroscope. It is not as important as other factors in selecting a good one.

Which Gyroscopes to buy

a. Grove โ€“ 6-Axis Accelerometer & Gyroscope:

The BMG160 is a 6-axis gyroscope and accelerometer in a single package. The LIS2MDL3-16000 is a low-power 6-axis accelerometer and gyroscope with 16 bit ADC resolution. It can sense angle rates with an upper limit of ยฑ2,000ยฐ/sec

b. ADXL 3-Axis Gyroscopes

There are three different series of analog ADXL gyroscopes based on LS5016AL.

The ADXL3-12 is a low-power general-purpose high-performance 3-axis analog gyroscope. It has a full scale of ยฑ200dps.

The ADXL3 -15 is the most accurate in its class at ยฑ5 ยตg/DPS (roll) and ยฑ2.5 ยตg/DPS (pitch and yaw). In addition, resolution remains consistent throughout the entire operating range.

The conversion ratio of the ADXL3-15 is much higher than the other models available in this series. This is why we have mentioned it.

c. DRV2605L 3-Axis Digital Gyroscope

The DRV2605L from Texas Instruments is a digital gyroscope. It uses MEMS sensor technology with an embedded MSP430 controller.

Applications compatible with this gyroscope include automotive, robotics, vision systems, and wearable computing.

The sensor has 3-axes, ยฑ2g/ยฑ2g range, 0.01ยฐ resolution, and +/-0.1ยฐ/s bandwidth. It consumes a little less than one mA per axis, with 0.5V supply voltage.

Difference between Accelerometer and Gyroscope

When analyzing these two sensors, there are many similarities. You will find that they have similar capabilities and applications. So it is quite challenging to determine which one performs better.

This section will help you understand the differences between accelerometers and gyroscopes. Then, it will help you choose the right sensor for your project.

Function:

We use accelerometers to measure acceleration. On the other hand, a gyroscope can measure the angular rate and angular velocity. In short, accelerometers sense changes in speed and direction. Gyroscopes sense rotational speed.

Gyroscopes are also known as rate gyros or rotation sensors. However, this depends on their function.

It is famous for sensing Linear Acceleration, angle, and angular acceleration or rotation. Additionally, we can measure by combining an accelerometer and a gyroscope.

We refer to measuring the angle of rotation of a body using an accelerometer as angular rate sensing. The sensor measures changes in the tilt of a rotating body. This is what we call angular velocity when it senses movement. These movements are due to gravity, acceleration, and rotation. The three-axis accelerometer measures the change in tilt.

Sensing linear velocity is the measure of how fast the spinning body rotates. The gyroscope senses the angular velocity by measuring motion in the yaw axis (pitch and roll).

Gyroscopes measure the rotational speed in inertial navigation and flight control systems.

Robots also use gyroscopes as sensors to determine their orientation and maintain balance.

We can consider accelerometers as mini gyroscopes. This is because they do a similar angular rate measurement.

Signal to noise ratio:

The signal-to-noise ratio is the ratio between the signal level and the noise level observed by the detection device.

The higher the signal-to-noise ratio, the more sensitive it is to variations in the input.

The signal-to-noise ratio is essential when choosing a sensor. This is because it affects its accuracy and precision. For example, working with a sensor with a low SNR will not respond to small changes in output.

The gyroscope is a very sensitive sensor with high SNR to measure the smallest changes. As a result, accelerometer measurements are lower, defeating the purpose of an accelerometer.

We build Inertial Navigation Systems using gyroscopes. This is due to their sensitivity to angular velocity changes rather than accelerometers.

The gyroscope has an advantage over the accelerometer when dealing with drift. This is because of its constant measuring error.

Measurement of angular velocity:

Gyroscopes measure or sense the rotation of a rotating body. To get an accurate measurement, you must mount the gyroscope on a fixed point to control the direction of rotation.

The gyroscope is an electronic device. We use it to sense angular velocity and applied to 3D scanning, sensing, navigation, and position control systems.

Measuring linear velocity is insufficient for inertial guidance systems. This is because the space vehicle can move at high speeds and maintain orientation. However, we can use it in position control systems where the vehicle is stationary to get orientation information.

A gyroscope has several modes, such as horizontal, angular rate, and angular rate drift. Each type of mode is essential for different applications and conditions.

Horizontal Mode:

The basic mode measures rotational movement in an east or west direction, also called yaw. Yaw may also refer to it as pitch or roll, depending on which axis the gyroscope senses rotation in.

Conclusion

Finally, the right sensor to choose depends on the application and environmental conditions.

First, we need to determine what output is more important in the given application.

If it is possible to get raw data from the sensor, you should get an accelerometer over a gyroscope.

You should choose a gyroscope over an accelerometer if you need high accuracy and precision.

How do Microwave Motion Sensors Work

Microwave Motion Sensors

Everyone endeavors to secure their property – and you are not any different, especially for your home. It is common to find a security system here, a padlock there, and for the more astute, motion sensors. However, it can get a little murky trying to find the best motion sensor for the latter. So how then can you go about it?

First, motion sensors come in diverse types, though all with the same application of improving your homeโ€™s security. Of course, you can always get infra-red motion detectors or photosensors. However, the most straightforward โ€“ microwave motion sensor uses microwave or radar technology in detailing an intruderโ€™s location within your house. So what do you need to know about microwave motion sensors before making your motion sensor decision?

What does a Microwave Motion Sensor Entail?

A microwave motion sensor is a simple gadget instrumental for your home security system. It utilizes electromagnetic radiation and emits waves that get reflected in your receiver. Electromagnetic waves or radiations comprise oscillating magnetic and electric fields that proliferate at very high speeds (comparable to light). The receiver acts as an analyzer of the bounced back waves. For example, a typical object moving across the room will alter the waves. The receiver will then identify such alterations whenever they happen.

For a microwave motion sensor to work, it must have a corresponding motion detector. The detectors become useful in measuring the time the signal takes to reflect onto the sensor. Such a period gets inferred as the echo time. It is instrumental in calculating the in-between distances of all stationary objects located in the detection zone. The echo time acts as the baseline upon which the system functions.  

Typically, the microwave motion sensor’s mode of action implies that it can either prove less or more sensitive. Therefore, you can calibrate the MMS to spot tiny changes or more elaborate movements of larger objects to avert false positives.  

Types of Microwave Sensors

The properties of electromagnetic radiation or waves imply that their corresponding sensors can get classified into different types. Some important properties include wavelength or frequency, strength or intensity, and polarization. Frequency implies the change rate of the electromagnetic waveโ€™s amplitude. It is also related to the lightโ€™s wavelength or speed.

On the other hand, the intensity comes as the measure of the electromagnetic wave or radiationโ€™s amplitude and correlates to the energy that the wave carries. Remember, the magnetic and electric fields in the electromagnetic wave come as vector quantities. As such, they have both a direction and a magnitude.

The electric field’s direction lies perpendicular to the propagation’s direction and often defines the wave’s polarization. It can have either a linear or circular polarization. Because of the vector nature of the radiation, you find an electromagnetic wave proving sensitive to the orientation of the object it scatters from. It thus gives extra details about the morphology of the surface.   

Passive Microwave Sensors

All microwave sensors operate within the electromagnetic frequency range of 0.3-40 GHz. In addition, a passive microwave sensor detects natural microwave radiations that a surface produces.

Active Microwave Sensors

It involves microwave motion sensors that emit microwaves before detecting the reflected microwaves from the object of interest under observation.

Classes of Microwave Motion Sensors

best microwave motion sensor

Microwave motion sensors come in diverse types that generally fall under the following classes. It includes the pulsed radar type, frequency-modulated, continuous-wave or FM-CW radars, Doppler-effect radars, and UWB systems. Other classes entail transmitter-receiver systems, resonator sensors, modulated targets, impedance meters, and radiometers.

Most of the microwave motion sensor classes utilize a transmitter or a signal generator and a receiver save for the radiometers. However, the distinguishing factor between the classes arises from the signal modulation type and the system’s design. Additionally, some microwave motion sensors can work when placed at a distance from the object, while others function while mechanically joined with the object.

Features of a Microwave Motion Sensor

Intrinsically Safe: Microwave motion sensors cannot generate sparks, especially from electrostatic discharge or friction.

No Contact: It can operate without establishing any contact with the object. Additionally, the microwave sensor can also successfully penetrate nonmetallic exteriors.    

Rugged: Microwave sensors possess no moving components or parts and thus prove reliable. It is especially true in comprehensive military applications.

Long-range: microwave motion sensors can detect objects located from distances spanning 25mm to 45000mm or more. However, this depends on the size, antenna design, and microwave availability.

Environmental reliability: in most cases, you will find microwave sensors operating from a -55A ยฐc to a 125Aยฐc in dirty, dusty, polluted, and gusty poisonous areas.

The microwave sensor’s size: As technology develops, advances in microwave circuits have allowed the ultimate package to become smaller and cost less. The package often contains the transmission source, transceiver or signal processing receiver, and the focusing antenna.  

Factors that Determine the Frequency of Microwave Motion Sensors

Your choice of a microwave motion sensor concerning frequency needs to get determined by various factors. It encompasses your intended application, power constraints, platform, and the availability of the desired spectrum at the preferred frequency range. For instance, you will get the following frequency bands within the stipulated wavelengths.

Wavelength Range (CM)Frequency Band (MHz)
1.13 โ€“ 0.7526,500 โ€“ 40,000
1.66 โ€“ 1.1318,000 โ€“ 26,500
2.4 โ€“ 1.6612,500 โ€“ 18,000
3.75 โ€“ 2.48,000 โ€“ 12,500
7.5 โ€“ 3.754,000 โ€“ 8,000
15 โ€“ 7.52,000 โ€“ 4,000
30 โ€“ 151,000 โ€“ 2,000
100 โ€“ 33300 โ€“ 900

What Can a Microwave Motion Sensor Do?

You must think by now that a microwave motion sensor only detects motion through wave disruptions. However, the functional enhancements presently available on it will not only surprise you but convince you of its efficiency in securing not only your property but other advanced operations. For instance, the advanced microwave motion sensors can also sense motion towards a random motion or a motion moving away from it. Such a differentiation of motion becomes helpful in detecting normal movement from that of an intruder. Moreover, it is a feature that makes a microwave motion sensor highly reliable.

Microwave motion sensors also come as a safe product for use. You can use them outside or within your household or property. Further, you can place the sensors across a large area besides configuring them to sense or detect diverse activity types. For example, you can configure the sensor to ignore specific activities in specific areas of your property, like the kids or pet areas.

The Arduino Doppler Radar

For newbies, the term doppler radar can prove sophisticated and confusing. However, it has the same meaning as that of a microwave sensor. The Doppler radar is sensitive and reflects microwaves from objects within the detection area but devoid of any temperature disturbance. In most instances, you will find doppler radars as one of three types: the planar microstrip, coaxial, and wave-guide microwave sensors.

Doppler radars bounce microwave signals off the anticipated target and analyze the object motionโ€™s effect in altering the returned signalโ€™s frequency. Therefore, the targetโ€™s velocity can also get measured based on the received variation against the radar. In summary, you will find microwave motion sensors using microwave technology. It, in turn, gets classified into motion sensing, velocity sensing, presence sensing, and sensing of the motion direction. Another crucial category includes range sensing.

You will possibly find doppler radars in applications such as meteorology, aviation, healthcare, military, and radar guns. But to make your own Arduino doppler radar, consider the following section.

Making an Arduino Doppler Radar

By now, you know that any microwave motion sensor must have a microwave transmitter, a receiver, and most times a related circuit or alarm. However, you must use some crucial components to develop the three. Critical components entailed in building a functional Arduino Doppler Radar entail the Arduino Nano, jumper wires, breadboard, character LCD, LED, character LCD, Buzzer, resistor, etc. It never ends here as the hardware components must get controlled via a software system.

Follow the following steps once you have assembled all the necessary components required to build a functional Arduino Doppler Radar.

Wire the hardware up by connecting the Arduino, the RCWL, character LCD, the Led, and the buzzer in the prescribed sequence. It mostly involves LED and Content with Arduino PINs of 2 and 3, respectively. Arduino analog IO of A5 and A4 with SDA and SCL character LCD. The Arduino Nano encompasses the GND, 5V, and D2, while the RCWL encompasses the GND, VIN, OUT.

It is crucial to note that the Pin 3V3 located on the RCWL comes as the output pin. Additionally, the CDS pin allows you to incorporate an LDR into the breadboard. Such a light-dependent resistor will allow you to operate the system in low-power mode. Consequently, it will (sensor) can solely activate in darkness.

You must double-check all the connections before uploading the software’s source code.    

The Working Process of a Microwave Motion Sensor

For a microwave motion sensor to work, it needs all the components necessary for its proper function (transceiver, sensor, etc.) In addition, the sensors need a narrow beam and a high-gain antenna to reflect the energy to the module. However, the amount of energy will depend on the shape and composition of the object of interest.  

Operational Principles

The sensor module gets developed through the Doppler radar principle. Further, the sensor module’s role encompasses the transmission of a low-power microwave from the transmitting antenna besides receiving the microwave energy reflected by objects to the receiving antenna.

When the object’s movement is detected, the reflected frequency (microwave) gets shifted from the transmit bandwidth or frequency to the receiving antenna. The shifted and reflected microwave frequency gets mixed with the microwave frequency transmit and results in a low-frequency voltage at the sensor’s output.

Detection Factors

In almost every incidence, six probable factors affect the Pd or the probability of detection in volumetric sensors โ€“ though at varying degrees. It includes the pattern and amount of energy emitted, the size of the objects, the object’s distance, speed, the direction of the movement, and the absorption or reflection features of the waves (environment or the intruder)

It is beneficial to have a more defined energy pattern in theoretical terms. Similarly, if the intruder or the moving object proves larger, you also get a higher detection probability. In the same way, the shorter the sensor distance to the object or intruder, the quicker the intruder’s movement, the higher the detection probability. Additionally, a lateral and fast movement typically has a higher detection probability than a straight and slow movement.        

Upon returning the reflected energy to the transceiver, your mixer diode combines this energy with the transmitted signal. But remember, the target either moves towards or away from the module, which implies that the phase relationships between the two will change. As a result, the signal emanating from the mixer will prove audio frequency and also proportional to the target’s speed. The phenomenon gets inferred as the Doppler frequency.

Further, microwave motion sensors or detectors must be combined with PIR technology to limit false alarms. In most instances, you will come across the tech combination as a dual technology detection approach.

Prices of Microwave Motion Sensors

If you want to get a quality and efficient microwave motion sensor, you must consider different aspects. Firstly, understand the functionality of the microwave motion sensor, the different types available, and the cons and pros of each system. Additionally, it would help if you considered the available manufacturers and their reputations. Finally, but most importantly, the price vis-ร -vis the quality of the Doppler Radar needs to guide your decision-making.

However, the general microwave motion sensor price range of microwave motion sensors begins from $ 0.8 to about $52.5. however, the specific range depends on the minimum order quantity the seller offers besides the type of microwave sensor. Further, wholesale prices will always prove cost-effective though this often needs a large order โ€“ otherwise not feasible for most end users.

Factors that Influence the Microwave Motion Sensor Price

microwave motion sensor range

The Brand of the Manufacturing Company

Microwave motion sensors will always come under different brand names and product lines. It implies that each will have distinct features depending on the manufacturer and product line. Such often indicate their differential quality, which then influences the microwave motion sensor price. Other price determinants of microwave motion sensors attributable to the manufacturer include the reputation of the brand or manufacturer (industry experience), size of the manufacturer, location of the manufacturing plant, and the type of microwave motion sensor. For instance, RayMing PCB and Assembly has a demonstrated history of over fifteen years in manufacturing and assembly of printed circuit boards crucial for sensor devices. Its production plant in diverse areas over the globe also makes it suitable for the global clientele.

Further, bigger companies with excellent reputations have established supplier relationships. Such relationships lead to discounts on raw materials and reduce the cost of production. What’s more? The company easily takes advantage of the affordable production costs (quality and affordable labor in China, raw materials, world-class technology and infrastructure, etc.) As such, you will not only trust the world-class products and services offered but enjoy incomparable prices with competitor companies within the industry. The result of all this entails getting high-quality microwave sensors and allied components at relatively affordable prices.

Finally, the type of microwave under a specific brand name will either drive the cost of the sensor up or down. For instance, experimental active microwave sensors will cost higher than passive microwave sensors regardless of the brand.

The proximity of the Manufacturing Company

Once the fabrication of the different components of a microwave motion sensor gets completed, assembly and distribution ensue. The latter part can drive the cost of the final product owing to shipping, especially when they have to get transported for longer distances. It is thus advisable to always go for a manufacturer or decent brand located near you.

Application Areas of a Microwave Motion Sensor

Different microwave motion sensor exists for diverse applicationsโ€”the diversity in application demands different capabilities of the sensors. For example, a microwave motion sensor for home security will not have the same capacity as one used for geospatial studies. One will rely on passive microwave technology while others will entirely depend on active microwave technology. Size also plays a crucial role here as different applications prefer specific sizes. The smaller the microwave motion sensor, the less material it uses and hence lowers the cost of material in production.

Here are some of the Applications

Medicine and Physical Wellbeing. Microwave motion detectors find application in detecting patients’ breathing rates and heartbeats in hospitals.

Monitoring your Building Lighting System

You can also use a doppler radar for monitoring your light system in the house or office. It is a common feature in elevator shaft-ways besides your propertyโ€™s security. You will also find it getting used in enforcing traffic rules and regulations.

Microwave motion technology not only applies in the traffic arena but also industry. For instance, you will find microwave technology in measuring the speed in vehicles, automated doors, automation lights, reversing radar, alarm systems, etc.

Another crucial application area for the microwave motion sensor entails securing areas like banks, museums, military installations or warehouses, prisons, transformer substations, etc. however, for such applications, the microwave technology needs to get combined with the PIR motion detectors. Such a combination of technologies for motion sensors enhances reliability and performance.

How Can You Benefit from a Microwave Motion Sensor?

  • A universal truth about microwave motion sensors entails using them in almost any environment. You can use it in most environments; especially those many can deem unhospitable for sensors. For instance, you can comfortably use it in high-heat environments that can fry photo-electric sensors. The MMS ranks as among the versatile sensor system types available in the market.
  • A microwave motion detector can also go through holes and walls. Therefore, it implies that you can use it to cover larger areas of your home or property, including your large outdoor area. If you, therefore, have a large area to secure, then this microwave motion sensor can prove the best option for your motion detection.
  • You can program a microwave motion sensor to limit the volume or number of false alarms devoid of minimizing correct positives. Consequently, you get to enhance your motion sensor’s ease of use and accuracy. Further, you comparatively spend less to buy a microwave motion detector compared to other motion detector types. It is, however, imperative to understand that running them can become more expensive.
  • A microwave motion sensor also covers a 360 degree-wide scope compared to other systems like the PIR, which only covers a 90 degree-wide scope.

Drawbacks of a Microwave Motion Detector

  • A major challenge you will most likely experience with a microwave motion detector entails the countless false alarms that may occur from slight object vibrations. It can include swinging signs, curtains, etc. Further, a microwave motion detector operates in intervals and not continuously. Because of this, it increases the probability of any intrusion.

However, the enhanced detector combats this challenge by having every component of a typical sensor besides two mixer/receiver diodes. Additionally, some sensors possess diodes that enable the sensing of the intruder’s direction to the detector.

  • Microwave beams have special properties that enable them to permeate almost any type of surface (around the detection shield). However, for metallic surfaces, this never proves the case. Therefore, the sensor can detect a motion in undesirable detection areas and fail to detect motion where it proves desirable. Further, metallic objects act as shields that create dead zones or shadows behind them. It is in such areas that the sensor fails to detect any motion.

Microwave motion sensors also have the predictable ability of sensing motion behind walls because of their beam. As such, it will not discriminate the motion even if it proves typical because of the sensitivity of the sensors to motion. It can always become a challenge in a home setup, especially with false alarms.

Final Thoughts?

The specter of microwave motion sensors in terms of their capability and related costs makes it an ideal fit for your domestic or commercial use. You can not only enhance the security of your premises or household with such powerful security tools but use them for other investigative, security, and explorative ventures. However, understanding what a microwave motion sensor entails, how it functions, the different types, and possible application areas will effectively kickstart your journey. Hopefully, at this juncture, you have managed to answer some of the pertinent questions you had about microwave motion sensors. You also understand where and what price range you can secure your microwave motion sensor.

Top 8 FPGA manufacturers in the world

FPGA Manufacturers

FPGAs play a crucial role in any industry. It does not matter if it is modern designs or complex prototyping. They offer reliable design and manufacturing solutions. They do this by offering the best of both worlds. FPGAs have been instrumental to the success of many big organizations. FPGAs are also gaining more and more critical in the medical industry. The medical sector is a multi-billion dollar market. In addition, a vast amount of information needs analyzing. The process of them in real-time is growing at a tremendous rate. It makes FPGA technology in the medical industry an essential factor.

According to a new report published by Persistence Market Research, the global FPGA market valued USD 28.9 billion in 2016. Furthermore, we expect it to grow with a CAGR of 13% over the forecast period (2017โ€“2022). According to a new report published by Persistence Market Research (PMR), this is according to a new report. The report also indicates that North America, Asia, and Europe will emerge as the fastest-growing markets.

FPGA History

Initially, manufacturers developed programmable logic devices to emulate custom computer chips. Xilinx invented the first PLD in the early 1980s. As a result, we often refer to it as the Xilinx device. With Xilinxโ€™s FPGA, many companies produce FPGA, including Lattice Semiconductor and Altera.

The development of FPGAs began in the early 80s. This is with the advent of gate arrays and reprogrammable logic devices. The first commercially available gate arrays were available from Xilinx in 1984. In 1987, Altera developed the EPLD to provide customers with a lower-cost alternative to gate arrays and decoded PLDs. Today, Altera is the FPGA leader, with a market share of 60% in 2016.

Countries where we find FPGA companies

fpga board producer

The global FPGA market is around North America, Europe, Asia Pacific, and the Rest of the World. Among these regions, North America was the leading FPGA market in 2016. It accounts for a market share of 40.8% in 2016. We expect the market to grow at a CAGR of 9% from 2017 to 2022 n projected by 2022.

The revenues from the European region were USD 7.8 billion in 2016. We expect it to grow at a CAGR of 13% during the forecast period.

The Asia Pacific FPGA market will show considerable growth with a CAGR of 17% from 2017 to 2022. This is due to the growing demand for mobile devices and other consumer electronics. It uses FPGAs as semiconductors. In addition, the increasing demand for smart wearables will further fuel the growth in this market.

How FPGA influences technology in the world

FPGA technology is also revolutionizing the gaming industry. Several faster and more powerful gaming platforms are being introduced in the market every year. Newer PC games are now demanding more from their processors and graphics cards. It has led to a huge demand for these technologies

In addition to gaming, FPGA technology also has a huge impact on other industries. The development of new improvements in FPGA has changed the way data center servers are performing. FPGA technology is helpful in high-end supercomputers. Such technologies can conduct calculations and simulations that traditional chips cannot perform. The Financial sector has also used FPGA technology to process large amounts of data. It has led to significant improvements in cryptocurrency mining.

Top 8 FPGA manufacturers in the world

1) Xilinx Inc.

xilinx

One of the lesser-known companies that produce various products is an Australian company called Xilinx Incorporated. This company has a reputation for being one of the more advanced companies in the production of very high-technology.

Xilinx is a manufacturer that produces integrated circuits. Why are integrated circuits essential, you might ask? They are responsible for making everything work better, faster, and using less power. This is ideal because of the rapid development of technology and because we donโ€™t always want to drain our batteries all the time.

One of the most popular integrated circuits that Xilinx produces is an FPGA. This stands for Field Programmable Gate Array. But, again, what does this mean? We can configure this type of integrated circuit in many different ways and areas.

The company Xilinx has been producing FPGAs for several years now. They have managed to produce different FPGA models, all suited to certain uses. This has meant that even though their FPGAs did not dominate the market for long, they are still very popular.

Another thing that makes Xilinx stand out from the crowd of FPGA producers is that they produce the chips and software and hardware integration tools.

2) Altera Corporation

Another FPGA manufacturer that has been around for several years is Altera Corporation. Just like Xilinx, this company is also one of the top FPGA companies in the world.

The company was founded in 1984 and is in California. Since 1984, they have been continually producing high-quality products and are now one of the worldโ€™s best-known companies. Altera Corporation manufactures FPGAs for several different uses. These include the fields of industrial automation, microprocessors, and consumer electronics.

The Altera Corporation is the third-largest FPGA manufacturer globally, after Xilinx and chip giant Intel Corporation. The company holds around 35% of the market for FPGAs in total. For this reason, quite a few technology companies are using their products.

Altera Corporation had designed chips for NASA to build their Mars Rover. They have also made chips for the European Space Agency and the US Military. This is because of the high quality that Altera Corporation produces.

3) Lattice Semiconductor

Another very influential company in the world of FPGAs is Lattice Semiconductor Corporation. This company was founded back in 1997 and has quickly risen to become one of the top FPGA manufacturers.

Lattice Semiconductor Corporation focuses on making products too complex for individual companies to produce. These include chips made just for the needs of a particular company. However, the lattice has also become very successful at producing adaptable chips to be used in many different applications. This is why they have made such a name for themselves as a top FPGA manufacturer. They make the chips helpful in everything from high-tech medical equipment to workstations and even video cards.

The company has won many awards because of its products used in many different applications. They have won the โ€œBest Products of the Yearโ€ award and the โ€œTechnology Innovation of the Yearโ€ award. This is all because they produce such high-quality products.

4) Achronix

Achronix Semiconductor Corporation is an American FPGA manufacturer that has been in the game since 2003. This is not a very long time, but it is certainly sufficient time to become successful.

The company concentrates on producing ultra-small FPGAs used in many different applications. These include use in military and medical systems as well as consumer electronics. As a result, the company has managed to produce some of the smallest FPGAs on the market today, allowing them to compete favorably with other manufacturers.

Achronix Semiconductor Corporation is also one of the few FPGAs manufacturers to produce and sell baseband processors. These are chips used in wireless communication, and they have managed to get themselves an excellent reputation in this industry. It focuses on data center, networking, ML, AI, and 5G, which is why the company has become so successful.


5) QuickLogic Corporation

QuickLogic Corporation is another FPGA manufacturer that has achieved good results over the past few years. However, unlike many other companies on this list, QuickLogic does not produce just high-quality FPGAs. Instead, they also produce high-quality ASICs and other components.

The company originally started as a GLOBALFOUNDRIES spinoff and was started in 2006. Since then, they have grown to become a very well-known and successful company indeed. Their products are helpful in many different applications and many different types of industries. They have been involved with some very high-profile companies in the past, including Google, Cisco, and Marvell.

QuickLogic Corporation is often responsible for designing chips for other high-profile companies. Many chips you will see in the devices you use daily, such as cellphones, have been designed by QuickLogic Corporation. This means that they are one of the most successful FPGA manufacturers on the market today.

6) Microchip Technology

Microchip Technology

Another very well-known company in the FPGA industry is Microchip Technology. This company was started back in the 1980s and has become one of the top microcontrollers and other microprocessors.

PJ Rodgers, a very successful businessman, founded the company. They have been able to branch out into many different markets to expand their business. Perhaps their most famous product is the hugely successful PIC microcontroller.

Microchip Technology has also produced a range of FPGAs called Microchipโ€™s Multimedia Module. These are chips used in many different types of devices, including set-top boxes and video cards. These FPGAs are known for being very high quality and have won many awards because of their high performance. They have even been able to win โ€œBest in Classโ€ awards from the Electronic Design Magazine.

Microchip Technology has also designed and produced RFID chips. This has allowed them to carve out a niche in this market, which is why they are one of the biggest FPGA manufacturers.


7) Microsemi Corporation

Another FPGA manufacturer which has seen a lot of success over the years is Microsemi Corporation. This company is one of the largest COTS manufacturers globally, so you will see their products in many applications worldwide.

The company was founded back in 1983, making it one of the oldest companies on this list. This means that the company has had plenty of time to perfect their products, which is why they are now so successful.

Unlike Altera and Xilinx, Microsemi does not produce FPGAs for just any use. Instead, they concentrate more on providing their products to military applications and scientific ones. This is why many of their products are often helpful in government contracts and research endeavors.

Microsemi Corporation has worked with Qualcomm, a very influential communication company. They also have their line of FPGAs, which are called SmartFusion. Microsemi Corporation has recently released a new version of this range called SmartFusion2. This is because the technology within these chips has significantly advanced since the release of the first versions.

8) Efinix

Efinix Corporation is another well-known company in the FPGA industry. They were founded way back in 2000 and have since become one of the top FPGA manufacturers on the market today.

Efinix specializes in making very small FPGAs complex enough for customers to use as high-level control chips for other chips and devices. They are known for making incredibly tiny components, which means that they can be helpful in all sorts of different markets. For example, they are essential in the manufacturing industry and consumer electronics.

The company also manages several other subsidiaries, including a chip design company, a design services and research center, and an RFID supply services business. They have also branched out into the Semiconductor Open Source Hardware (OSHW) market. This allows people to build their own FPGA boards legally.

How to select a good FPGA company

FULL PCB MANUFACTURING Quote

Letโ€™s face it. It is not easy to choose a supplier of embedded FPGA solutions. First of all, finding a good FPGA company is a lot like choosing an investment advisor. For example, you can pick one of the top companies above based on price, quality, and reputation. However, this approach has some obvious advantages.

The best advice to selecting the right embedded FPGA solution is to pick a business partner, not a product provider. This means you should know what sort of company you are dealing with and how it operates.

1. SOC-based board or an FPGA?

An integrated SOC-based board. It includes an FPGA that can sometimes provide a higher level of performance than an FPGA on its own. However, the performance difference may be small.

A good FPGA board can sometimes offer better performance in certain applications than a good SOC. For example, an excellent FPGA-based wireless modem might perform better than an off-the-shelf SOC modem. Unfortunately, no company has integrated SOC and FPGA that provide better performance. This is why most FPGA companies are also selling SOCs. It is because many customers want both the SOC and the FPGA.

Some embedded FPGAs provide an integrated processor and SoC in a single chip. Still, they provide a poor level of performance. This is due to high power consumption. Also, it is due to a lack of flexibility in integrating the processor with other components in an SoC design.

2. Interfaces and IOs

The number of interfaces and IOs must be sufficient to support the application. Some FPGA companies provide FPGAs with over 1000 IOs. However, if the application only requires a few IOs, it would be a waste of money to use an FPGA with over 1000 interfaces and IOs. The optimal number of IOs will also depend on the software used.

Some FPGAs provide greater flexibility by supporting interface standards. Examples include PCI, PCIe, or USB 3.0, which are not commonly available in SoCs and SOCs.

3) Ease of use

It is not easy to program an FPGA, whether it is a SOC-based board or just the FPGA on its own. Therefore, some companies provide a software development environment for their product. This removes some of the complexity in programming embedded FPGAs. Others provide a set of libraries that simplify programming embedded FPGAs.

Using an existing software development environment to program an FPGA may be possible. Some FPGA companies provide free development tools or host code. But, these tools and libraries do not always work well with all embedded applications.

The ease of use will also depend on the FPGA companyโ€™s software and hardware support.

4) Technology (FPGA architecture)

The most flexible FPGAs depend on a multiple-core approach. It has multiple configurable logic sections. The logic sections include an FPGA fabric. In addition, it provides programmability and an embedded processor core. This approach allows you to program a single chip to perform multiple tasks.

The best FPGAs have an FPGA fabric that supports high-performance logic and embedded processor cores. So, the embedded processor core improves performance. However, we can achieve this through extensions. We can also do it through optimized versions of standard cores that the company sells in standalone FPGAs.

5) Open source or closed source?

Some FPGAs are open source, which means that the code for the FPGA is available on the internet. The most common FPGAs in a SOC-based product is open source. However, some companies also provide closed-source FPGAs. An example is the Synopsys 21Gbit Coherent Accelerator Platform.

Most FPGA companies sell their FPGAs through distributors. In addition to selling the hardware, the distributor will also support the end-user. They may also provide training on how to use the hardware and software. But, this is not always possible due to time and travel constraints.

The best-embedded FPGA suppliers provide end-users sales, technical support, and training. A companyโ€™s distributors can provide these services.

6. Buttons, LEDs, and Displays

Some embedded FPGAs provide buttons and LEDs. Others have more advanced user interfaces. If you need more buttons, LEDs, and displays, it is easier to use an FPGA that supports the standard user interfaces already present on a computer. Knock-on effects of supply chain security and reliability

If you are having trouble picking an embedded FPGA company, it may be because of:

โ€ข The lack of information that is available to compare these companies. This can make it challenging to choose the right product and company.

7) Memory and Resource Count

The application determines the resources required for embedded FPGA solutions. Some applications need very large amounts of memory, while others do not. It is also possible to find embedded FPGAs. They provide higher performance than standalone FPGAs. They do not need as much memory and limited resources.

An FPGA with a higher memory capacity may be more suitable. However, some embedded FPGAs depend on a very large internal memory and do not need much memory at all. The best-embedded FPGA companies overcome these issues. You can do this by providing access to external memory through an interface.

8) Power Consumption

It is possible to find FPGAs that consume very little power. Examples include Cypress CY8C27x25 and Green Hills GLCM2-6XC57-E). The best suppliers can provide up to 10 W of power consumption. In addition to its power consumption, we can determine the power rating of an FPGA by its technology. Other factors to consider

Most FPGA suppliers provide support for their products. However, if you need help with the development, Rayming PCB & Assembly offers free or paid software development tools and libraries. In addition, some FPGAs provide a variety of interfaces. They include USB, Ethernet, and PCIe.

Via the xPort family of high-performance connectivity FPGAs, Xilinx provides the Xilinx iGate. It enhances the flexibility and performance of existing embedded memory designs. It connects them to the I/O interfaces, an SoC or SOC. The high-performance interface enables easy communication between microprocessors and embedded memories. This enables customers to develop systems with enhanced performance and increased cost savings.

9. The Toolchain

The toolchain will also determine which FPGAs you can use. For example, running the software on a standalone FPGA may be necessary. Especially if a set of libraries from your software development environment is not compatible with an FPGA.

Some embedded FPGAs have a simplified toolchain that works with an existing embedded platform. However, we need other tools, which often cost more than the basic toolchain.

It will also be necessary to choose the correct FPGA for your system. Usually, there is a trade-off between area space and the number of logic elements (LEs) in the FPGA.

The number of LEDs available in an FPGA can vary from 4K LEs to over 1M LEs.

10. Programming Interfaces

The programming interface will determine how easy it is to program your FPGA. The best companies provide programming interfaces compatible with industry-standard tools. The most popular programming languages for embedded development. This allows designers to use the same programming tools and libraries.

Some embedded FPGAs provide an industry-standard programming interface. Others may need to buy a tool or software development kit. Buy a tool that allows access to the internal hardware of the FPGA.

11. Learning Resources and community support

While some embedded FPGA suppliers provide technical support and training, others do not. Some suppliers provide a forum where users can ask questions. However, suppose you do not receive any support from the supplier. In that case, it may be necessary to hire a consultant. One that can help you with your development or troubleshooting issues. For example, Xilinx HW-Acceleration Center.

The best-embedded FPGA companies know that customer support is essential. So they use it to create robust and reliable products.

12. Operating Temperature

The operating temperature of an embedded FPGA will depend on the physical environment. For example, some environments need the use of an embedded FPGA. Therefore, they should have a higher operating temperature.

We can measure this with the help of a thermal camera. This is to determine if the device is working under stressful conditions. If your FPGA is essential in a warm environment, it might be possible to use it in a cooler area by using heat pipes. However, be careful not to overheat your FPGA.

13. Security and cross-platform support

Some embedded FPGAs will have some security features that are not compatible with other platforms. Therefore, it is essential to determine if you can use the same security libraries and tools for other platforms with an embedded FPGA.

Some embedded FPGAs use security features that are not compatible with other platforms. For example, most suppliers provide a TPM or secure boot option enabled by default.

14. Cost

The cost of an embedded FPGA depends on the design and implementation of the product.

Some FPGAs are very expensive, while others are cheaper.

To help reduce the cost of your embedded FPGA, some companies provide a similar product for less.

15. Availability and longevity

The FPGA life expectancy will depend on your application. While some will live for a long time, others may only last for a few days or even weeks. Therefore, you should determine the expected life expectancy from the FPGA supplier.

16. Environmental Factors

Your embedded FPGA will operate in various environmental factors. These factors might affect its performance and operation. The quality of the material used for the FPGA will affect its durability.

Conclusion

The embedded FPGA market is growing. This is because more companies and individuals appreciate the benefits of using FPGAs. So, the number of suppliers should also increase. As a result, the embedded FPGA market is expanding. It will be interesting to see how these markets develop soon.

Suppose you are looking for an embedded FPGA development kit. In that case, you should look for a supplier that supports their products. They should also provide a way to overcome embedded FPGA development challenges.

Altera and Xilinx are already integrating FPGAs into their application development toolchains. This means that we can program FPGAs alongside other processors and microcontrollers. Therefore, if you are working on a new embedded application, you should consider using an embedded FPGA development kit.