A Comprehensive Overview of WLCSP: Wafer Level Chip Scale Packaging

WLCSP

Wafer Level Packaging, also known as WLP, is a subcategory of IC packaging technique that is suitable for wafer level. You cannot cut the wafer without packaging. Instead, it is important to first cover the wafers with packaging and then cut them through. 

Before cutting the wafer, it is important to add special bumps while assembling the components. WLP is a simple and cost-efficient process. There are different steps in the WLP that need precision. 

These are wafer fabrication, wafer testing, and analysis. WLP is also reliable when you need to make sure everything is in place, from procuring the raw materials to shipping the final product to the customers. 

The process is also known as Chip scale packaging and can be divided into two further sub-categories called fan-in and fan-out packaging. 

In the past times, people used wires to combine the semiconductor chips and their substrate together.

 It is important to do this on the periphery of the semiconductor as problems majorly arise from the edges. Now this whole process is wire bonding of semiconductors. Sometimes things can go south, and you might end up facing two issues while doing wire bonding. 

  • The electrical conductance can be too low during the process
  • Less number of wires used for each chip 

Now poor electrical conductance eventually disrupts the performance of high-frequency devices, and insufficient wires hamper the data transmission of the chips as well. 

People started to find portable semiconductors and circuits not appropriate as their wires were thin and too long, which increased the power losses and lagging. 

Now this led to the invention of flip chip packaging, which was a one-stop solution to major problems that occur during wire bonding. The flip-chip method made the manufacturers use bumps instead of wires for the purpose of connections.

 You place these on top of the wafer, which increases the electrical density throughout your setup. After this, you cut the wafer and flip the chips to combine them with the substrate by using special copper pillars.

ย WLP is the simplest technique that most producers rely on today. Major giants in the semiconductor industry use WLP to ensure positive results.ย ย 

Types of WLCSP: Wafer Level Chip Scale Packaging

LGA-vs-BGA

 WLP has two major divisions. These are fan-in and fan-out types. The interposer is the main factor that differentiates these two types on the whole. For the fan-in type, you keep the sizes of the die and interposer the same.

 For the fan-out type, the interpose is always bigger than the die. These processes are also different from a standard WLP package because you apply the interposer on these types directly, which does not happen in the WLP. You can even cover the die and interposer for these two types to protect them under stressful and non-favorable conditions.  

Benefits of WLCSP: Wafer Level Chip Scale Packaging

There are certain benefits of using the fan-out method in different applications.

  • It is reliable for producing TSVs that are silicon-made wires. These are highly cost-efficient and save enough energy when there is a need to achieve more electrical density. 
  • TSVs shrink the packages and make them slimmer without their quality at all.

Purpose of WLCSP: Wafer Level Chip Scale Packaging

  •  The main purpose of using the fan-out method is to draw out the same features of chips, even on artificial wafers. Such wafers use polymers that are affordable for production processes. 
  • Another purpose is to expand the space between the individual chips and their connections. 

Sub-categories of WLCSP: Wafer Level Chip Scale Packaging

You can carry out fan-out WLP in two different ways; letโ€™s check them out below:

 Chip-First: 

  • In this way, you need to incorporate the chips into a fine metallic entity. 
  • Now the next step is to perform the RDL as per its standards and guidelines. 
  • Chip’s first method is reliable due to its cost-effectiveness. 
  • Not only is its affordability attractive for the producers, but it also offers excellent performance in I/O devices and operations. 

Drawbacks of Chip First:

Despite the fact that the chip-first method is viable, there are some problems that might occur. It can lead to faults like die shift, die protrusion, and wafer warpage.

Chip-Last (RDL-First): 

  • In this process, you need to develop the RDL in the first place. 
  • Now, once the RDL is formed, place it on the wafer. 
  • After this, it’s time to develop the chips for melding them during the packaging procedure. 
  • Molding is important before you place the chips on RDL.
  •  The purpose of molding is to prevent the wafer warpage as much as possible.
  •  It is exceptional in electrical conductance and has an impressive pitch scale for your ease.

Drawbacks of Chip last:

  •  If you talk about the reliability of this process, it does not meet some of the industry standards that make it doubtful for usage.  
  • It also offers much less TSV potential as compared to Chip-first. 

Uses of WLCSP: Wafer Level Chip Scale Packaging

FULL PCB MANUFACTURING Quote

 Uses of WLCSP:

  • One major use of WLP is in I/O devices, as this industry is growing at a rapid pace. The industry stands only on fine interconnect density, and for that, there is nothing more reliable than WLP itself. WLP and RDL come together to offer durability and a certain boost to interconnect density for I/O applications. 
  • RDL is beneficial for the WLP process because it allows different chips to have exceptional features which will be later used in several applications. The encapsulations offered by RDL are useful for developing smartphones and other forms of semiconductors. 

Advantages of WLCSP:

  • WLP allows you to place chips on chips in vertical and horizontal positions
  • Due to the flexibility offered by WLP, different variants of ICs are now common.
  • The ICs developed from WLP are useful for finetuning the fan-out technology and sustaining TSVs when you use them for high-density areas. 
  • WLP is also reliable for increasing the bandwidth of your system.
  • WLP consumes less power as well. 
  • It is important for developing image sensors, AI devices, and IoT smart home appliances. 

Letโ€™s Explore XC3S1400A-4FGG484I FPGA.

wholesale Xilinx FPGA

If you are not new to the world of electronics, you may have come across the term “XC3S1400A-4FGG484I” before. Apparently, it seems number, but it is actually. Let me simplify things for you. It is an FPGA. FPGAs are different from integrated circuits.   Moreover, they are highly versatile and customizable. XC3S1400A-4FGG484I is one such FPGA with unique features and applications that set it apart from other models. Let’s dig deeper to know more about this FPGA.

 What Is XC3S1400A-4FGG484I?

XC3S1400A-4FGG484I is an FPGA. It is from Xilinx. This company is a leading manufacturer of FPGAs and other digital electronics components. You can find a long list of its products. This XC3S1400A-4FGG484 belongs to the Spartan-3A family of FPGAs. The spartan-3A family is a well-known family of FPGAs. Because of their high-performance architecture, and flexible configuration options,  they are outstanding. Its model number, XC3S1400A-4FGG484I, contains information about its specifications and package type.

 Technical Specifications of XC3S1400A-4FGG484I

  • It belongs to the Spartan-3A FPGA family.
  • It has 1400K system gates. These are the basic blocks of FPGA fabric. As a result, it can implement a large digital system. Thatโ€™s why its demand is increasing day by day.
  • It has 512KB of block RAM. As a result, it has a great memory for storing data in the FPGA.
  • It has 8 digital clock managers, aka DCMs. As a result, it can generate and synchronize clock signals. In addition, it improves signal quality.
  • It has 144 Input and input and output pins, that’s why it has a user-friendly interface with external devices.
  • It operates at a maximum frequency of 400MHz. As a result of this, FPGA can perform 400 million operations per second.
  • It has a 4-input lookup table architecture. That’s why complex logic functions are no harder to perform. As a result, you can implement complex logic functions so easily.

Alphanumeric Breakdown Of FPGA

FULL PCB MANUFACTURING Quote

Break down of numbers alphabet and numerics of XC3S1400A-4FGG484I. if you are new in the world of FPGA, then you may consider these just numbers. Actually, every digit and alphabet has some specific meaning. We are going to break down this alphanumeric code for your convenience. As a result, you can have a better understanding of this code.

  • XC3S1400A: This is the model or type of FPGA. In this case, it refers to the Xilinx Spartan-3 series, and the specific model is the XC3S1400A.
  • 4 refers to the speed grade of the FPGA. In this case, it indicates that the device is rated for a maximum operating frequency of 4 MHz.
  • FGG484  refers to the package type or the physical shape and size of the FPGA. In this case, it indicates that the device is packaged in a Fine-Pitch Ball Grid Array (FBGA) with 484 pins.
  • I indicate the temperature range for which the device is intended to operate. In this case, it indicates that the device has optimal temperature range of -40ยฐC to +100ยฐC.

Features of XC3S1400A-4FGG484I

XC3S1400A-4FGG484I has several features that make it stand out in the world of FPGAs. Some of its key features are:

ยท High-Performance Architecture

XC3S1400A-4FGG484I has a high-performance architecture. Thatโ€™s why it is easy to process data quickly and efficiently. It has up to 1,536 logic cells, and that is just icing on the cake. As a result, it can perform up to 266 million logic operations per second. Thatโ€™s so amazing. As a result, designers and engineers like it and consider it ideal for applications. Such applications require fast processing speeds.   video and image processing applications are one of the examples.

ยท Flexible Configuration

XC3S1400A-4FGG484I is highly customizable. You can make all the necessary changes according to the requirements. Integrated circuits are hard to customize or configure. That’s why FPGA is popular. Thanks to its flexible configuration options, you can now easily configure this FPGA. It can be programmed using a hardware description language such as Verilog or VHDL. Xilinx is also supportive in this matter. That’s why you can use this Xilinx’s software tools. These tools include ISE or Vivado, for the configuring. As a result, it allows users to tailor the FPGA to their specific needs and applications.

ยท Extensive Connectivity

The XC3S1400A-4FGG484I is a highly versatile device.  It supports a wide range of high-speed interfaces, Forexample DDR and DDR2. Similarly, it also supports interface DDR3 to some extent. Additionally, it is equipped with a built-in memory controller.   As result it can accommodate multiple memory types. For example, it supports SDRAM and SRAM. Similarly it supports FLASH memory type.

Moreover, the XC3S1400A-4FGG484I provides high-speed connectivity. As a result, it can support numerous high-speed communication protocols. These protocols include such as Ethernet, and PCI Express. This feature makes it a highly suitable FPGA for use in applications.   Such applications require fast and reliable data transmission.

One of the most impressive features of the XC3S1400A-4FGG484I is its programmable logic architecture. As a result, It allows designers to tailor the device to their specific needs. That’s why The logic blocks of the device are highly flexible and easy to reconfigure. As a result, it can execute an array of different functions.

ยท Digital Signal Processing  Capabilities

Furthermore, the XC3S1400A-4FGG484I possesses advanced Digital Signal Processing, aka DSP capabilities, which enable it to process high-performance signals with ease. The dedicated DSP blocks of the device can perform intricate signal-processing tasks. For example, it includes different tasks but is not limited to FIR filters. Further, it revolves around the FFTs and convolution. Signal processing matters a lot when it comes to FPGA integration with other systems or devices.

Final Note

Overall, the XC3S1400A-4FGG484I is a powerful FPGA. Designers and engineers like it to use for  In a  wide range of digital design applications. Its popularity is increasing due to its excellent features. That’s why if you are looking for an ideal FPGa for your next electronic project, then go for it. Its maximum frequency of 400MHz is great for high-speed devices. Similarly, its LUT architecture can make complex logic function implementation so easy. Above all, XC3S1400A-4FGG484I  is an ideal FPGa in all aspects.

What Makes NHI350AM4 NIC Different from the Rest of All?

NHI350AM4 Network Interface Card

Suppose you are a designer and looking for high-performance and reliable network interface cards. Then you may get confused by seeing different options. Some are low-cost, and some options are pricey with zero features. Let me tell you about NHI350AM4. What exactly is it, and what makes it so special? In this article, we will explore NHI350AM4 in detail.

 What Is Network Interface Card?

A network interface card, aka NIC, is a relatively new term for new hobbyist designers or engineers. But many of you may be familiar with it. It is a hardware component. It connects a computer to a network. It is also available in the market with the name of network adapter or LAN adapter. The NIC is responsible for communicating with other devices on the network. For example, servers, routers, and other computers. So you cannot connect to other devices or networks without NIC.

What Is NHI350AM4 Network Interface Card?

NHI350AM4 is a quad-port network interface card. As a result, it provides high-speed connectivity for data centers and cloud computing. In addition, enterprise-level applications also get benefit from it. As a result, it delivers high bandwidth and low latency. Moreover, you can expect high efficiency from it. That’s why it is an ideal choice for businesses. All businesses or applications require a reliable and high-performance network interface card can go for it.

The Key Specifications of NHI350AM4

Here are some of the key specifications of NHI350AM4. These specifications will help you to understand this NIC in detail.

  • This NIC has Four RJ45 ports
  • Its Interface type is PCI Express 3.0 x8
  • Data rate: is 10/100/1000/2500Mbps
  • It supports different Operating systems. For example, it supports Windows, Linux, FreeBSD, and VMware.
  • NHI350AM4 is based on Intel’s Ethernet Controller I350. In addition, it is a highly integrated Gigabit Ethernet controller. You can use it for high performance and low power. 
  • It is ideal for small form factor applications.
  • It is available in RoHS Compliant. Package
  • Operating supply voltage for this NIC is 3.3 Voltage

 Why Use NHI350AM4 NIC?

FULL PCB MANUFACTURING Quote

NHI350AM4 comes with a range of features. That’s why it is an ideal choice for businesses that require high-speed connectivity. The following reasons will be enough to tell you why you should go for it.

ยท High Performance and Low Latency

NHI350AM4 provides high-speed connectivity of up to 10Gbps, that’s why it is an ideal choice for different applications that require high bandwidth and low latency. It comes with four RJ45 ports, enabling multiple devices to be connected to the same network interface card, making it a cost-effective solution.

ยท Less Operating Cost

NHI350AM4 is ideal due to its energy-efficiency, reducing power consumption, and lowering operating costs. It comes with Intel’s Energy Efficient Ethernet aka EEE technology. It automatically reduces power consumption during periods of low network activity.

ยท Unswerving Quality

NHI350AM4 is a reliable and stable network interface card. As a result, it provides continuous network connectivity. In addition, it comes with a range of advanced features, such as link aggregation and load balancing. Similarly, it supports VLAN tagging. As a result, it ensures network reliability and unwavering connection.

ยท Hassel Free Installation

NHI350AM4 is easy to install and use. You don’t need to go through a complex process. Similarly, it has plug-and-play functionality. That’s why it comes with a range of drivers for different operating systems. What type of operating system you are using then, you just need to install drivers. As a result, it is easy to set up and configure.

The Alphanumeric Breakdown of NHI350AM4

 Alphanumeric breakdown talks about the alphabet and numbers’ signification and what they represent.

  • NHI is three alphabetic. That represents a manufacturer code, product line, or model name.
  • 350 is a numeric value that could indicate a specific product or feature within the manufacturer’s product line.
  • AM could represent a product variant, color, or other distinguishing characteristic.
  • 4 could indicate a version or revision number of the product.


Applications Of NHI350AM4 Network Interface Card

 It has a wide array of uses, but some important ones are mentioned below.

  • The NHI350AM4 Network Interface Card enables the connection of computers to wired networks. For example, Local Area Networks, aka LANs, and Wide Area Networks, aka WANs, through Ethernet cables. This NIC is ideal for swiftly transferring data between computers and servers. That’s why it supports high-speed data transfer rates of up to one Gbps.
  • Furthermore, the NHI350AM4 NIC is able to support virtualization technologies like VMware and Hyper-V. As a result, it enables multiple virtual machines to share the same physical NIC. Its outstanding Performance and reliability make it a common fixture in server applications. It can fix many problems with web servers and database servers.
  • Moreover, network monitoring and analysis are easy to carry out using this NIC. It allows allowing network administrators to troubleshoot network issues. As a result, it enhances network performance.

Technical Frequently Asked Questions

ยท What Is the Data Rate of NHI350AM4?

Data rates depend upon various factors. It varies from application and how you are going to use it.

The data rate of NHI350AM4 is 10, 1001000, and 2500Mbps, but it varies according to the situation.

ยท What Is Intel’s Energy Efficient Ethernet Aka EEE Technology?

Intel’s Energy Efficient Ethernet aka EEE technology is a feature that automatically reduces power consumption during periods of low network activity.

ยท What Operating Systems Are Supported By NHI350AM4?

 The good news is that it can support different operating systems. It supports Windows and Linux. Similarly, it can also support FreeBSD and VMware. So you donโ€™t worry about its compatibility.

Wrapping Up

So, thatโ€™s it with the topic. Nowadays you cannot deny the importance of a Network Interface Card. NHI350AM4 is one of the best Network Interface cards. In addition, it supports multiple operating systems. As a result, its connectivity and use become more versatile. So if you are looking for the best Network Interface Card for your next project, then we recommend NHI350AM4. You can go for it without hesitation.

Why AD7760BSVZ isย an Exceptionalย Analog to Digital Converter?

Ti AD7760BSVZ

The AD7760BSVZ is an analog-to-digital converter (ADC). Its manufacture is Analog Devices, which is highly efficient. Engineers and designers favor it because of its 24-bit resolution, high accuracy, and low noise. That’s why it is suitable for different applications. It includes medical equipment, instrumentation, and industrial control systems. Understanding the technical specs of AD7760BSVZ can be daunting, particularly for newbies or hobbyists. Therefore, this article offers a comprehensive guide to decoding AD7760BSVZ’s technical specifications. In addition, it includes key terms and concepts. But let’s start with the basics to know what these digital to analog devices are.

What Is Digital to Analog Device?

An Analog Digital Converter, aka ADC, is an electronic device. It converts continuous analog signals, like sound or light waves, into digital signals. These signals are analyzed by digital devices. That’s why Analog signals are continuous and can have an infinite number of values.ย 

Moreover, digital signals have a specific set of values. ADCs measure the amplitude of an analog signal at regular intervals and convert it into a numerical value. These values are in the form of 

Binary code. As a result, digital devices can understand. ADCs find applications in diverse fields. ย  For example, industrial automation uses ADC. They enable precise measurements of analog signals. Later it can then be analyzed by digital devices. It provides greater accuracy in microcontrollers or computers.ย  ย  AD7760BSVZ is one of the best digital-to-analog devices.

Break Down the Alphanumeric Code

FULL PCB MANUFACTURING Quote

 Following is the alphanumeric breakdown of the code. This code represents some significant meaning. Provide important information about the analog-to-digital converter. Let’s have a look at the alphabet and numeric of this code.

  • The AD in the code signifies that Analog Devices is the manufacturer of the component.
  • The 7760 is a unique identification number assigned to the specific product.
  • The letter B denotes the package type of the component, which is a 32-lead LFCSP.
  • The S indicates the temperature range for which the component is rated, which is the industrial temperature range. For this device, it is -40ยฐC to +85ยฐC. In this temperature range the device can work better.
  • The letter V represents the voltage range for which the component is rated, which is from 2.35V to 5.25V.
  • The letter Z represents additional specifications or options for the component. Which, in this case, is a BP-free and lead-free finish.
  • Now you can understand AD7760BSVZ is an ADC produced by Analog Devices. It has a specific package type, temperature and voltage ranges, and a lead-free finish.
  • Understanding the Technical Specifications of AD7760BSVZ

In order to comprehend the technical specifications, you must have a deep analysis of the specifications. 

The following content will help you to go through the specifications so easily.

 The Resolution of an ADC

The resolution of an ADC is the number of bits. These bits represent an analog signal. With a resolution of 24 bits, the AD7760BSVZ can precisely represent the analog signal. Its precision level is 1 part in 2^24. This level of precision is ideal for applications that demand high levels of accuracy and precision. For example, scientific instruments and medical equipment do best in this regulation.

Exceptional Sampling Rate

This ADC shows an exceptional sampling rate. The sampling rate of an ADC is the number of samples taken per second. The AD7760BSVZ has a maximum sampling rate of 256 kSPS. As a result, it can take up to 256,000 samples per second. The sampling rate plays a crucial role in the ADC’s speed and accuracy. Higher sampling rates provide faster response times and greater accuracy.

Input Voltage Range

 The AD7760BSVZ has a differential input voltage range of ยฑ2.5 V. and a single-ended input voltage range of 0 V to Verve, where Vref is the reference voltage. The input voltage range affects the accuracy and precision of the ADC. If you use ADS with wider ranges and greater flexibility, then you can expect lower accuracy.

Power Voltage

The power supply voltage means the voltage needed to operate the device. The AD7760BSVZ necessitates a power supply voltage of 2.7 V to 5.25 V. The power supply voltage has an impact on the device’s performance and power consumption. 

Undoubtedly higher voltages provide a better performance, but it consumes higher power.

 Operating Temperature

Fifthly, the operating temperature range of an ADC is the range of temperatures. 

In the Operating temperature, the device can operate reliably. The AD7760BSVZ has an operating temperature range of -40ยฐC to +125ยฐC. It is a great range, so it can easily work even in harsh environments.

 Noise Performance

Noise is unavoidable if you are working with any analog or digital converter.ย The noise performance of an ADC means the level of noise introduced into the digital signal during the conversion process. The AD7760BSVZ has a noise performance of 20 nV/โˆšH. It is good performance, rendering it a fitting choice for applications. Especially the applications that require low noise levels, like audio equipment and instrumentation.

Are Analog-To-Digital Converters ADC And Field-Programmable Gate Arrays (FPGA) Similar?

No, the analog-to-digital converter and the field-programmable gate array are similar components. Both are different and serve different purposes. The ADC has the responsibility of transforming analog signals. The AD7760BSVZ, with its high resolution and fast sampling rate, is a specific instance of an ADC.

On the other hand, the FPGA is programmable.   In addition, you can configure and reconfigure to perform an assortment of digital logic functions. You can customize them according to your needs.

Although both the ADC and FPGA can be integrated into electronic systems, they serve different purposes and possess unique capabilities.

 Wrapping Up

Analog-to-digital converters are getting polarized and are part of many electronic devices. The unique articles make them ideal for Digital signal conversion and processing. Many people confuse ADC with FPGA and integrated circuits. But the above content will help you to understand what they are actually ADC and how they function. Above all, ADC AD7760BSVZ has unique architecture. That’s why it is ideal for analog to digital conversion.

Why Need Tooling Holes On PCB?

Tooling Hole PCB

Ever imagined why tooling holes for PCB are crucial for the fine performance of the devices? Not yet? Well, we are going to leave no stone unturned for you regarding fully understanding tooling holes in this post. 

Tooling holes, aka mounting holes, are openings present at the corners of PCBs. You don’t plate these holes at all. Their purpose is to serve the machines that align and help in assembling the PCBs.

 Tooling holes play their part during assembling, where PCB components need to be in a straight line and in a fixed position. It eventually eases out drilling as well. Non-plated tooling holes are a perfect fit for the drilling process. 

Since these are more accurate than the holes in the plate. The solder mask also should not expand around the hole, which can complicate the drilling process. There is much more to the tooling holes that you might not know as of now. So letโ€™s shed light on some important aspects of tooling holes together!ย 

Amazing Features of Tooling Holes On PCB

pcb castellated holes

You know that tooling holes are important for their salient features. These features eventually provide ease to the relevant PCB procedures. As you are already familiar with the fact that a PCB production area relies on different machines and equipment.

The purpose of these machines is to develop and assemble PCB components. The tooling holes are also important for PCB fabrication, where experts need to use these during designing the PCB components. 

Also, tooling holes are necessary for applying the solder paste between the PCB components when machines are performing their jobs. After all this, if you are mistaking tooling holes with fiducial markers, then don’t. 

Since these are not what you are thinking. Fiducial markers are some sort of pad-like structures for attaching to the PCBs to assist the machines used in the PCB production process. 

Now it does not mean that fiducial markers are useless for PCBs. These elements are integral for the assembly of SMD PCB components and designing processes. 

Functions Of Tooling Holes On PCB

Itโ€™s time that we start discussing the salient functions of tooling holes in this section. Or else you might leave out the most important aspect of tooling holes for your future projects. Hereโ€™s the thing, when you design or fabricate the PCBs, you need to make some holes of unlike sizes on the surface of the PCBs. Wait, what purpose do these holes serve? Letโ€™s take a look at the following bullets for this:

  • Well, these holes are for stabilizing the electrical transmission that takes place among the layers of PCBs. 
  • Some of these holes are responsible for holding the PCB components when you are about to solder them.
  •  Now, here comes the hitch. PCBs have some stubborn components that need you to give them extra mounting just to give them more physical anchor. 
  • Another role of tooling holes is to join the PCB parts with the electrical panel ground so that they can easily conduct the heat through the system. 
  • Some holes are useful for the assembly process that help the technicians with putting the hardware together easily.
  • These tooling holes are also important for easing the mounting with the help of various machines.
  • One more interesting function of tooling holes is that these are helpful in keeping the PCBs in a firm position when technicians are performing a technical task on PCBs. 

Importance of Tooling Holes in PCB Manufacturing

FULL PCB MANUFACTURING Quote

ยท Cost Reduction

At the end of the day, you would want to produce bulk PCBs with a minimum budget. So tools just fit with this purpose for you. The PCB assembly is a process that needs a lot of finance from the producers. It means you can rely on the cutting boards and stencils for reducing the overall cost of PCB assembly. 

ยท Faster Assembling Time

Sometimes, your clients keep throwing projects at you. It means you need to meet their demands and speed up your production process as well. If they require you to produce more PCBs, it means you need to focus on multiple PCB assemblies as well. So using tools like stencils can help you save much time and expedite the process at the same time. 

ยท Reduce Material Waste

PCBs are nothing to waste since they are expensive. It means you need to devise ways to reduce the production cost. The producers have to consume all the PCB materials to reduce waste. So for this purpose, go with appropriate tools that will help you prepare your desired PCB structure with minimum wastage. 

ยท Optimize Performance

Who does not want optimized PCBs for their devices? So do your clients right? Now if you use proper tools for optimizing your PCBs, here is what happens. It will consume less power and offer more data transmission and more longevity. What else do you need to add to your PCB designs? 

ยท Improve Connectivity

PCBs need to be highly connective and efficient. Bear in mind that only efficient PCBs will offer you more connectivity. Not just tools help you with improving connectivity, but they also minimize layer swaps. All of this comes together and reduces the production cost for you. 

Wait, the tooling won’t just stop surprising you here. We are only getting started with the remarkable benefits of tooling for PCBs. The next one is how tooling helps you maximize space on your PCBs. 

ยท Maximize Space

Spacing on PCBs is an important factor that you need to pay attention to while designing PCBs. More space means you can add more important components to your PCBs. Now you see how you are making your PCBs more useful with tools. It mostly comes in handy when you need to work on small PCBs where there is less space for all the essential components. 

ยท Ensures Good Quality Control

Is there any reason left for not choosing tooling for your next PCB project? Tooling for PCBs is a viable method to ensure quality control, reduce waste and precisely produce PCBs when you are under pressure from your clients and their deadlines. 

ยท Correct Positioning  

The PCB parts need to be perfectly positioned on the PCBs when there are more than one transformer, complex wiring networks, connectors, transistors, and others. 

ยท Prevent Electrical shorts

Imagine giving your client an electric shock through a faulty PCB design. A nightmare, no? Tooling saves your sleep from such nightmares and prevents electrical setbacks. Electric short circuits and electrical fires often result when you don’t properly route the traces and mismanage the wires. When you use tools, these make sure everything is in place and working just fine. 

ยท NRE Tooling

An electronic database is highly important for PCBs. Now such a database will help you revamp the former PCB designs and invent new ones. It only uses special software and eases the interpretation of designs. The designs also go through a review to ensure there are no hidden faults in the PCBs. It leads us to the next section, engineering, where we will see how it plays its role for the PCBs. Now you know why NRE tooling is of high importance for several PCB producers around the globe. It’s time that we see how NRE tooling combines with engineering, and for that, we need to check out the next section!ย 

ยท Engineering

The purpose of engineering PCBs is to completely detect the minor to major PCB components. These can be tooling holes, fiducial markers, coupons, and everything that comes under the term โ€œPCB components.โ€ Now these components need perfect positioning on the PCBs, and an engineer makes sure of that. Another role of engineering is to make these PCBs get rid of small defects and technical problems as well. If there is a slight mishandling at the engineering step, it can create a negative impact on the PCBโ€™s performance later. 

ยท Processing

Now comes the final step, processing. You need to pay heed to the cost of the tools you are using for PCBs. There are some elements that contribute to the production of PCB components that have individual prices that you must know. Tooling holes go with a master panel during the production process to make it a smooth sail for the machines and the humans. After this, you drill the holes and route them to the PCBโ€™s corners. Now, the early-stage panels are for combining them for drilling to save up time from drilling individual panels. Registration holes are for connecting the front-to-back imagery and inner-core imagery. These holes stay within the PCB and help in producing integral elements like legend, image, layup, and mask.  

Bottom Line

It should be clear to you that without tools, your PCBs would be missing a certain kick that can put a huge smile on your clientโ€™s face. 

Tools are for making your good PCBs better and more durable in the long run. Besides, these are for easy maneuvering of the PCB components as well. 

However, it is important to use industrial-grade tools that offer nothing just finesse. Worn-out tools can terribly hurt your expectations that can cost a fortune to a PCB producer.

Protoboard vs Breadboard: What are the Differences and Similarities

Protoboard vs Breadboard

In the Printed Circuit Board (PCB) market, some terms can be confusing. Two of such terms are protoboard vs breadboard. For some, they are one and the same, but to others, there are also differences between the two.

This article explains the differences and the similarities between the protoboard and the breadboard.

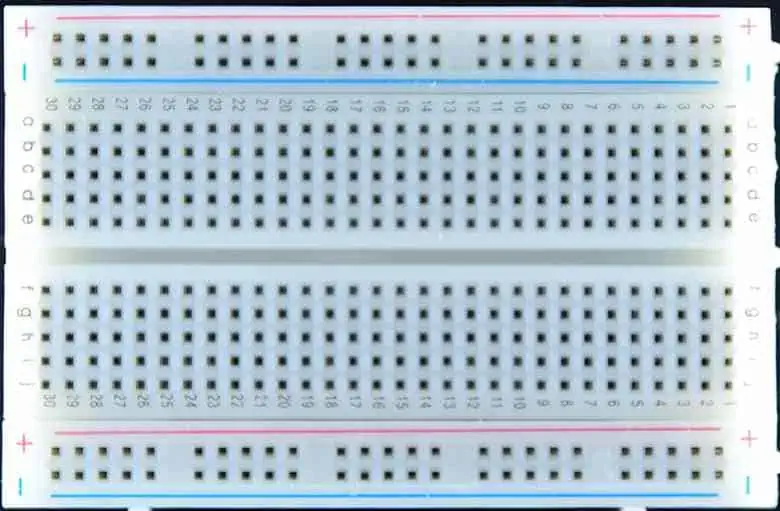
What is a Breadboard?

Letโ€™s go back in time. The term, โ€œbreadboard,โ€ was originally used to refer to the board upon which bread is laid for cutting. In the modern electronics industry, the meaning has been expounded to mean the construction base or platforms for making prototypes or earliest designs of electronics.
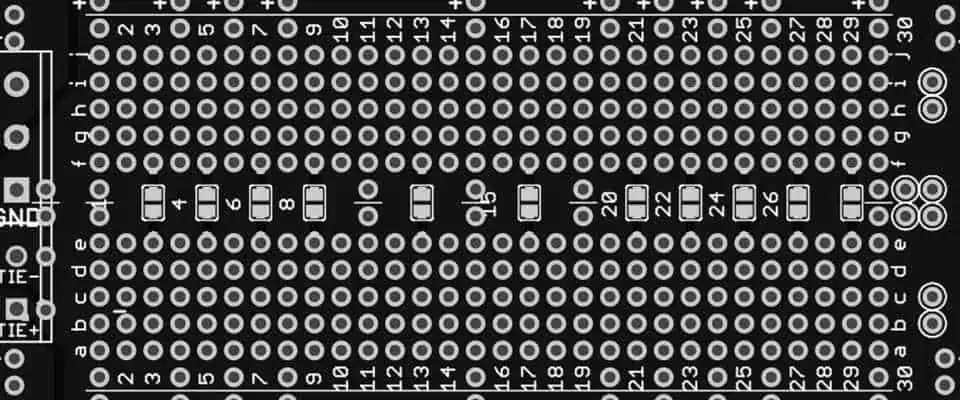
What is Protoboard?

The full name is prototyping board. As the name suggests, it is the board upon which the prototypes of electronic devices are made or built.

What is the Difference between Prototyping Board vs. Breadboard?

Solderable Breadboard

In electronic circuits, the difference between protoboard vs breadboard is not always easy to decide. According to Wikipedia, the breadboard is also known as the protoboard and solderless board. As such, it infers that protoboard is the same as a breadboard and vice-versa.

When to Use Breadboards or Protoboards

From the definitions, you can see that both the protoboards and the breadboards refer to almost the same thing. However, they can serve a single purpose โ€“ enabling the making of earliest designs of PCBs or electronic circuits.

Here are some of the instances of when you need to use the breadboard or protoboard:

Circuit Building/Development

The primary function of the breadboard is to enable the prototyping or making of the earliest designs of Printed Circuit Boards (PCBs).

The beauty of the process is that you can do all these without necessarily soldering. You will learn more about how this works in this article.

Circuit Board Design Learning

The use of protoboards or breadboards also paves the way for the circuit board learning process to be easier. Due to the reusability, solderless process and zero track destruction; it makes a good learning tool for PCB enthusiasts.

What Makes up the Protoboard?

An ideal breadboard or protoboard is made up of some elements. Understanding how they all stack-up and work is a major step to understanding how the different parts combine to boost the boardโ€™s function.

Plastic Socket

The first thing you will notice is the perforated block of plastics that make up the solderless board. It is common for the plastic socket to comprise of the following:

  • Several alloy spring clips are located underneath the perforations. These clips can be derived from either the tin-plated phosphor bronze or the nickel silver.
  • The alloy spring clips also serve as the tie points, i.e., the contact points for the fabrication.

Interconnecting Wires

Wires used for interconnection are often used to fill-up the free holes located at the centerline of the block. They are being inserted to straddle the block.

Metal Strips

The metal strips are used to make a pin-to-pin connection on the protoboard. Depending on the specifics of your fabrication, the boards can be clipped together as a way of forming a bigger protoboard/breadboard.

Bus Strips

This is the third type of strip used in a breadboard. The function of the bus strips is to provide power for the electronic components mounted on the protoboard.

The compositions of the bus strips include:

  • One column delegated to serve as the supply voltage.
  • Another column used as the ground for the board.

Sometimes, there are disparities as to how these compositions are made. For example, you could find some bus strips with a red marking denoting the supply voltage and the column intended for the ground marked either in black or blue.

Jump Wires

Breadboards also use a variety of jump wires. Popular options are manually-manufactured and ready-to-use variants.

While you can find the manually-manufactured variant difficult to use with larger circuits, the ready-to-use variant offers more versatilities.

Types of Protoboard

FULL PCB MANUFACTURING Quote

You will find two major types of protoboards. These are the soldered and the solderless. While the former can be soldered, the latter doesnโ€™t necessarily need to.

Let us see how they compare:

Soldered Breadboards

This type of breadboard or protoboard requires the use of solder to fit each of the leads or jumper wires into the designated holes.

Solderless Protoboards

Since they donโ€™t rely on the use of solders, the solderless protoboards can be easier to use. In place of the solders, the boards use a metal clip attached to the hole for capturing either the jumper wires or leads when any of those are inserted.

Differences between the Soldered and Solderless Breadboards

The major differences are:

  • Soldered protoboards use solder, while the solderless doesnโ€™t.
  • In terms of performance, the soldered breadboards are high-performing, due to the permanent capture of the leads.
  • In terms of versatility, you will find the solderless protoboards a better option. This is because of the reusability โ€“ a feature the soldered breadboards donโ€™t support.

Why Do We Need Breadboards?

You need to use a breadboard if you want to reduce the risks of designing circuit boards that end up having one design issue or the other.

You also need to use one of these boards to meet the following needs:

1. Temporal Circuit Design

You need the breadboard to make a temporal or prototype design of your electronic circuit.

2. Faster Prototyping Process

You will find out that, in some cases, you may end up processing the electronic circuitโ€™s prototypes faster with the use of breadboards.

It is obtainable due to the zero use or demand for advanced tools, such as a CAD software. Besides, it is more of a hands-on process.

In extension, you will save costs in terms of not manufacturing several PCBs at once. You also save costs due to the use of manualized processes, other than paying for a CAD software or any other advanced/automated prototyping tool.

3. Adaptive Circuit Design

A Printed Circuit Board (PCB) is said to have an adaptive design if it supports the detection of issues, the real-time implementations of changes and making repairs, where necessary.

Since the entire circuitry is open, you can make these changes almost at the same time.

4. Flexible PCB Probing and Testing

Detecting and fixing the issues relating to how a circuit board is designed is also another reason for using the breadboard.

The outlined process allows you to have a full glance of all the components and to make an unrestricted probing of each of them.

Moving from a Breadboard to Protoboard

Do you know that the major difference between a breadboard and a protoboard is not the name differences? It is indeed in how they function. Although they are used as a sort of โ€œbuilding blockโ€ for the first set of electronic circuits, they can sometimes be independent of each other.

You can move from a breadboard to a protoboard when it is time to make a detailed prototyping of the board.

Here are some of the reasons why a protoboard (also called a prototype PCB layout) is better than the breadboard:

1. Connection Solidity

The connections and interconnections on a prototype PCB layout are more solid. This is because of the permanent capture of the leads. This way, you are assured of the fact that the leads wouldnโ€™t slip out during the prototyping process.

2. Improved Signal Integrity

While trying to keep the boardโ€™s performance optimal, you also want to be sure of the signalโ€™s integrity. The signal is greatly improved when using the protoboard, thanks to the absence of higher parasitic capacitance and inductance โ€“ a feature common with the solderless (breadboard) board design.

3. Copper Durability

In place of the jumper wires and metal connections used in the breadboard; copper is used for the protoboard.

4. Custom Prototype PCB Design

By default, the breadboard has a definite size, which you are expected to use for the prototype. On the contrary, this limits you to work within the ambient of that real estate.

On the other hand, the protoboard offers the flexibility that allows you to create custom PCB prototype designs and sizes.

5. Voltage and Current-Carrying Capacities

The capacities of the current and the voltages are higher in the protoboard. This is possible because of the adjustability of the metal area fills or power traces when designing for optimum width.

6. Flexible Component Usage

Protoboards also make the temporal electronic circuit design fun due to the flexible support for component usage.

Ideally, you wouldnโ€™t be restricted to using one type of component (usually, the through-hole components).

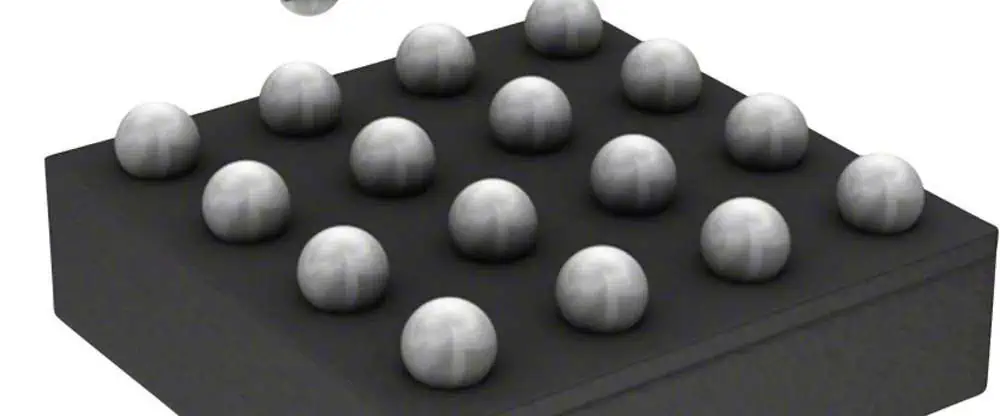
This time, you can choose between the through-hole and Surface Mount Devices (SMDs) for the prototyping.

5. Circuit Board Replication

The Printed Circuit Board (PCB) needs to be replicated in due time. For example, you may want to make variations of the prototype. It is a herculean task to do with the use of breadboards.

This is why you need to use an advanced and almost automated process, as the protoboard presents. This allows for the faster replication of the prototyped boards.

6. Cost Implementations

The manualized or breadboard process of prototyping a board is quite expensive and not time-critical. You spend a lot of time making a temporal design of one of the boards, and at the same time, would spend more to make copies of it.

The reversal is the case with the automated and scalable architecture of the prototype PCB layout board.

Limitations, Downsides and Disadvantages to Breadboards

Protoboard for pcb
Protoboard for pcb

The solderless (breadboard) approach to making circuit board prototypes comes with a lot of disadvantages.

1. Risks for Complex Electronic Circuits

You may not encounter major problems when working on less-complex circuits. But when working on the complex electronic circuits; the challenges triple.

Here are some of the considerations:

  • The large amounts of wiring used in the breadboards can make the management of complex circuits almost impossible.
  • The risks of contact resistance development are higher.
  • Signal integrity and overall reliability of the system/circuit is at the mercy of the flexible connection methods. You are just one plugging and unplugging away from distorting the entire process.

2. Component Preferences

Solderless boards or breadboards work best with the through-hole electronic circuits. The preference for this is largely attributed to the challenges experienced with using components with wider spacings, of more than 2.54mm. This is the reason why the Surface Mount Devices (SMDs) are not a popular choice for this process.

The inability of the electronic components to match the specifics of the Dual In-Line layout is also an issue. In this case, it is almost impossible to provide the accurate electrical conductivity.

3. Limited Operations

Do not expect the solderless boards (breadboards) to function up to a certain limit. This is because of the limited operations โ€“ a derivative of the high inductance and larger parasitic capacitance.

The following are examples of the limitations:

  • The operations of the breadboard are limited to certain low frequencies. These can be as low as less than 10 MHz
  • Limited voltage and current-carrying capacities.
  • โ€œThe relatively high and not very reproductible contact resistanceโ€ can also pose a challenge for some Direct Current (DC) and low-frequency circuit boards.

Conclusion: How Do Breadboards Compare to PCBs?

The main purpose of breadboard is to simplify the process of making temporal designs of electronic circuits. These designs allow for the early-stage testing, analysis and fixture of the different issues before the mass production begins.

When compared to the Printed Circuit Board (PCB), prototypes help to save both money and time. You can always detect and fix the issues in good time, as compared to going back to the โ€œdrawing boardโ€ to map-out how to fix those issues after the board has been produced in the quantities.

Besides, using either breadboards or protoboards helps you to get acquainted with what it takes to make circuit boards. You will find out the technicalities, be able to master the design concept and create better electronic circuits.

Rayming Technology helps you note the design issues, and test the circuits to be sure they are in good working conditions. With an extensive experience and industry-leading equipment, we will make prototypes of your circuits and ensure that everything works as they ought to.

What is Micro Sectioning on a PCB (Microsection)?

microsection PCB

Some people know about sectioning on PCBs. However, this is not what it takes to be a PCB nerd at all. Do you know about micro-sectioning on a PCB? Not yet? Well, feel lucky since we are going to explain micro-sectioning right in this post for your today!

You define micro-sectioning as a much finer process than sectioning that takes place on congested and tight areas of PCBs. No, we are not going to let you go with this simple definition. There is more to micro-sectioning, and it needs your attention for your future projects as well. 

YouTube video

Role of Micro Sectioning on a PCB

The purpose of micro-sectioning is to exclude some layers and components of complex PCBs so that you can detect the faults in the layout, PCB parts, and their performance. Now these layers can be totally damaged as well. If you go for micrometer scale sectioning, you will be able to cover all the important aspects of solder joints and their robustness on PCBs, material composition, and, yes, plating thickness is also on the list. 

Uses of Micro Sectioning on a PCB

PCB microsection
PCB microsection

 Have you ever been interested in surgery? Or might you get a surgeon friend that cuts open humans in an operation theater? Well, consider micro-sectioning as the surgery of the PCBs. You cut open a PCB, perform micro-sectioning and see where the faults lie. Pretty similar to a normal human surgery, but letโ€™s not go deeper into this analogy. There are some small steps that contribute to the success rate of this process. These are:

  • Using a raw functional material of PCBs
  • Perform build verification on the PCBs
  • See if the width of hole-wall plating is suitable or not
  • Whether all the conductors are of appropriate thickness or not
  • Register all the paddings on the inside and outside of PCBs
  • Develop connections between the PCB layers
  • The surface finish of PCBs has a correct thickness, or not
  • How thick is the solder mask 

ยท It’s time that we see how the PCB producers perform micro-sectioning at different intervals of PCB production. These include:

  • Check the size and quality of the holes
  • See if the registration is proper or not after drilling
  • Verify the width of the wrapโ€™s thickness and the barrelโ€™s thickness after plating
  • Check consistency, plating, roster, and problems that occur during the last stage, which is the quality assessment

Creating the Micro Sectioning on a PCB

YouTube video

Now your geeky brain must be wondering how PCB producers even create micro-section. There is no rocket science in it. Producers rely on special through-hole coupons for this purpose. Before doing this, they need to prepare the cross-sectional area of PCBs where they are going to perform the through-hole method. A process called automated coupon extraction is viable for CNC routing that assists in the extraction of the coupon. Other than this, there are some important factors that you need to know for the process:

  • Precision router-cutter machines are important for the determination of PCB cross-sectional area through buried and blind holes.
  • Also, the functions of these machines change as per their use for vendor qualification, failure analysis, conformance, and lot verification.
  • Once you choose your purpose, you grab the coupon and cut a small piece of it for the sake of sampling.
  • Now dip it in the resin or a soft acrylic if you have
  • Wait for it, and it will harden itself to form a hockey puck-like structure.
  • After this, you will crush this hockey puck structure and change it into a fine flat surface.
  • Polish the surface, and etch it as well if there is a need.
  • In the end, use a microscope to visualize and analyze the PCB.

Analyzing the Micro Sectioning on a PCB

FULL PCB MANUFACTURING Quote

There are different steps that you need to perform when analyzing your micro-section:

  1. Build Checking: It means you are verifying the layers of complex PCBs through the process of micro-sectioning. It includes checking the width of cores, foils, prepregs, and also the connection between the solder joints. Not just this, build checking helps you verify if there are any cracks, thermal stress, delamination, gaps, and blistering on the layers. 
  2. Wall Plating Thickness in PTHThe producers love to combine the through-hole method with micro-sectioning when analyzing. It helps you go deeper into the verification and quality check of PCBs. They use a coupon on every production panel they rely on. Six measurements are important to take, three per side of the hole. When you calculate the average of these six readings, you get the wall plating thickness. 
  3. The thickness of Conductors: You already know that we don’t plate the internal layers of PCBs at all. It means you can use micro-sectioning to check the width of internal layers. Sometimes cleaning just removes some of the copper from the layers. However, you can still find some traces of copper left on the foils. It will help you determine the thickness. 
  4. Hole Registration: When you analyze the micro-section by using a microscope, the internal padding is quite visible. Besides, you can also check the tolerance as well. A special coupon is important for this purpose, and you use it on all the panels. It helps you identify the position of the drilled holes in accordance with the layers. 
  5. The connection between Layers: The PTH should be with a strong connection with the internal copper layers. When you perform micro-section analysis, it enables you to detect problems like insufficient hole-wall cleaning, which can lead to faulty drilling and weak connections. 
  6. Surface Finish: You can even detect the surface finish of PCBs through micro-sectioning. Surface finish like lead-free HAL and hot air leveling support micro-sectioning. However, you can only measure the Nickelโ€™s thickness through this if you want to determine for ENIG. Use X-rays for this purpose. 
  7. Solder Mask: Sometimes, you need to measure the width of the solder mask, and micro sectioning just makes it happen for you. The standard thickness of the solder mask is always 8 micrometers. 

Micro Sectioning on a PCB for Traceability

If you have ever observed a coupon, there are some fine markings present on it. These markings help you identify the machine that produced it in the past. Now, this helps you in separating healthy PCBs from sick ones. Not just it, you can even reduce the chances of possible failures of PCBs through traceability. 

Identifying Failure with Micro Sectioning on a PCB Analysis

So the question is, how do you stop your PCBs from failing through micro-section analysis? Weโ€™ll see that in just a bit! 

  • If your PCBs have faults and defects like improper solder mask thickness, poor etching, or defective registration, micro-sectioning can help you with it.
  • The areas which are uneasy to reach out to, like pads, solder masks, and micro-sectioning, open a doorway for you to easily access these areas for analysis.
  • Once you collect the data given by micro-section analysis, you can later use the same data for improving the PCBs
  • You can rely on micro-sectioning for the failure analysis of PCBs as well when the internal failures keep hidden from the technicians.

Challenges of Micro Sectioning on a PCB

Letโ€™s talk about the hurdles that you might face during micro-sectioning. Wait, did you think it was a smooth process? No, there are still some difficulties that you should take into your account. 

  • The equipment and the materials used for producing a PCB can complicate micro-sectioning since these materials are unlike in hardness, and the equipment might be challenging to handle for the technicians.
  • Sometimes problems with drilling can also occur.
  • The positioning of the spot must be in the boundary of 10% of PCB, which leaves no margin of negligence at all. 
  • In some cases, micro-sectioning can need you to use expensive equipment as per the complexity of your PCBs which can disturb your budget.

Additional PCB Testingโ€™s for Micro Sectioning on a PCB

Micro Sectioning on component

 Other than micro-sectioning, functional PCB testing also plays its role in ensuring the quality of PCBs. There are more tests that include: 

  • Using X-rays to completely visualize the internal area of PCBs
  • Test the PCBs for contamination that might lead to degradation and other problems like metallization.
  • Check the frequency of the board to prevent breakdowns.
  • Peel testing to determine how robust the laminate of PCBs
  • Testing the solder float to check the thermal stress each hole can endure
  • Flying probe testing is for checking the capacitance, inductance, and resistance issues of the PCBs
  • Automated optical inspection of PCBs uses the latest 3D cameras to take pictures of PCBs and analyze them from their photographs.
  • Burn-in testing is a rigorous procedure that you need to perform in the beginning; however, it can also harm the sensitive PCB parts.

Wrapping It Up

The bottom line is that micro-sectioning is becoming more important than ever since the PCBs are getting smaller for miniaturization. Since the process is crucial for quality checks, producers are training their employees for micro-sectioning as well. 

You also get a chance to diagnose the pain point of your PCBs through micro-sectioning. So, if you are facing problems like improper solder thickness, technical issues like lamination faults, and frequency changes, your PCB is in dire need of micro-sectioning. 

Hopefully, this discussion was helpful for you in terms of understanding micro-sectioning. We will see you in the next post with something more intriguing from the field of PCBs. 

What is BGA Via in Pad ?

bga via in pad

Have you been considering a PCB design with via-in-pad? Via-in-pad design is becoming increasingly popular, and if youโ€™re not familiar with the idea of vias on BGA pads, it may be in your best interests to explore this new printed circuit board design option that seems to be growing in popularity.

YouTube video

WHAT IS A VIA-IN-PAD?

A via-in-pad design, as the name indicates, is a printed circuit board design with the vias directly on the BGA pads. The main benefit of a via-in-pad design, also called VIP design, is that you reduceย the area needed for the vias, making it easier to manufacture miniaturized PCBs and dramatically minimizing the amount of board area you need for signal routing. With via holes connected directly to layers beneath the component, you can have signal routing without escaping the device footprint perimeter.

IS IT CONSIDERED BAD PRACTICE TO PUT VIAS ON BGA PADS?

Is this a good practice or a bad practice? Why isnโ€™t everybody doing it? In fact, many people are. It is becoming a common practice to put vias on BGA pads. Why donโ€™t all designers do it? The main reason is that if you put a via in pad, you have to fill it โ€” either with copper or a copper-covered non-conductive material. Non-conductive fill is most popular and more price competitive.  If you do not, the solder will flow away from the pad and you will not get a functional electrical connection.

Filling the vias is an extra step, and some designers may not want to incur the cost and lost time required to do it. Putting vias in pad also affects the drill diameter you will need. Nevertheless, there are many good reasons to opt for a via-in-pad design, which is why many PCB users do call for them, despite the slightly added cost and time commitment.

Next, what are the advantages and disadvantages of VIP vs. traditional via placement?

TRADITIONAL VIAS VS. VIP TYPES ADVANTAGES AND DISADVANTAGES

As mentioned, in a traditional via layout, you can simply apply solder mask to prevent the solder from drawing into the barrel of the via and creating electrical connection problems. But when you have via-in-pad, this will not work. You must completely fill the vias so there will be no air entrapment with resulting outgassing in the assembly phase. You also need a flat planar surface in order to attach fine-pitch BGAs as well as components effectively.

How can you fill these in-pad vias? After mechanically drilling and plating your in-pad vias, you must fill them with epoxy. Alternatively, you can laser-ablate your vias and fill them with copper. Which you choose to do will depend on your specific application and needs when it comes to your printed circuit boards as well as the size of the via. The main issue when deciding your process will be pad diameter. You need to make sure the pad size is large enough for the via diameter while still being able to accommodate manufacturing tolerances and meet the minimum IPC Class 2 or 3 annular ring requirement.

The VIP advantage is that once you effectively place the vias in-pad, you will enjoy some incredible space savings, and this can not only increase your efficiency but may also be required for certain modern applications. If you have a revolutionary application that necessitates space flexibility, VIP can be the ideal choice and may, in fact, be the only choice.

The advantages of via in pad

Via in PCB

There are a lot of advantages of via in pad PCB. First of all, Itโ€™s good for increasing density, using finer pitch packages, as well as lessening inductance. Whatโ€™s more, in the process of via in pad, a via is directly placed below the contact pads of the device, which can achieve greater part density and superior routing. So it can save a great quantity PCB spaces with via in pad for PCB designer.

Compared with blind vias and buried vias, there are many advantages for via in pad as follows:

  • Apply to fine pitch BGA;
  • Lead to higher density PCBs and promote space saving;
  • Improve thermal dissipation;
  • Provide a flat and coplanar surface with component attachment;
  • Lower inductance due to no dog-bone pads with traces;
  • Increase voltage capability of the via;

However, you need to confirm that your PCB manufacturer is well-equipped to fabricate your PCBs because it may cost more. If you are not able to place via in pad, putting directly and using more than one can assist in decreasing inductance.

When should I use via in pad?

It will lead to design rule check errors because of trace width, annular ring, as well as size limitations while trying to route and escape component packages with sub 0.5mm pitch with traditional routing methods. For the small pitch components, only to route them with capped via in pad can it make the circuit board routing to be as compact as possible.

And it can simplify routing for complex BGA and LGA packages as well with capped via in pad. And the components like bypass capacitors to be placed as close as possible with minimizing the surface routing so that minimizing parasitic inductance. In addition, the paths to power and grounds planes are short, which will be good for minimizing EMF emissions of high frequency designs.

Vias in thermal pads also can play an effect on heat management. In general, high power surface mount parts have a thermal pad that mounts to the circuit board. So youโ€™d better drop vias through the board to the other side of PCB to increase the copper area for heat release.

Via in pad application for SMD pad

1. Plug the via by resin and plated it flat by copper

It is compliant with small BGA via in pad;

First of all, the process is filling the via hole with a conductive or non-conductive material, and then plating the via on the surface, which provide a smooth flat for solderable surface;

There are used in via in pad designs where it can mount the component over the via, or extend the solder joint to the via connection.

2. Microvias and via in pad plated over

A microvia is a hole with a diameter of less than 0.15mm based on IPC. It can be a through via hole ( related to a aspect ratio ), however, in normal the microvia is regarded as blind vias between 2 layers;

There are a majority of drilling the microvias with laser but some PCB manufacturers are also drilling them with a mechanical drill bit, which is slower, however the holes have a clean and nice cut;

The microvia cooper fill process is an electrochemical deposition process used for the multilayer PCB fabrication process, it also known as capped vias;

Although the process is complicated, it can fabricate HDI PCB that most PCB manufacturers will get the copper filling of microvias.

3. Plug the via by solder mask

Itโ€™s free and compliant with big solder SMD pads;

The standardized LPI solder mask process can not form the fill vias without the risk of exposed copper in the hole barrel. In general, it can deposit UV or thermally curable epoxy solder mask into the holes to plug them after using the second screen print;

It is known as via plugging. Via plugging is used to plug via holes with a solerrsist material so that protect air from leaking as testing the boards, or prevent the components near the board surface from shorting.

Via in pad PCB

FULL PCB MANUFACTURING Quote

In PCB design, via is a pad with a small plated hole in a printed circuit board which are used for a connection between copper tracks on a various layers of a board. There is a via known as micro vias, which have apparent blind vias only on a single surface for high density multilayer PCB or invisible buried vias on either of the surface. Whatโ€™s more, there is a new challenge after bringing in and being widely used the high density pin out parts, as well as the need for small dimension PCB. So the better solution to meet the kind of challenges is using the latest but popular PCB manufacturing technology called โ€œ via in padโ€.

It needs to quickly use via in pad in the current PCB design due to the constantly reducing pitch of part footprints, as well as the need for miniaturizing PCB form factor. Whatโ€™s more, it can achieve signal routing in as little an area of the PCB layout as possible, in most instances, even avoiding escaping the perimeter of the device footprint.

Via in pads is mostly useful in high speed designs as they reduce trace length and consequently inductance. Youโ€™d better check whether your PCB manufacturer is well equipped to fabricate your board or not, because it may spend more money on it. However, if you canโ€™t place via in pad, directly putting and using over one to decrease inductance.

A Beginner’s Guide to DSBGA (Die-Size Ball Grid Array)

DSBGA

It is just another name for wafer-level chip scale packaging. Now don’t let the name of this process fool you. It’s not that hard to learn about. After reading this post, you will have sufficient knowledge about DSBGA so that you can educate others about it as well. 

 So letโ€™s get this straight. DSBGA is different from other forms of packaging because you do not separate it from the wafer at all. There is a fine layer of copper that combines the silicon connections and solder material. You keep the die of silicon smaller, which sets it apart from other types of packaging. 

To name one of its crucial applications, it will be using it when you do not have enough space. It is useful when you are considering miniaturization. It normally happens when you are producing mobile phones and smart wearables like health and fitness devices and trackers. 

Introduction

So this flip chip method is not a new one. Instead, it has been involved in common applications for many years. Formerly, producers would use it for the process of miniaturization.

 The archaic producers would always rely on smaller dies and would also reduce the number of connections of the semiconductors. The process included bumps made from metal alloys that offered strong bonding with the substrate. 

The SMT just enhanced the results given out by this process. As time passed, industry leaders and decision-makers gathered to educate the semiconductor sector to keep up with the latest technologies and new trends.

 So that they could be able to invent new solutions that have the potential to solve the problems of semiconductor production, since this was the key focus area of the stakeholders, it gave birth to a new technique that was useable for every producer. 

The evolution in miniaturization ended in keeping the die size equal to the package itself. Consider DSBGA as an alignment of metal balls that are beneath the package. On the other hand, you place the die with the substrate. 

Now it will allow smooth redistribution of the connections of the die with the pads. It is what we need to focus on and make sure it happens as well. You can use a substrate of any shape since there is no thumb rule for it. 

Today, producers follow the standard of keeping the substrate and die sizes the same during the process. It is because it keeps the chances of failure and error near to none. Plus, it promises positive results for the final products at the same time.ย 

Applications of DSBGA (Die-Size Ball Grid Array)

BGA Reballing

The fields of telecommunication and media cannot survive without semiconductors, and we all know it. People now love portable devices that do not feel bulky in their hands. Such devices offer more dependability and are exceptional in their performance as well. 

Modern users are now expecting smaller variations of these devices. Since nobody likes to carry heavy and clumsy gadgets, this is something that producers need to scratch their heads for. 

Semiconductors have always proved to be beneficial in reducing the sizes of smart devices. Not only this, they maintain the quality and performance of portable devices as well. Thus, they support miniaturization and help you invent the most cherishable marvels of all time!

It seems like we are just praising the semiconductors here; letโ€™s quickly hop on to the actual discussion – the applications of semiconductors that are too common. You might not have considered them before reading this post!

  • Highly important for producing portable MP3 players 
  • Different types of memory cards need DSBGA elements for proper working
  • Some common types of digital cameras use DSBGA as well
  • Man-portable video games and gaming consoles all use DSBGA 

You must be surprised to know that different producers are now considering miniaturization for wireless headsets and many other bulky devices to meet the expectations of consumers. They are devising solutions to make this possible. 

For this, DSBGA seems to be a multipurpose asset on all counts. Array packaging is another method that is interesting to know about. You do not need to worry about any type of lead frame for this packaging.ย 

Just use the same die for the flip-chip method, and you are good to go. It helps with more electrical density, which eventually boosts the electrical performance of the devices. Now you see how one small component can deliver you great results. 

Itโ€™s time that we discuss the doโ€™s and donโ€™ts of DSBGA in detail! So letโ€™s not keep you waiting!ย 

Assembly Process of DSBGA (Die-Size Ball Grid Array)

FULL PCB MANUFACTURING Quote

Die size (DSBGA) array packaging is undoubtedly a fruitful method that supports the production of many devices. 

Besides, the flip-chip method has also been successful in transforming less efficient devices into something that consumers can avail of in the longer run. Remember the DSBGA uses uncovered dies? 

So when you are using this type of die, there is a sure impact on the process as well. It means you need to be extra careful and concerned when using uncased dies.

 In this section, we are going to crack this code for you so that you wonโ€™t mess up anything when working with such a die. Ready to dive in? Letโ€™s start with it!

  • Never proceed with the process without encapsulating the uncased die because it can cause damage in the form of cracks.
  • Ignoring encapsulation can also disturb the siliconโ€™s expansion ability along with laminations and solder connections, which can complicate the process, thus lowering the success rate as well.
  • If you go for miniaturizing the die in the first place, it can save you from the aforementioned risks to a large extent.
  • Or else, you can rely on a special type of wire bonding called face-down wire bonding that is useful for packing silicone.
  • The best part about face-down wire bonding is that it regulates the performance and keeps it improving from time to time. 
  • The method is viable for reducing the package size as much as possible.
  • One thing that you need to take care of is that a license is important when you are performing this method. 

The End Note

The world will witness extreme miniaturization of smart devices and futuristic machinery in the forthcoming years. Owing to this fact, the producers would need to come together to reduce the size of silicon semiconductors even more than before.

It will make a pathway for the producers to enhance the circuit densities and maintain the quality at the same time. Hopefully, you have learned the importance of miniaturization through DSBGA from this post! We will see you in the next one, till then don’t let your fascination with the latest technology trends rest at all! 

Why Is XCZU4EV-2FBVB900E One of The Efficient System-On-Modules?

wholesale Xilinx FPGA

Do you want to know about XCZU4EV-2FBVB900E? This article is just for you. We’ll go over the technical specifications and other important details of this powerful FPGA. FPGAs are gaining popularity in the digital and electronic world due to their features. Let’s have a closer look at XCZU4EV-2FBVB900E to learn more about this.

 What Is XCZU4EV-2FBVB900E?

The XCZU4EV-2FBVB900E is a System-on-Module FPGA. Again its manufacture is by Xilinx. Xilinx is the name of quality in the field of logic devices.

 It belongs to the Zynq UltraScale+ MPSoC and provides high performance and low latency. This part number has been specifically designed for use in embedded systems. As a result, it provides high levels of computer power for applications. For example, machine learning, signal processing, and image processing, the list is long.

Here are some of the key features of the XCZU4EV-2FBVB900E:

  • It has Processing System Quad-core ARM Cortex-A53 with a dual-core Cortex.
  • This FPGA has Programmable Logic cells. 176K logic cells make it ideal for data processing
  • 6,600 Kb block RAM and 360 DSP slices are just the icings on the cake.
  • It has a great memory for data storage. 1GB DDR4 SDRAM (PS), 4GB DDR4 SDRAM (PL), 128 MB QSPI Flash, and 8GB eMMC Flash memory are great for data storage.
  • It can support many Interfaces. For example, PCIe Gen2 x4, Gigabit Ethernet, USB 3.0, SD/SDIO, and the list is long.
  • This FPGA Single 12V input with onboard power sequencing. So it has an efficient power management system. As a result, it is part of many delicate systems.             

Technical Specifications

xilinx kria board
xilinx kria board

Let’s take a closer look at some of the technical specifications of the XCZU4EV-2FBVB900E.

1. Exceptional Processing System

Processing systems are necessary for quick data processing. Asa result, they can show better results. The XCZU4EV-2FBVB900E employs a processing system that comprises a quad-core ARM Cortex-A53 with a dual-core Cortex-R5F Real-Time Processor and a Mali-400 MP2 GPU. It renders a notable degree of performance and versatility. As a result, it is an optimal option for an extensive array of embedded applications. Similarly, its exceptional performance makes it ideal for programmable Logic functions.

2. Programmable Logic Functions

The XCZU4EV-2FBVB900E features a large programmable logic section. As you know that it has 176K logic cells with 6,600 Kb block RAM. This provides a high degree of flexibility in system design. As a result, designers can implement custom algorithms and processing pipelines. Integrated circuits don’t work well for complex functions. Asa result, you can’t get desired results.

3. Exceptional Memory for Data Storage

Data storage is always an issue. That’s why designers always try to use FPGAs with extended Memory. The XCZU4EV-2FBVB900E includes a range of memory options, including 1GB DDR4 SDRAM for the processing system. Moreover, it has 4GB DDR4 SDRAM for the programmable Logic. 128 MB QSPI Flash. In addition, 8GB eMMC Flash is also there. As a result, it ensures that the processing unit has plenty of space for both program code and data storage. For example, if there is less RAM, then low data storage.

4. Interfaces And Their Connectivity

The XCZU4EV-2FBVB900E provides a range of interfaces. It includes PCIe Gen2 x4 and Gigabit Ethernet. Similarly, it includes USB 3.0, SD, and more. As a result, it allows easy integration with a wide range of peripherals and other system components.

 Alphanumeric Breakdown

 When you read XCZU4EV-2FBVB900E., then you may consider it an ordinary number. For your ease, we did it. The XCZU4EV-2FBVB900E is an alphanumeric code used to identify a specific System-on-Module (SOM) designed by Xilinx. Let’s see what these alphabets tell us.

Here’s a breakdown of the code and numbers

  • XCZ indicates the family of the SOM. It belongs to the Zynq UltraScale+ series. That’s why XCZ is the part number.
  • U4 indicates that it uses the Zynq UltraScale+ MPSoC with four processing cores. As a result, it offers high processing.
  • E indicates that it uses the Mali-400 MP2 GPU for graphics processing.
  • V indicates that it has a processing system with a dual-core Cortex-R5F Real-Time Processor.
  • 2F indicates that it has two GB of DDR4 SDRAM for the processing system.
  • BV indicates that it has eight GB of eMMC Flash for storage. That’s why it can store large data easily.
  • B indicates that it has a single 12V input for power.
  • 900 is the code for the package type of the SOM. Most package types are BGA. Thatโ€™s why it is compact packaging.

Now you have a better understanding of all the alphabet and numerals in this part number.

Frequently Asked Questions

FULL PCB MANUFACTURING Quote

What is the power input for the XCZU4EV-2FBVB900E?

The XCZU4EV-2FBVB900E has a single 12V input with onboard power sequencing. That’s why it has an efficient power management system. So it is part of many power-conservative devices.

 Is the XCZU4EV-2FBVB900E suitable for different applications?

Yes, of course, it is suitable for a wide range of applications. Different machine learning, signal processing, and image processing applications have this FPGA as an important part. That’s why Designers are trying to interrogate this FPGA with other systems so innovatively. As a result, these devices show better results.

From where can I get Xilinx’s at a suitable price?

You can buy it from an authorized dealer. Otherwise, there is fear of counterfeit products. Moreover, you can easily recognize this product to get the real one. The FPGA will have a pattern of small metal balls on the bottom side. Additionally, the packaging may also have a label. This label conation all the necessary information. In addition, it also conation the manufacturer’s logo and part number. That’s why it is easy to recognize. In addition, you can take help from the seller or dealer. So there is no need to worry about recognition.

Wrapping Up

XCZU4EV-2FBVB900E is an exceptional unit in terms of Memory and other specifications. Similarly, its processing speed is so exciting. That’s why designers and engineers like to use it in their projects. As a result, it is easy to explore many other applications and possibilities. It all depends upon your specific needs and requirements. Sky’s the limit as there are various options to employ FPGA. That’s why if you are looking for versatile FPGA, then you must go for it.