Introduction to Veroboard Soldering
Veroboard soldering is an essential skill for electronics enthusiasts and professionals alike. This versatile prototyping method allows you to create custom circuits quickly and efficiently. In this comprehensive guide, we’ll explore everything you need to know about Veroboard soldering, from the basics to advanced techniques.
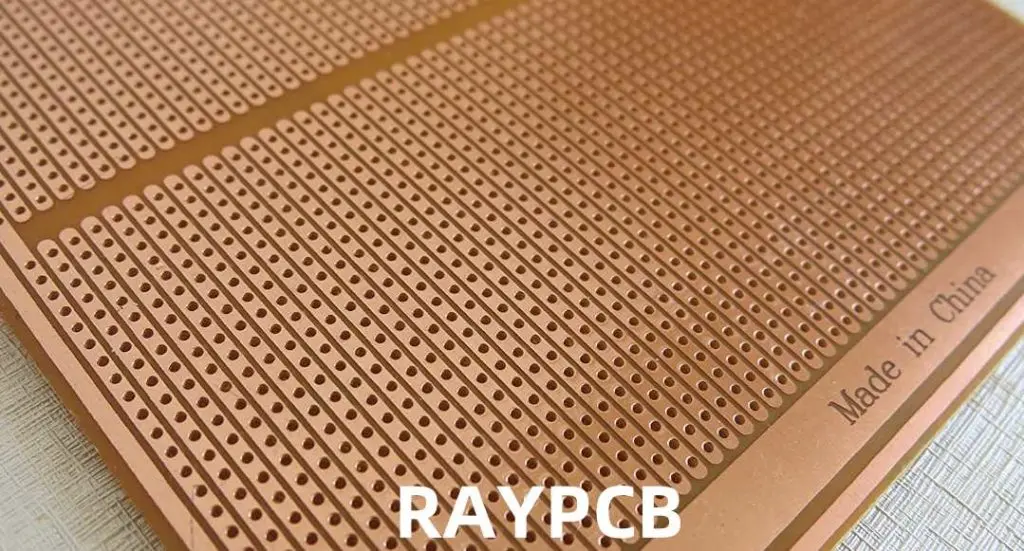
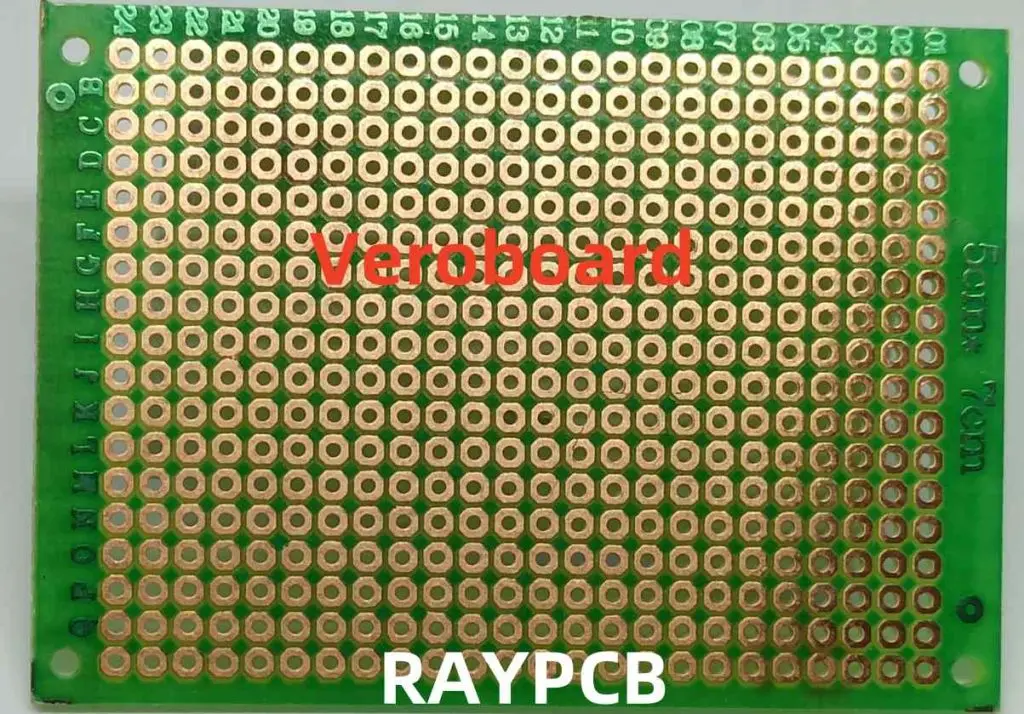
What is Veroboard?
Veroboard, also known as stripboard, is a type of prototyping board with copper strips and pre-drilled holes. It’s an excellent alternative to custom-printed circuit boards (PCBs) for small-scale projects and prototypes.

Essential Tools for Veroboard Soldering

Before diving into the soldering process, let’s review the tools you’ll need for successful Veroboard soldering:
- Soldering iron (15-30 watts)
- Solder (60/40 or lead-free)
- Wire cutters
- Wire strippers
- Small pliers
- Desoldering pump or solder wick
- Multimeter
- Safety glasses
- Ventilation fan
Choosing the Right Soldering Iron
For Veroboard soldering, a temperature-controlled soldering iron is ideal. Look for these features:
- Adjustable temperature (300-400°C range)
- Fine tip for precise work
- Comfortable grip for extended use
Read more about:
Preparing Your Veroboard
Proper preparation is key to successful Veroboard soldering. Follow these steps:
1. Planning Your Circuit
- Sketch your circuit layout on paper
- Identify component placement and connections
- Consider the direction of copper strips
2. Cutting the Veroboard
- Measure the required board size
- Score the board with a sharp knife
- Snap the board along the scored line
3. Breaking Tracks
To isolate different parts of your circuit:
- Locate the tracks to be broken
- Use a drill bit or track cutter tool
- Verify breaks with a multimeter
Veroboard Soldering Techniques
Now, let’s dive into the core Veroboard soldering techniques:
1. Component Placement
- Insert components from the non-copper side
- Bend leads slightly to hold components in place
- Ensure proper orientation of polarized components
2. Soldering Components
Follow these steps for each connection:
- Heat the copper pad and component lead
- Apply solder to the joint, not the iron tip
- Remove solder, then the iron
- Allow the joint to cool naturally
3. Creating Solder Bridges
To connect non-adjacent tracks:
- Apply flux to both tracks
- Heat one track and apply solder
- Quickly move to the second track
- Add more solder to form a bridge
4. Using Wire Links
For longer connections:
- Strip both ends of a wire
- Insert into appropriate holes
- Solder each end to the Veroboard
Advanced Veroboard Soldering Techniques
As you become more comfortable with Veroboard soldering, try these advanced techniques:
1. Double-Sided Veroboard Soldering
- Use for more complex circuits
- Carefully plan component placement
- Create through-hole connections with wire or component leads
2. Integrated Circuit (IC) Soldering
- Use IC sockets for easy replacement
- Align pins carefully before soldering
- Solder corner pins first, then check alignment
3. Surface Mount Device (SMD) Adaptation
- Create small solder pads on the copper strips
- Use fine-tipped tweezers for placement
- Apply solder sparingly to avoid bridges
Common Veroboard Soldering Mistakes and How to Avoid Them
Even experienced makers can make mistakes. Here are some common issues and solutions:
1. Cold Solder Joints
Problem: Dull, grainy-looking joints Solution: Ensure proper heating of both the pad and component lead
2. Solder Bridges
Problem: Unintended connections between adjacent tracks Solution: Use less solder and a finer tip; clean up with solder wick if needed
3. Lifted Tracks
Problem: Copper track separates from the board Solution: Apply heat carefully and avoid overworking joints
4. Component Damage
Problem: Overheating sensitive components Solution: Use heat sinks and limit soldering time
Tips for Successful Veroboard Soldering
Improve your Veroboard soldering skills with these pro tips:
- Keep It Clean: Regularly clean your soldering iron tip
- Use Flux: Flux improves solder flow and joint quality
- Practice on Scrap: Hone your skills on spare Veroboard pieces
- Inspect Your Work: Use a magnifying glass to check joints
- Be Patient: Take your time, especially on complex circuits
Veroboard Soldering Projects for Beginners
Start with these simple projects to practice your Veroboard soldering skills:
- LED Flasher Circuit: Learn timing and component placement
- Simple Amplifier: Understand audio circuit layout
- Power Supply: Practice voltage regulation techniques
Veroboard vs. Other Prototyping Methods
Let’s compare Veroboard soldering to other prototyping methods:
Veroboard vs. Breadboard
Veroboard:
- More permanent
- Allows for compact designs
- Requires soldering skills
- Quick and easy prototyping
- No soldering required
- Limited to simpler circuits
Veroboard vs. Custom PCBs
Veroboard:
- Faster for one-off projects
- More flexible for modifications
- Lower initial cost
Custom PCBs:
- Better for complex circuits
- More professional appearance
- Ideal for mass production
Maintaining Your Veroboard Soldering Equipment
Proper maintenance ensures long-lasting, reliable performance:
- Clean Your Soldering Iron: Regularly clean and tin the tip
- Replace Consumables: Change soldering iron tips and sponges as needed
- Store Properly: Keep tools in a dry, clean environment
- Calibrate When Necessary: Check temperature settings periodically
Safety Considerations in Veroboard Soldering
Always prioritize safety when Veroboard soldering:
- Ventilation: Work in a well-ventilated area to avoid fume inhalation
- Eye Protection: Wear safety glasses to protect against solder splatter
- Fire Safety: Use a soldering iron stand and keep flammable materials away
- First Aid: Keep a first aid kit nearby for minor burns
- Proper Disposal: Dispose of waste solder and flux responsibly
Troubleshooting Veroboard Circuits
When your Veroboard circuit doesn’t work as expected:
- Visual Inspection: Check for obvious issues like solder bridges or missing connections
- Continuity Testing: Use a multimeter to verify connections
- Signal Tracing: Follow the signal path to identify where it stops
- Component Testing: Verify individual component functionality
- Power Supply Check: Ensure proper voltage and current delivery
Advanced Applications of Veroboard Soldering
As your skills improve, explore these advanced applications:
- Modular Circuit Design: Create interconnectable circuit blocks
- Mixed-Technology Boards: Combine through-hole and surface-mount components
- Multi-Layer Designs: Stack Veroboards for complex 3D circuits
- Custom Enclosures: Design and build enclosures around your Veroboard circuits
Future Trends in Prototyping and Veroboard Alternatives
While Veroboard remains popular, new prototyping methods are emerging:
- 3D-Printed Circuit Boards: Rapid prototyping with conductive filaments
- Flexible PCBs: Adaptable circuits for wearable technology
- Paper Electronics: Low-cost, disposable circuit prototyping
- Modular Prototyping Systems: Pre-made circuit blocks for quick assembly
Conclusion: Mastering Veroboard Soldering
Veroboard soldering is a valuable skill that bridges the gap between breadboard prototypes and custom PCBs. With practice and patience, you can create professional-quality circuits for a wide range of applications. Remember these key points:
- Proper preparation is crucial for successful Veroboard projects
- Technique matters: focus on creating clean, strong solder joints
- Start with simple projects and gradually increase complexity
- Always prioritize safety in your workspace
- Maintain your tools for consistent performance
Whether you’re a hobbyist or a professional, mastering Veroboard soldering will expand your capabilities in circuit design and prototyping. Keep practicing, stay curious, and don’t be afraid to tackle challenging projects. With time, you’ll be soldering Veroboard circuits like a pro!