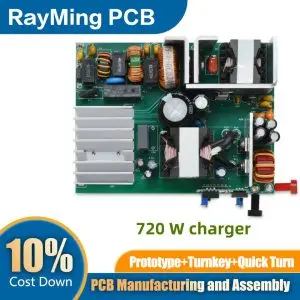
Electronic devices are an important part of present life since they have a wide range of applications. However, the existence of these devices solely depends on electronic assembly. For example, the manufacture of such appliances like refrigerators, smart cars, air conditioners, and many other machines depends on printed circuit boards (PCBs). Therefore, we will look at what electronic assembly at home is and dig deep into what it involves. In addition, we will highlight the advantages and disadvantages of assembling electronics at home.
What is Electronic Assembly at Home?
Understanding the Concept
Electronic Assembly at Home refers to the process of assembling, soldering, and testing electronic components and circuit boards in a residential setting. This practice has gained popularity due to advancements in technology, the rise of the maker movement, and the increasing demand for flexible work arrangements.
Typical Tasks Involved
When engaging in electronic assembly at home, you can expect to perform a variety of tasks, including:
- Soldering components onto printed circuit boards (PCBs)
- Mounting through-hole and surface-mount components
- Testing circuits and troubleshooting issues
- Reading and interpreting circuit schematics
- Assembling complete electronic devices or prototypes
Required Skills and Basic Knowledge
To excel in electronic assembly at home, you’ll need to develop the following skills and knowledge:
- Basic understanding of electronic components and their functions
- Proficiency in soldering techniques
- Ability to read and interpret circuit diagrams
- Familiarity with various types of PCBs and assembly methods
- Knowledge of safety procedures and proper handling of electronic components
- Attention to detail and patience for precise work
Essential Tools and Equipment for Home Electronic Assembly
Creating a well-equipped workspace is crucial for successful electronic assembly at home. Here are the essential tools and equipment you’ll need:
Soldering Irons and Stations
- Temperature-controlled soldering iron
- Soldering station with adjustable temperature settings
- Various soldering tips for different applications
Multimeters and Circuit Testers
- Digital multimeter for measuring voltage, current, and resistance
- Continuity tester for checking connections
- Logic probe for testing digital circuits
PCB Holders, Tweezers, and Magnifiers
- PCB holder or vise for secure board positioning
- Fine-tipped tweezers for handling small components
- Magnifying glass or illuminated magnifier for detailed work
Safety Gear and Workbench Setup
- Safety glasses to protect your eyes
- Anti-static wrist strap to prevent electrostatic discharge
- Fume extractor or well-ventilated workspace
- ESD-safe work surface
- Proper lighting for clear visibility
How to Solder PCBs at Home: A Beginner’s Guide
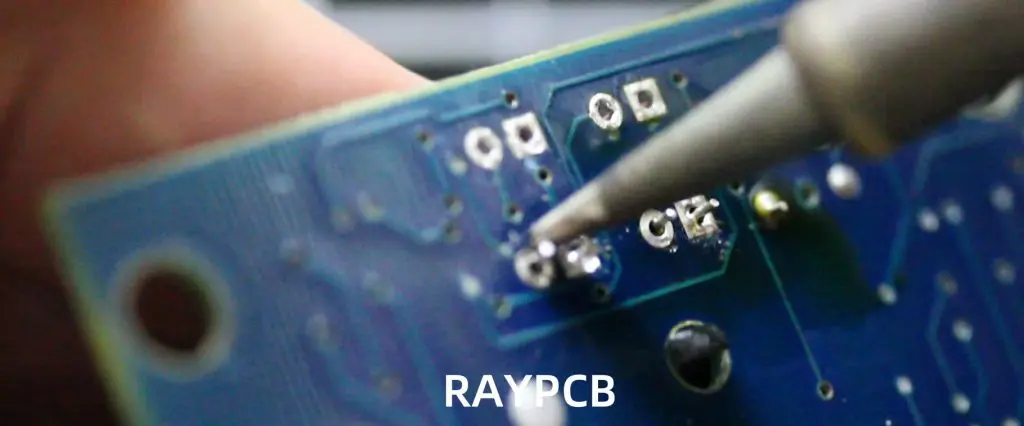
Soldering is a fundamental skill in electronic assembly. Follow these steps to master PCB soldering at home:
Preparing Your Workspace
- Set up your soldering station in a well-ventilated area
- Ensure proper lighting and a comfortable seating position
- Organize your components and tools for easy access
Selecting the Right Solder and Components
- Choose lead-free solder for environmental safety
- Select the appropriate solder diameter for your project
- Ensure you have all the necessary components before starting
Step-by-Step Soldering Instructions
- Clean the PCB and components with isopropyl alcohol
- Tin the soldering iron tip with a small amount of solder
- Heat both the component lead and the PCB pad simultaneously
- Apply solder to the junction, allowing it to flow smoothly
- Remove the iron and allow the solder joint to cool naturally
Common Soldering Mistakes and How to Avoid Them
- Using too much solder, leading to bridges between connections
- Insufficient heating, resulting in cold solder joints
- Overheating components, causing damage or lifted pads
- Poor tip maintenance, leading to inefficient heat transfer
Tips for Clean and Durable Connections
- Keep your soldering iron tip clean and well-tinned
- Use flux to improve solder flow and adhesion
- Practice proper heat management to avoid damaging components
- Inspect your work with a magnifying glass for quality assurance
Read more about:
Circuit Board Assembly at Home: Step-by-Step
Assembling complete circuit boards at home requires attention to detail and a systematic approach. Here’s a step-by-step guide:
Understanding Circuit Schematics
- Familiarize yourself with common schematic symbols
- Learn to trace signal paths and identify component connections
- Use software tools like KiCad or Eagle for schematic design and PCB layout
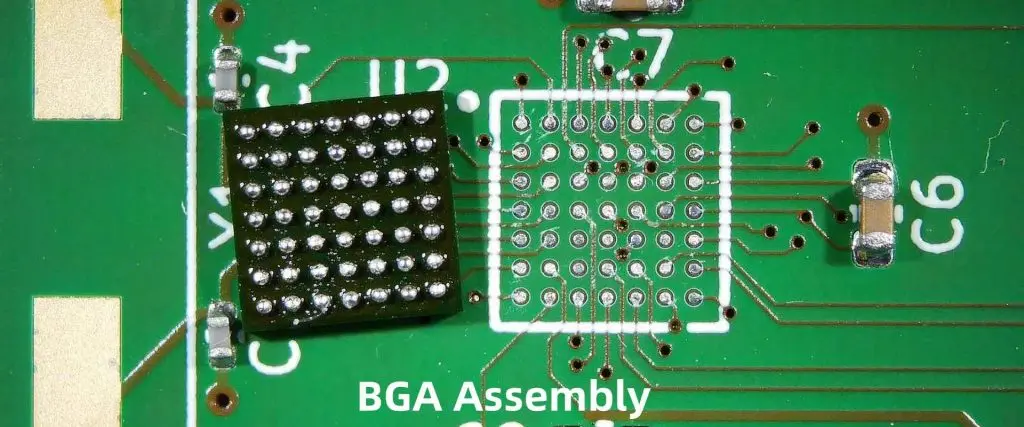
Placing Components (Through-Hole and Surface Mount)
- Start with larger components and work your way to smaller ones
- Use the PCB silkscreen as a guide for component placement
- Double-check component values and polarities before soldering
Soldering and Securing Components
- Begin with through-hole components, soldering from the bottom of the board
- For surface-mount components, apply solder paste and use a hot air rework station or reflow oven
- Ensure all connections are secure and free from solder bridges
Inspection and Troubleshooting
- Visually inspect all solder joints using a magnifying glass
- Use a multimeter to check for continuity and proper connections
- Power up the board and test functionality, addressing any issues that arise
Finding Work-from-Home Jobs in Electronic Assembly
The rise of remote work has created new opportunities in electronic assembly. Here’s how to find and secure work-from-home jobs in this field:
Companies Hiring for Remote Electronic Assembly
- Research electronics manufacturers offering remote positions
- Explore job boards specializing in electronics and engineering roles
- Connect with staffing agencies focusing on technical and manufacturing jobs
Freelancing and Starting Your Own Service
- Create a portfolio showcasing your skills and completed projects
- Set up profiles on freelancing platforms like Upwork or Fiverr
- Network with local businesses and startups that may need prototyping services
How to Market Your Skills
- Develop a professional website highlighting your expertise
- Utilize social media platforms to showcase your work and connect with potential clients
- Obtain relevant certifications (e.g., IPC-A-610) to demonstrate your qualifications
Expected Pay Rates and Workload Examples
- Entry-level remote positions: 15−15−25 per hour
- Experienced assemblers: 25−25−40+ per hour
- Freelance project rates vary depending on complexity and timeline
- Typical workloads range from part-time gigs to full-time positions
Benefits and Challenges of Electronic Assembly at Home
Benefits
- Flexibility in work hours and environment
- Low startup costs compared to traditional manufacturing setups
- Opportunity for continuous skill development and learning
- Potential for higher earnings through specialization
Challenges
- Initial learning curve for newcomers to electronic assembly
- Maintaining consistent quality control standards
- Effective communication with clients and team members remotely
- Keeping up with rapidly evolving technology and techniques
Tips for Success in Home-Based Electronic Assembly

To thrive in the world of electronic assembly at home, consider these tips:
Building a Professional Home Workspace
- Dedicate a specific area for your electronic assembly work
- Invest in proper lighting, ventilation, and ergonomic furniture
- Organize your tools and components for maximum efficiency
Continuous Learning and Certifications
- Pursue industry-recognized certifications like IPC-A-610
- Attend online workshops and webinars to stay updated on new technologies
- Experiment with different types of projects to broaden your skill set
Keeping Up with Technology Trends
- Subscribe to electronics and maker-focused publications
- Join online communities and forums to exchange knowledge
- Explore emerging technologies like IoT and wearable electronics
Best Practices for Quality Assurance
- Develop a systematic approach to testing and inspection
- Document your processes and create checklists for consistency
- Invest in quality tools and equipment for reliable results
Resources for Learning and Improving Your Skills
To continue growing in the field of electronic assembly, take advantage of these resources:
Recommended Online Courses and Tutorials
- Coursera’s “Introduction to Electronics” by Georgia Tech
- edX’s “Electronic Interfaces: Bridging the Physical and Digital Worlds” by UC Berkeley
- Udemy’s “Learn to Solder: Electronics Soldering for Beginners”
Community Forums and Maker Spaces
- Join local maker spaces or hackerspaces for hands-on learning
- Participate in electronics forums like EEVblog or All About Circuits
- Attend maker faires and electronics expos to connect with like-minded enthusiasts
Useful YouTube Channels, Blogs, and Certifications
- YouTube channels: EEVblog, GreatScott!, and AdaFruit Industries
- Blogs: Hackaday, Electronics-Lab, and SparkFun
- Certifications: IPC-A-610 (Acceptability of Electronic Assemblies), J-STD-001 (Requirements for Soldered Electrical and Electronic Assemblies)
Conclusion
Electronic Assembly at Home presents a wealth of opportunities for both hobbyists and professionals alike. From mastering PCB soldering techniques to assembling complex circuit boards, the skills you develop can lead to fulfilling work-from-home jobs and entrepreneurial ventures.
As you embark on your journey in electronic assembly, remember that success comes with practice, continuous learning, and attention to detail. Whether you’re just starting or looking to expand your existing skills, the world of electronic assembly at home offers a pathway to creative expression, technical mastery, and professional growth.
By following the guidelines, tips, and resources outlined in this article, you’ll be well-equipped to transform your passion for electronics into a rewarding home-based career. Embrace the challenges, stay curious, and never stop learning – the future of electronic assembly is bright, and it starts right in your own home.