Introduction
China has become a leading hub globally for electronics manufacturing services including prototype engineering and low volume production. The availability of skilled engineers, advanced manufacturing infrastructure and competitive costs has attracted many multinational OEMs, startups and design houses to source electronics prototyping in China.
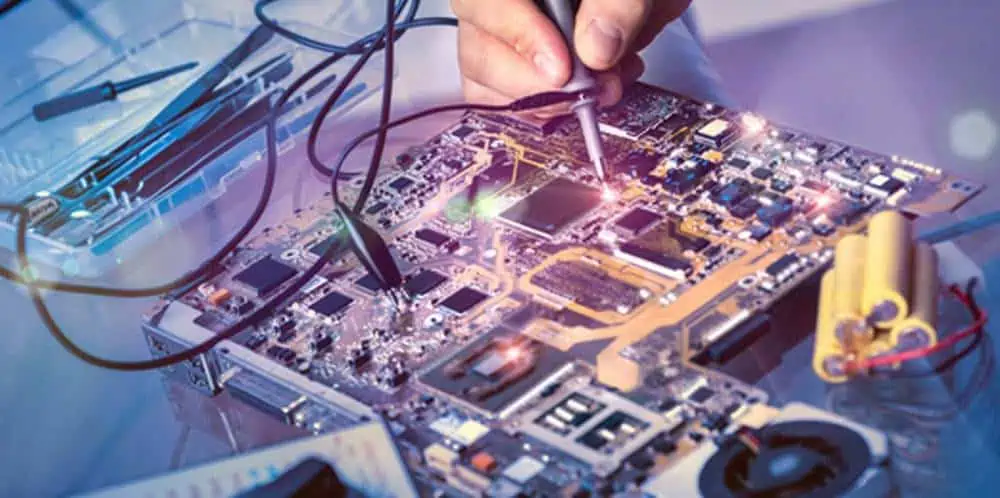
This article profiles the top 12 electronic prototype manufacturers in China who deliver advanced capabilities, quality and rapid turnaround for NPI (new product introduction) engineering.
1. RayMing Technology
RayMing is an ISO 13485 and ISO 9001 certified company focused on fast turnkey prototyping of electronic devices. With over 200 engineers and three manufacturing facilities, they deliver advanced capabilities across PCB design, component engineering, enclosure design, firmware development and testing services.
Location: Shenzhen, China
Services:
- PCB Design – Up to 16 layer boards
- Component Engineering
- Enclosure – Plastic and metal
- Prototype Assembly
- Testing including EMC/RF
- Firmware and software
- Complete product engineering
Industries Served:
- Medical and Healthcare
- Industrial Automation
- Transportation
- Smart Home
- Consumer Electronics
Customers: Startups, OEM R&D teams, design houses in North America and Europe
Key Differentiators:
- One stop shop for electronic product engineering
- Both in-house capabilities and partner network
- Design for manufacturing expertise
- Focus on quality and product safety
Certifications: ISO 13485, ISO 9001, UL

2. StarLink Electronics Technology
StarLink provides rapid prototyping and electronics engineering services to help companies launch products faster. With over 500 engineers and 14 years of experience supporting startups, they deliver functional prototypes meeting quality and reliability needs.
Location: Zhuhai, China
Services:
- PCB Development
- Mechanical Engineering
- Prototype Manufacturing
- Product Testing
Industries Served:
- Consumer Electronics
- Automotive Electronics
- Industrial Electronics
- Medical Electronics
Customers: Startups, medium/large companies in North America and Europe
Key Differentiators:
- Rapid prototype delivery in 7-15 days
- One stop engineering capabilities
- Scalable volume production
- Strong focus on quality
Certifications: ISO 9001, ISO 14001, QC 080000
3. Wispro Technology
Wispro provides electronic product design, prototyping and manufacturing services. With 700+ employees, they deliver high quality prototypes and low volume production using advanced technologies.
Location: Shenzhen, China
Services:
- Product Design – Mechanical, Electrical, Software
- PCB Layout
- Prototype Fabrication
- Low Volume Manufacturing
- Testing Services
Industries Served:
- Consumer Electronics
- Wireless Communications
- Industrial Controls
- IoT Products
- Automotive Electronics
Customers: Multinational companies, startups, design houses
Key Differentiators:
- 28 years of experience supporting electronics OEMs
- High quality prototypes with quick turnaround
- Seamless transition to production
- Rigorous quality systems
Certifications: ISO 9001, ISO 14001, ISO 13485
4. Libing Technology
Libing provides professional one-stop engineering services focused on electronic product design and manufacturing. With over 200 employees and 10 years of experience, they deliver reliable high-tech solutions.
Location: Shenzhen, China
Services:
- Electronics Design
- Mechanical Engineering
- PCB Layout
- Firmware Development
- Prototype Building
- Pilot Manufacturing
Industries Served:
- Industrial Equipment
- Measurement Instruments
- LED Lighting
- Automotive Electronics
- IoT Products
Customers: Startups, small and mid-sized brands based in North America and Europe
Key Differentiators:
- High quality deliverables with effective design for manufacturing
- Supply chain management capabilities
- Ability to seamlessly scale up to production
- Comprehensive project management
Certifications: ISO 9001, ISO 14001

5. Advanced Assembly
Advanced Assembly provides rapid prototyping of electronic devices with a focus on assembling and testing prototypes. They leverage an international supply chain to procure components and build prototypes.
Location: Shenzhen, China
Services:
- Prototype PCB Assembly
- Component Procurement
- Functional Prototype Building
- Prototype Testing and Validation
Industries Served:
- Consumer Electronics
- Industrial Equipment
- Automotive Electronics
- IoT and Home Automation
- LED Lighting
Customers: Startups, makers, and electronics companies worldwide
Key Differentiators:
- Specialization in assembling fully functional prototypes
- Flexible and fast turnaround times
- International component sourcing
- Convenient online order placement and tracking
Certifications: ISO 9001
6. OurPCB Tech
OurPCB provides fast PCB prototyping as well as electronics assembly. They have instant online quoting and order placement for PCB fabrication and assembly with flexible quantity.
Location: Shenzhen, China
Services:
- 24 Hour PCB Prototypes
- SMT Assembly
- PCB Component Procurement
- Functional Prototype Building
Industries Served:
- Consumer Electronics Makers
- Maker Community
- Small Businesses
- Education and R&D
Customers: Startups, makers, hackers, students and electronics enthusiasts globally
Key Differentiators:
- Instant 24 hour PCB prototype service
- Online order placement and tracking
- Flexible order quantities
- Cost effective solutions
Certifications: ISO 9001
7. JZJ PCB
JZJ PCB provides advanced PCB prototype services as well as electronics manufacturing. They have 16 years of experience focused on meeting prototyping needs for innovators worldwide.
Location: Jiangmen, China
Services:
- Multilayer PCB Prototypes
- SMT Assembly
- Sheet Metal Fabrication
- Functional Prototype Building
Industries Served:
- Consumer Electronics
- Industrial Automation
- Automotive Electronics
- Medical Equipment
Customers: Startups, makers, and electronics innovators globally
Key Differentiators:
- High quality multilayer PCB prototypes
- Flexible order quantities
- Design for manufacturing services
- Seamless transfer to production
Certifications: ISO 9001, ISO 14001, UL
8. Wellpcb Technology
Wellpcb offers advanced PCB prototyping capabilities using high end manufacturing equipment. They provide engineering services to support all phases of electronic product development.
Location: Dongguan, China
Services:
- Multilayer PCB Prototypes – up to 16 layers
- HDI PCBs
- Flexible PCB Circuits
- PCB Component Selection and Sourcing
- DFM Analysis
Industries Served:
- Consumer Electronics
- Automotive
- Industrial Equipment
- Medical Devices
Customers: Electronics manufacturers, OEM R&D teams, product design companies
Key Differentiators:
- Advanced PCB technology – SLP, any-layer HDI, Flex-rigid
- Strong engineering capabilities
- Inventory of components for prototyping
- Seamless transfer to volume production
Certifications: ISO 9001, ISO 14001, IATF 16949
9. Amitron
Amitron delivers electronics engineering design including PCB layout, simulation, mechanical design and prototyping services to customers globally.
Location: Shenzhen, China
Services:
- PCB Design Services
- PCB Simulation and Analysis
- Electronic Product Design
- Mechanical Engineering Design
- Prototype Fabrication
Industries Served:
- Industrial Equipment
- Consumer Electronics
- Automotive
- Medical Devices
Customers: Small and mid-sized electronics companies, startups, makers
Key Differentiators:
- Advanced engineering capabilities and expertise
- Strong focus on electronics reliability
- Experience supporting a wide range of industries
- End-to-end product development services
Certifications: ISO 9001
10. PCB Masters
PCB Masters provides professional engineering support for PCB prototyping along with design for manufacturing analysis. Their capabilities support faster development of electronic devices.
Location: Shenzhen, China
Services:
- PCB Design Services
- PCB Prototype Fabrication
- Component Engineering
- PCB DFM and Analysis
- PCB Testing Services
Industries Served:
- Industrial Controls
- Consumer Electronics
- Automotive Electronics
- IoT Products
Customers: Electronics manufacturers, startups, makers
Key Differentiators:
- 20 years experience in PCB engineering services
- Adherence to IPC standards
- Strong PCB design expertise
- Seamless transfer to production
Certifications: ISO 9001

11. JingHongYiDa
JingHongYiDa provides specialized electronics engineering services focused on supporting product design and prototyping. Their capabilities help accelerate time-to-market.
Location: Shenzhen, China
Services:
- Electronics Product Design
- PCB Layout
- Mechanical Engineering
- Firmware Development
- Prototype Fabrication
Industries Served:
- Consumer Electronics
- Industrial Equipment
- Automotive Electronics
- IoT Products
- Medical Devices
Customers: OEM R&D teams, startups, makers, design houses
Key Differentiators:
- Multidisciplinary engineering capabilities
- Experience transitioning prototypes to production
- Rigorous quality control practices
- Bilingual team for good communication
Certifications: ISO 9001, ISO 14001
12. Shenzhen Limei Electronics
Limei provides specialized electronics manufacturing services focused on supporting engineering teams with PCB fabrication and assembly. Their capabilities help accelerate prototyping.
Location: Shenzhen, China
Services:
- PCB Prototype Fabrication
- PCB Assembly Services
- Functional Testing
- Component Procurement
- New Product Introduction
Industries Served:
- Consumer Electronics
- Industrial Equipment
- Automotive Electronics
- Medical Devices
Customers: OEM engineering teams, startups, design houses
Key Differentiators:
- 15+ years experience supporting prototype builds
- Small and mid-size orders accommodated
- Multiple quality certifications
- Convenient order tracking system
Certifications: ISO 9001, ISO 14001, ISO 13485
Conclusion
China offers a wide range of capable electronics manufacturing services companies to partner with for engineering and prototyping new electronic devices. They provide advanced expertise, rapid turnaround, and competitive costs to help innovators accelerate product development. With stringent quality systems, international sourcing and experience transitioning to production, they enable streamlined new product introduction. Global OEMs, startups and entrepreneurs are leveraging these expert Chinese prototyping partners to bring their electronics innovations to market faster.
Frequently Asked Questions
Q1: What are some of the benefits of prototyping electronics in China?
Some key benefits are:
- Access to skilled, low cost engineering talent
- Mature component supply chains
- Advanced manufacturing technologies
- Ability to scale to high volume production
- Cultural understanding of local Chinese market
- Cost savings compared to domestic US or Europe prototyping
- Convenient time zones for communication
Q2: What due diligence should be done before selecting an electronics prototyping partner in China?
Important factors to consider in selection process:
- Review their design capabilities, expertise and past projects
- Evaluate their quality certifications and processes
- Ensure they have good security and IP protection
- Check lead times, minimum order quantities
- Validate responsive communication channels
- Request customer references to check satisfaction
- Review their component sourcing abilities
- Audit their manufacturing setup if possible
- Align on project requirements like documentation, DFM, inspection testing needed