Are you looking to get started with ESP32 development using the Arduino IDE? Whether you’re working with the popular ESP32 WROOM32 or the newer ESP32-C3 boards, this comprehensive guide will walk you through the entire setup process. From installing the necessary software to troubleshooting common issues, you’ll learn everything needed to successfully flash code to your ESP32 devices.

Why Choose ESP32 for Your Projects?
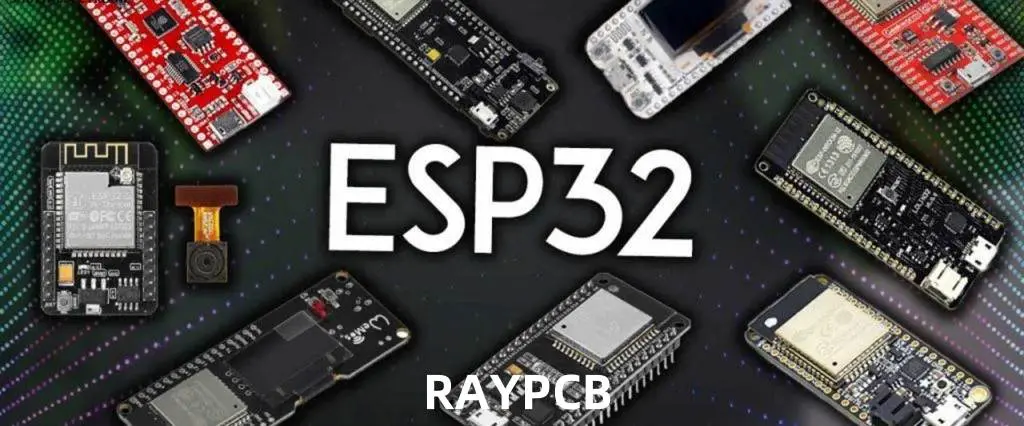
The ESP32 microcontroller family has revolutionized IoT development with its powerful features and affordable price point. Before diving into the setup process, let’s understand what makes ESP32 boards so popular among hobbyists and professionals alike.
Features and Capabilities of ESP32 Boards
ESP32 boards pack impressive capabilities into a small form factor. They support both Wi-Fi and Bluetooth connectivity, feature dual-core processors (in the WROOM32 variant), and offer numerous GPIO pins for connecting external components. The ESP32-C3 variant brings RISC-V architecture to the table, offering excellent performance while maintaining compatibility with existing ESP32 code.
These versatile microcontrollers can operate on low power, making them ideal for battery-operated devices and IoT applications. With built-in touch sensors, temperature sensors, and hall effect sensors, ESP32 boards provide a complete solution for a wide range of projects.
Comparing WROOM32 and C3 Variants
When selecting an ESP32 board for your project, understanding the differences between variants is crucial:
- ESP32 WROOM32: Features a dual-core processor, more GPIO pins, and generally higher processing power. Ideal for complex projects requiring substantial computational resources.
- ESP32-C3: Utilizes a single-core RISC-V processor, offers smaller form factor, lower power consumption, and reduced cost. Perfect for simpler IoT applications where size and power efficiency are priorities.
Both variants support Arduino IDE programming, making them accessible to developers familiar with the Arduino ecosystem.
Setting Up Arduino IDE for ESP32 Development
Let’s start with the essential steps to configure your Arduino IDE for ESP32 programming.
Installing Arduino IDE
Before programming ESP32 boards, you’ll need the Arduino IDE installed on your computer. If you’re just starting with ESP32, Arduino IDE is recommended for its simplicity and intuitive interface.
The process to install Arduino IDE is straightforward:
- Visit the Arduino official website to download the latest version
- Select the appropriate installer for your operating system (Windows, macOS, or Linux)
- Follow the installation prompts to complete the setup
You can choose between Arduino IDE 1.x and the newer Arduino IDE 2.x versions. Both support ESP32 development, but the setup process differs slightly between them.
Adding ESP32 Board Support to Arduino IDE 1.x
To program the ESP32 using Arduino IDE, you’ll need to install an add-on that enables the ESP32 board compatibility with Arduino’s programming language. Follow these steps to add ESP32 support:
- Open Arduino IDE
- Navigate to File > Preferences
- In the “Additional Board Manager URLs” field, add:
https://raw.githubusercontent.com/espressif/arduino-esp32/gh-pages/package_esp32_index.json - Click “OK” to save the preferences
- Go to Tools > Board > Boards Manager
- Search for “ESP32”
- Find “ESP32 by Espressif Systems” and click “Install”
- Wait for the installation to complete and restart Arduino IDE
Adding ESP32 Board Support to Arduino IDE 2.x
For the newer Arduino IDE 2.x, the process to add ESP32 support is slightly different but equally straightforward. Here’s how:
- Open Arduino IDE 2.x
- Click the Boards Manager icon in the left sidebar (or go to Tools > Board > Boards Manager)
- Search for “ESP32”
- Find “ESP32 by Espressif Systems” and click “Install”
- Select version 2.0.11 or newer from the dropdown menu
- Wait for the installation to complete
Configuring Your ESP32 Board
After installing the ESP32 board support, you need to configure Arduino IDE for your specific board model.
Setting Up WROOM32 Boards
To configure Arduino IDE for ESP32 WROOM32 boards:
- Connect your ESP32 WROOM32 board to your computer via USB
- In Arduino IDE, go to Tools > Board > ESP32 Arduino
- Select “ESP32 Dev Module” or “DOIT ESP32 DEVKIT V1” (depending on your board model)
- Set the following parameters under the Tools menu:
- Upload Speed: 921600
- CPU Frequency: 240MHz
- Flash Frequency: 80MHz
- Flash Mode: QIO
- Flash Size: 4MB
- Partition Scheme: Default 4MB with spiffs
- Core Debug Level: None
- PSRAM: Disabled
- Under Tools > Port, select the COM port where your ESP32 is connected
If you don’t see any available ports, you may need to install the appropriate USB drivers for your board.
Setting Up ESP32-C3 Boards
For ESP32-C3 boards, the configuration is slightly different. After connecting your board to the computer, select the corresponding board model and port. Follow these steps:
- Connect your ESP32-C3 board to your computer via USB
- In Arduino IDE, go to Tools > Board > ESP32 Arduino
- Select “ESP32C3 Dev Module” or your specific C3 board model
- Configure the following settings:
- Upload Speed: 460800
- USB CDC On Boot: Enabled (important for ESP32-C3)
- CPU Frequency: 160MHz
- Flash Frequency: 80MHz
- Flash Mode: QIO
- Flash Size: 4MB
- Partition Scheme: Default 4MB with spiffs
- Core Debug Level: None
- Select the appropriate port under Tools > Port
Installing USB Drivers
Many ESP32 boards require specific USB drivers to be recognized by your computer.
Common Driver Types
ESP32 development boards typically use USB-to-serial converter chips that may require driver installation before you can upload code to your board. The most common types are:
- CP210x: Used in many ESP32 DevKit boards and the WROOM32 module
- CH340/CH341: Found in lower-cost ESP32 boards and many ESP32-C3 variants
Installing Drivers on Different Operating Systems
Driver installation varies by operating system:
Windows:
- Download the appropriate driver from the manufacturer’s website
- Run the installer and follow the prompts
- You may need to restart your computer after installation
macOS:
- Download the macOS version of the driver
- Open the installer package and follow the instructions
- You may need to authorize the driver in System Preferences > Security & Privacy
Linux:
- Most Linux distributions include the necessary drivers by default
- For some boards, you may need to add your user to the “dialout” group with the command:
sudo usermod -a -G dialout $USER - Log out and log back in for the changes to take effect
Uploading Your First Sketch
Now let’s test your setup by uploading a simple sketch to your ESP32.
Basic Blink Sketch
To test the ESP32 board installation, upload a simple code that blinks the on-board LED (typically connected to GPIO 2). Here’s a basic sketch to try:
cpp// Simple blink sketch for ESP32
// LED pin varies by board - GPIO 2 is common for WROOM32, GPIO 8 for many C3 boards

#define LED_PIN 2  // Change to 8 for ESP32-C3 if needed

void setup() {
  pinMode(LED_PIN, OUTPUT);
  Serial.begin(115200);
  Serial.println("ESP32 Blink Test");
}

void loop() {
  digitalWrite(LED_PIN, HIGH);
  Serial.println("LED ON");
  delay(1000);
  digitalWrite(LED_PIN, LOW);
  Serial.println("LED OFF");
  delay(1000);
}
Putting ESP32 in Boot Mode
Some ESP32 boards don’t automatically enter programming mode when uploading code. If you encounter issues, you may need to manually enter boot mode by pressing specific button combinations.
For WROOM32 boards:
- Press and hold the BOOT button
- Click the upload button in Arduino IDE
- When you see “Connecting…” in the console, release the BOOT button
For ESP32-C3 boards:
- Press and hold the BOOT button
- Press the RESET button once while holding BOOT
- Release the BOOT button
- Click upload in Arduino IDE
Monitoring Serial Output
After uploading your sketch:
- Open the Serial Monitor by clicking the icon in the top-right corner or navigating to Tools > Serial Monitor
- Set the baud rate to 115200
- You should see the “LED ON” and “LED OFF” messages alternating every second
- The onboard LED should blink accordingly
Troubleshooting Common Issues
Even with careful setup, you might encounter some challenges. Here are solutions to the most common problems.
Connection and Upload Problems
If you’re having trouble uploading code to your ESP32:
- Port not found:
- Ensure your board is properly connected
- Install or reinstall the appropriate USB drivers
- Try a different USB cable (some cables are charge-only)
- Try a different USB port on your computer
- Upload timeout: If you see the error “A fatal error occurred: Failed to connect to ESP32: Timed out… Connecting…” it means your ESP32 is not in flashing/uploading mode.
- Follow the boot mode instructions mentioned earlier
- For persistent issues, try lowering the upload speed in Tools menu
- Board not responding:
- Press the reset button on your ESP32 board
- Disconnect and reconnect the USB cable
- Restart Arduino IDE
Serial Communication Issues
If you can upload code but don’t see serial output:
- No data in Serial Monitor: Lowering the baud rate can help stabilize the serial communication, especially if you’re using a lower-quality USB cable or a system with limited resources.
- Ensure your Serial Monitor baud rate matches the one in your code (typically 115200)
- Check that your code includes
Serial.begin(115200)in the setup function
- Garbled characters:
- Verify that the baud rate in Serial Monitor matches your code
- Try a different USB cable or port
- For ESP32-C3 boards, ensure “USB CDC On Boot” is enabled in the Tools menu
Advanced ESP32 Features with Arduino IDE
Once you’ve mastered the basics, you can explore more advanced capabilities of your ESP32 board.
Wi-Fi and Bluetooth Functionality
ESP32’s built-in wireless connectivity can be easily accessed through Arduino libraries:
- For Wi-Fi, use the
WiFi.hlibrary to connect to networks, create access points, or implement web servers - For Bluetooth, the
BluetoothSerial.hlibrary enables classic Bluetooth functionality, whileBLEDevice.hprovides Bluetooth Low Energy support
Working with ESP32 Peripherals
ESP32 boards offer numerous peripherals that can be controlled through Arduino code:
- Analog-to-Digital Conversion: Use
analogRead()to read values from the ADC pins - Digital-to-Analog Conversion: The
dacWrite()function outputs analog voltages on supported pins - Touch Sensors: Access the capacitive touch sensors with
touchRead()functions - PWM Control: Create precise PWM signals using the
ledcfunctions for motor control or LED dimming
File System and Data Storage
ESP32 supports various file systems for data storage:
- SPIFFS: A simple file system for the flash memory, accessible through the SPIFFS library
- LittleFS: A more robust alternative to SPIFFS with better wear leveling
- SD Card: Interface with SD cards using the SD library for expanded storage capacity
Project Examples for ESP32 WROOM32 and C3
Let’s explore some practical applications for your newly configured ESP32 boards.
IoT Weather Station
Create a simple weather station that monitors temperature, humidity, and pressure:
- Connect BME280 or DHT22 sensors to your ESP32
- Read sensor data at regular intervals
- Send data to a cloud platform like ThingSpeak or create a local web server to display readings
- Implement sleep modes to conserve battery life for remote installations
Smart Home Controller
Transform your ESP32 into a smart home hub:
- Use relays to control household appliances
- Implement a web interface or mobile app for remote control
- Add sensors to create automation rules based on environmental conditions
- Integrate with existing smart home platforms like Home Assistant or MQTT brokers
Differences in Implementation Between WROOM32 and C3
When developing projects for different ESP32 variants, keep these considerations in mind:
- GPIO Assignments: Pin numbering and available pins differ between models
- Power Consumption: C3 generally consumes less power, making it better for battery-operated devices
- Processing Power: WROOM32’s dual-core architecture handles complex tasks more efficiently
- Memory Constraints: Adjust your code complexity based on the available RAM and flash memory
Conclusion
Setting up the Arduino IDE for ESP32 development opens up a world of possibilities for your DIY electronics projects. Whether you’re working with the powerful ESP32 WROOM32 or the energy-efficient ESP32-C3, this guide has equipped you with the knowledge to install the necessary software, configure your boards, and start programming.
Remember that the ESP32 ecosystem is constantly evolving, with new board variants and software updates appearing regularly. Stay connected with the ESP32 community through forums and the official Espressif documentation to keep up with the latest developments.
With your ESP32 Arduino setup complete, you’re ready to explore the full potential of these versatile microcontrollers. From simple LED blink projects to sophisticated IoT applications, the ESP32 platform offers the perfect balance of performance, features, and affordability for makers at all skill levels.