Printed Circuit Board (PCB) assembly is a crucial skill for anyone interested in electronics. Whether you’re a hobbyist, a student, or an aspiring professional, mastering PCB assembly can open up a world of possibilities for creating your own electronic projects. This article will provide you with essential tips and tricks to make your PCB assembly journey smoother and more enjoyable.
Understanding PCB Basics
Before diving into assembly techniques, it’s important to understand the basics of PCBs.
What is a PCB?
A Printed Circuit Board (PCB) is a board that connects electronic components using conductive tracks, pads, and other features etched from copper sheets laminated onto a non-conductive substrate.
Components of a PCB
PCBs consist of several key elements:
- Substrate
- Copper layers
- Solder mask
- Silkscreen
- Pads and vias
- Traces
Types of PCBs
| PCB Type | Description | Common Applications |
| Single-sided | One copper layer | Simple electronics, calculators |
| Double-sided | Two copper layers | Power supplies, amplifiers |
| Multi-layer | Three or more copper layers | Smartphones, computers |
| Rigid | Standard inflexible board | Most electronic devices |
| Flex | Flexible substrate | Wearables, compact devices |
| Rigid-flex | Combination of rigid and flex | Aerospace, medical devices |
Essential Tools for PCB Assembly
Having the right tools is crucial for successful PCB assembly. Here’s a list of essential tools:
Soldering Equipment
- Soldering iron
- Soldering station
- Solder wire
- Flux
- Desoldering pump or wick
Hand Tools
- Needle-nose pliers
- Wire cutters
- Tweezers
- Magnifying glass or loupe
- Multimeter
Safety Equipment
- Safety glasses
- Fume extractor
- Heat-resistant mat
- Anti-static wrist strap
Optional but Helpful Tools
- Hot air rework station
- Microscope
- PCB holder or vise
- Solder paste dispenser
Preparing for PCB Assembly
Proper preparation is key to successful PCB assembly. Follow these steps to ensure you’re ready to begin:
1. Gather All Necessary Components
Create a bill of materials (BOM) and ensure you have all required components before starting.
2. Organize Your Workspace
Set up a clean, well-lit area with all your tools within reach.
3. Review the PCB Design
Familiarize yourself with the PCB layout and component placement.
4. Check for Any Design Errors
Double-check the PCB design for any mistakes before beginning assembly.
5. Clean the PCB
Use isopropyl alcohol to clean the PCB surface before soldering.
PCB Assembly Techniques
There are two main techniques for PCB assembly: through-hole and surface mount. We’ll cover both methods in detail.
Through-Hole Assembly
Through-hole assembly involves inserting component leads through holes in the PCB and soldering them on the opposite side.
Steps for Through-Hole Assembly
- Insert components
- Bend leads slightly to hold components in place
- Flip the board
- Solder leads
- Trim excess lead length
Tips for Through-Hole Soldering
- Heat both the pad and the lead
- Apply solder to the junction, not the iron tip
- Create a small solder fillet around the lead
- Avoid overheating components
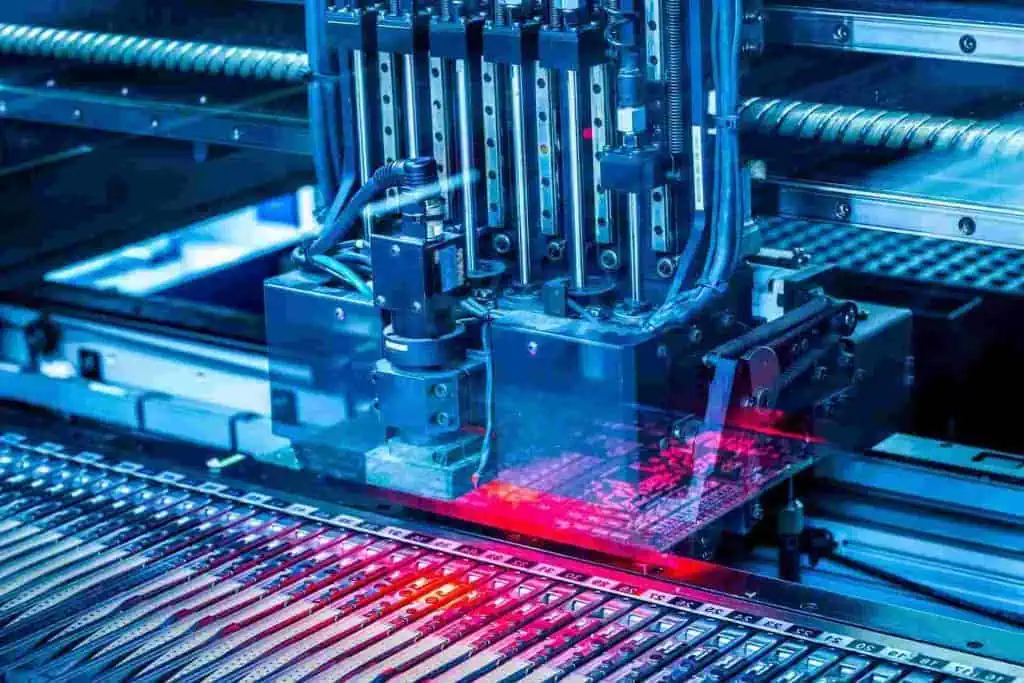
Surface Mount Assembly
Surface Mount Technology (SMT) involves soldering components directly onto the surface of the PCB.
Steps for Surface Mount Assembly
- Apply solder paste to pads
- Place components using tweezers
- Reflow solder using a hot air station or reflow oven
- Inspect and touch up as needed
Tips for Surface Mount Soldering
- Use a stencil for applying solder paste
- Practice component placement with tweezers
- Start with larger components and work your way to smaller ones
- Use flux to improve solder flow
Common PCB Assembly Mistakes and How to Avoid Them
Being aware of common mistakes can help you avoid them in your own projects.
1. Incorrect Component Orientation
Always double-check component polarity and orientation before soldering.
2. Cold Solder Joints
Ensure proper heating of both the pad and component lead for a good solder joint.
3. Solder Bridges
Use the appropriate amount of solder and clean your iron tip regularly to prevent bridges.
4. Overheating Components
Be mindful of heat-sensitive components and use heat sinks when necessary.
5. Poor Flux Removal
Clean the PCB thoroughly after soldering to remove flux residue.
Advanced PCB Assembly Techniques
Once you’ve mastered the basics, you can move on to more advanced techniques.
1. BGA and QFN Soldering
Ball Grid Array (BGA) and Quad Flat No-lead (QFN) packages require specialized equipment and techniques.
2. Reflow Soldering
Using a reflow oven or hot plate for precise temperature control during SMT assembly.
3. Wave Soldering
Automated soldering technique for through-hole components in high-volume production.
4. Mixed Technology Assembly
Combining through-hole and surface mount components on the same board.
Troubleshooting and Rework
Even with careful assembly, issues may arise. Here are some troubleshooting tips:
Visual Inspection
Use a magnifying glass or microscope to check for:
- Solder bridges
- Missing solder joints
- Incorrect component placement
- Damaged components
Electrical Testing
Use a multimeter to check for:
- Continuity
- Proper voltage levels
- Resistance measurements
Common Rework Techniques
| Issue | Rework Technique |
| Solder bridge | Use desoldering wick to remove excess solder |
| Cold joint | Reflow the solder joint with fresh solder |
| Misaligned component | Use hot air to remove and reposition |
| Damaged pad | Create a solder bridge or use wire to bypass |
Best Practices for PCB Assembly
Follow these best practices to improve your PCB assembly skills:
1. Work in a Clean Environment
Minimize dust and contaminants in your workspace.
2. Use Quality Tools and Materials
Invest in good-quality soldering equipment and components.
3. Practice Proper ESD Protection
Use an anti-static wrist strap and mat to prevent damage to sensitive components.
4. Take Breaks and Stay Focused
PCB assembly requires concentration. Take regular breaks to maintain focus.
5. Document Your Work
Keep notes on your assembly process for future reference.
6. Continual Learning
Stay updated on new techniques and technologies in PCB assembly.
Environmental Considerations in PCB Assembly
As an electronics enthusiast, it’s important to consider the environmental impact of your hobby.
1. Use Lead-Free Solder
Opt for lead-free solder to reduce environmental hazards.
2. Proper Disposal of Electronic Waste
Recycle old PCBs and components through appropriate e-waste channels.
3. Energy Efficiency
Use energy-efficient soldering equipment and turn off tools when not in use.
4. Minimize Chemical Use
Use flux and cleaning agents sparingly and opt for environmentally friendly options when possible.
Future Trends in PCB Assembly
Stay ahead of the curve by familiarizing yourself with emerging trends in PCB assembly:
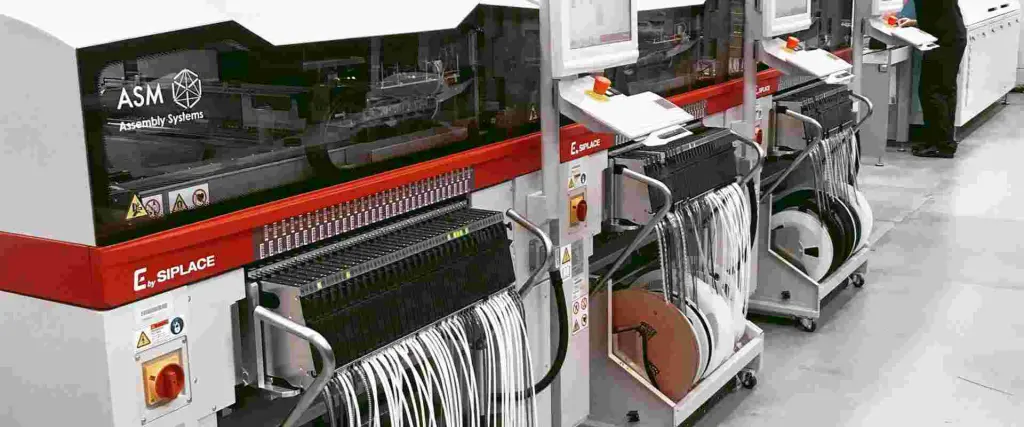
1. Automated Assembly
Increasing use of pick-and-place machines and automated soldering systems.
2. 3D Printed Electronics
Integration of 3D printing technology with PCB manufacturing.
3. Flexible and Stretchable PCBs
Development of PCBs that can bend or stretch for wearable electronics.
4. Embedded Components
Incorporating components within the PCB layers for increased density.
5. AI-Assisted Design and Assembly
Leveraging artificial intelligence for optimized PCB design and assembly processes.
Frequently Asked Questions (FAQ)
1. What’s the difference between through-hole and surface mount assembly?
Through-hole assembly involves inserting component leads through holes in the PCB and soldering them on the opposite side. Surface mount assembly involves soldering components directly onto the surface of the PCB. Through-hole is generally easier for beginners but takes up more space, while surface mount allows for higher component density and is more commonly used in modern electronics.
2. How do I choose the right soldering iron temperature?
The correct soldering iron temperature depends on the type of solder you’re using and the components you’re working with. As a general rule:
- For lead-based solder: 300-330°C (572-626°F)
- For lead-free solder: 350-370°C (662-698°F) Always start at a lower temperature and increase as needed to achieve good solder flow without damaging components.
3. How can I prevent solder bridges?
To prevent solder bridges:
- Use the appropriate amount of solder
- Keep your soldering iron tip clean
- Use flux to improve solder flow
- Practice proper soldering technique
- Use a finer soldering iron tip for closely spaced pads If bridges do occur, use desoldering wick or a solder sucker to remove excess solder.
4. What should I do if I accidentally damage a pad on the PCB?
If you damage a pad:
- Clean the area thoroughly
- If possible, scrape away the solder mask to expose nearby traces
- Use a small wire to create a jumper from the component lead to the exposed trace
- Solder the wire in place
- Use epoxy to secure the repair if needed For more severe damage, you may need to use a PCB repair kit or consider replacing the board.
5. How important is flux in PCB assembly?
Flux is crucial in PCB assembly as it:
- Removes oxides from the metal surfaces
- Improves solder flow and wetting
- Helps create stronger solder joints
- Prevents solder balls and bridges Always use flux when soldering, either as a separate product or within your solder wire. Remember to clean flux residue after soldering to prevent corrosion and electrical issues.
In conclusion, PCB assembly is a valuable skill that combines technical knowledge with hands-on practice. By following these tips and tricks, beginners can build a strong foundation for successful PCB assembly. Remember that patience and persistence are key – with practice, you’ll soon be creating professional-quality PCB assemblies for your electronics projects.