Introduction to High Speed PCB Design
In today’s rapidly evolving electronic landscape, the demand for faster, more efficient devices continues to grow exponentially. At the heart of these advancements lies a critical discipline: high speed PCB design. Modern electronic systems—from smartphones and laptops to data centers and automotive electronics—rely on printed circuit boards that can effectively handle high-speed signals while maintaining performance integrity.
High speed PCB design represents the sophisticated art and science of creating circuit boards that can reliably transmit signals at rates exceeding 1 Gbps. As clock frequencies and data rates increase, traditional PCB design approaches fall short, introducing a host of complex challenges including signal integrity issues, electromagnetic interference (EMI), and thermal management concerns.
The importance of mastering signal integrity, EMI control, and proper layout techniques cannot be overstated. When signals travel at high speeds, they behave less like simple electrical connections and more like transmission lines with complex electromagnetic properties. A minor design oversight—such as improper trace routing or inadequate grounding—can lead to significant performance degradation, intermittent failures, or complete system malfunction.
Common challenges faced by engineers in high-speed circuit design include:
- Managing signal reflections and impedance discontinuities
- Controlling crosstalk between adjacent traces
- Mitigating electromagnetic interference
- Handling propagation delays and timing issues
- Selecting appropriate materials with suitable dielectric properties
- Balancing performance requirements with manufacturing constraints
This comprehensive guide is intended for a wide range of professionals, including electrical engineers, PCB designers, hardware developers, and professionals working with design tools like Altium Designer and KiCad. Whether you’re designing high-speed digital circuits, RF systems, or mixed-signal boards, the principles and techniques outlined here will help you navigate the complexities of high-speed PCB design with confidence.
What Is High-Speed PCB Design?
Defining the High-Speed Domain
High speed PCB design refers to the specialized discipline of creating printed circuit boards that can reliably transmit and process signals at elevated speeds without degradation. But what exactly constitutes “high speed” in the context of PCB design?
While there’s no universal threshold, most industry experts consider designs with edge rates (signal rise and fall times) below 1 nanosecond or data rates above 1 Gbps to fall into the high-speed category. More importantly, high-speed design becomes necessary when the signal’s rise time approaches a critical threshold where transmission line effects become significant.
A practical rule of thumb states that high-speed considerations become essential when:
Signal Rise Time (Tr) < 4 × Signal Propagation DelayAt this point, the electromagnetic wave nature of signals becomes prominent, and traditional DC circuit analysis no longer sufficiently describes circuit behavior.
High-Speed vs. High-Frequency PCB Design
Though often used interchangeably, high-speed and high-frequency PCB design represent distinct concepts:
- High-speed design primarily concerns digital circuits with fast edge rates and focuses on maintaining signal integrity during state transitions. The challenge lies in preserving square wave shapes and timing relationships.
- High-frequency design typically relates to analog or RF circuits operating at elevated frequencies (often in the GHz range). Here, the focus is on maintaining precise impedance control, minimizing insertion loss, and managing wave propagation.
While there’s significant overlap in techniques, high-frequency designs often require more specialized materials and more rigorous attention to electromagnetic field management.
Why Speed Affects Signal Integrity and EMI
As signal speeds increase, physical board characteristics that were once negligible become critical factors:
- Transmission line effects: At high speeds, traces behave as transmission lines where signals propagate as waves, making impedance control essential.
- Capacitive and inductive coupling: Faster edge rates intensify electromagnetic coupling between adjacent traces, increasing crosstalk.
- Dielectric losses: At higher frequencies, signal energy dissipates in the board material, causing attenuation and distortion.
- Resonance and radiation: High-frequency components of fast signals can excite resonant structures and create unintended antennas, generating EMI.
- Ground bounce and power integrity issues: Rapid current changes stress power distribution networks, creating noise that affects signal integrity.
Typical Applications of High-Speed Design
High speed PCB design techniques are crucial in numerous applications:
- Data networking equipment: Switches, routers, and servers operating at multi-gigabit data rates
- Computing systems: CPUs, memory interfaces, and high-speed peripheral connections
- Telecommunications: Base stations, mobile devices, and infrastructure equipment
- Test and measurement instruments: Oscilloscopes, spectrum analyzers, and high-speed data acquisition systems
- Consumer electronics: High-definition displays, gaming consoles, and multimedia devices
- Automotive electronics: Advanced driver assistance systems, infotainment, and vehicle control units
- Aerospace and defense: Radar systems, communication equipment, and navigation electronics
As technology advances, the boundary defining “high speed” continuously shifts, requiring designers to stay current with evolving best practices and techniques.
High-Speed PCB Design Guidelines

Fundamental Design Principles
Successful high speed PCB design requires adherence to fundamental principles that collectively ensure signal integrity and system performance. These principles form the foundation upon which more specific techniques are built:
- Signal path continuity: Maintain uninterrupted signal paths with minimal discontinuities.
- Current loop minimization: Keep signal return paths short and direct.
- Impedance control: Maintain consistent impedance throughout signal paths.
- EMI containment: Implement strategies to contain electromagnetic fields.
- Layer management: Utilize stackup design to optimize signal integrity.
Let’s explore these principles in greater detail:
Controlled Impedance
Controlled impedance is perhaps the most fundamental concept in high speed PCB design. When signals travel at high speeds, traces must be treated as transmission lines with specific impedance characteristics rather than simple connections.
The impedance of a trace is determined by several factors:
- Trace width and thickness
- Distance to reference planes
- Dielectric constant (Dk) of the board material
- Trace geometry (microstrip, stripline, etc.)
For digital signals, common target impedances include:
- 50Ω for single-ended signals
- 100Ω for differential pairs
Consistent impedance throughout the signal path is crucial for minimizing reflections. Any abrupt change in impedance creates a reflection point, potentially causing signal integrity issues. Modern PCB design tools provide impedance calculators to help determine the appropriate trace dimensions based on your board stackup.
Differential Pair Routing
Differential signaling has become the standard approach for high-speed interfaces due to its superior noise immunity and EMI performance. Proper differential pair routing requires:
- Tight coupling: Keep paired traces close together (typically 2-3 times the trace width) to maximize common-mode noise rejection.
- Length matching: Ensure both traces in a pair have identical lengths to maintain timing relationships.
- Spacing consistency: Maintain consistent spacing between the traces throughout the route.
- Symmetrical routing: Keep both traces symmetrical relative to nearby reference planes and other signal traces.
- Avoid split planes: Route differential pairs over continuous reference planes without splits or gaps.
When routing differential pairs, maintain a minimum clearance from other signal traces (typically 3-5 times the trace width) to minimize crosstalk.
Termination Techniques
Proper termination is essential for controlling reflections in high-speed circuits. Common termination strategies include:
- Series termination: A resistor placed near the driver matches the trace impedance, absorbing reflections that return to the source.
- Parallel termination: A resistor to ground at the receiver end matches the trace impedance, preventing reflections at the load.
- Thevenin termination: A voltage divider network provides both DC biasing and AC termination.
- AC termination: A capacitor in series with a termination resistor blocks DC while terminating high-frequency components.
The optimal termination strategy depends on the specific interface requirements, signal characteristics, and board constraints. Many high-speed interfaces specify recommended termination schemes in their design guidelines.
Layer Stack-up Design
An effective layer stackup is fundamental to high-speed design success. Key considerations include:
- Signal-to-ground proximity: Keep signal layers adjacent to continuous reference planes.
- Power-ground plane pairs: Create closely-spaced power-ground plane pairs to form low-inductance power distribution networks.
- Layer symmetry: Design symmetrical stackups to prevent board warping during manufacturing.
- Dielectric thickness: Control dielectric thickness between layers to achieve desired impedance values.
A typical high-speed stackup might include:
- Top signal layer (microstrip)
- Ground plane
- Signal layer (stripline)
- Power plane
- Signal layer (stripline)
- Ground plane
- Bottom signal layer (microstrip)
This arrangement ensures every signal layer is adjacent to a reference plane, providing well-defined return paths and controlled impedance environments.
Read more about:
High-Frequency PCB Design Rules and Considerations

Defining High Frequency in PCB Terms
In PCB design, “high frequency” typically refers to circuits operating above 100 MHz, though this threshold continues to decrease as technology advances. At these frequencies, wavelengths become comparable to physical board dimensions, making electromagnetic wave propagation effects dominant.
The relationship between frequency and wavelength in PCB materials is given by:
λ = c / (f × √εr)Where:
- λ is wavelength
- c is speed of light in vacuum
- f is frequency
- εr is the relative permittivity (dielectric constant) of the material
When circuit dimensions approach 1/10 of the wavelength, transmission line effects become significant, necessitating high-frequency design techniques.
Dielectric Material Selection and Properties
Material selection becomes increasingly critical as frequencies rise. Key material properties include:
- Dielectric constant (Dk): Affects signal propagation speed and impedance. Lower values generally yield better high-frequency performance.
- Dissipation factor (Df): Represents dielectric losses. Lower values minimize signal attenuation.
- Glass transition temperature (Tg): Indicates thermal stability. Higher values improve reliability.
- Coefficient of thermal expansion (CTE): Affects mechanical stability during temperature changes.
- Moisture absorption: Impacts electrical properties stability in varying environments.
High-frequency applications often require specialized materials with lower dielectric constants and dissipation factors than standard FR-4. These properties remain stable across wider frequency and temperature ranges.
Signal Loss and Dispersion Management
As frequencies increase, signal losses become increasingly problematic:
- Conductor losses: Result from skin effect and surface roughness. These increase proportionally to the square root of frequency.
- Dielectric losses: Caused by energy absorption in the substrate material. These increase linearly with frequency.
- Radiation losses: Occur when signal energy radiates into space rather than propagating along the intended path.
Dispersion (variation in propagation velocity with frequency) causes different frequency components of a signal to travel at different speeds, distorting pulse shapes. Techniques to manage these issues include:
- Using lower-loss materials
- Widening traces to reduce conductor losses
- Implementing pre-emphasis and equalization
- Minimizing via transitions and discontinuities
- Employing smooth trace routing without sharp bends
Shielding and Isolation Techniques
Effective isolation becomes increasingly important at higher frequencies:
- Guard traces: Grounded traces placed between sensitive signal paths to intercept coupling.
- Ground plane stitching: Closely-spaced vias connecting ground planes to create electrical walls.
- Compartmentalization: Dividing the board into separate RF zones with ground barriers.
- EMI shields: Metal enclosures or cans covering sensitive circuits.
- Ground pour islands: Strategic ground copper pours surrounding sensitive components.
For exceptionally sensitive circuits, consider advanced techniques like buried cavities or embedded waveguides to provide superior isolation.
PCB Material for High-Speed and High-Frequency Designs
FR-4 vs. Advanced Materials
For decades, FR-4 has been the standard substrate material for PCBs due to its reasonable performance, manufacturability, and cost-effectiveness. However, as signal speeds and frequencies increase, its limitations become apparent:
Standard FR-4 Characteristics:
- Dielectric constant (Dk): ~4.0-4.7 (varies with manufacturer and frequency)
- Dissipation factor (Df): ~0.02 at 1 GHz
- Maximum usable frequency: Generally suitable up to 1-3 GHz
- Glass transition temperature (Tg): 130-180°C
For applications exceeding these parameters, advanced materials become necessary:
High-Performance Materials:
- Rogers Corporation laminates:
- Isola materials:
- I-Speed: Dk ≈ 3.8, Df ≈ 0.008, suitable for high-speed digital
- Astra MT77: Dk ≈ 3.0, Df ≈ 0.0017, excellent for RF/microwave
- Nelco materials:
- N4000-13: Dk ≈ 3.7, Df ≈ 0.009, good for high-speed digital
- N9000: Dk ≈ 2.8, Df ≈ 0.0022, designed for microwave applications
Many modern designs employ hybrid stackups, using advanced materials for critical signal layers while maintaining FR-4 for other layers to balance performance and cost.
Dk, Df, and How Material Properties Affect Signal Performance
Understanding material properties and their impact on signal performance is crucial for high-speed design:
Dielectric Constant (Dk):
- Determines signal propagation velocity (v = c/√Dk)
- Affects impedance calculations
- Influences wavelength at a given frequency
- Lower Dk typically allows faster signal propagation
Dissipation Factor (Df):
- Directly proportional to dielectric loss
- Higher values cause greater signal attenuation
- Increases with frequency
- Critical for long traces and high-frequency applications
Material Stability:
- Dk/Df variation with frequency (dispersion)
- Temperature coefficient of Dk
- Moisture absorption effects on electrical properties
- Mechanical stability during manufacturing processes
These properties profoundly affect signal integrity in high-speed designs:
- Signal attenuation: Higher Df materials cause greater signal amplitude reduction over distance.
- Propagation delay: Dk determines how quickly signals travel, affecting timing budgets.
- Impedance consistency: Variations in Dk across the board affect impedance control.
- Signal distortion: Frequency-dependent losses can distort signal shapes, closing eye diagrams.
Choosing the Right PCB Material for High Speed Design
Selecting appropriate materials involves balancing multiple factors:
- Performance requirements:
- Maximum frequency/data rate
- Trace lengths
- Loss budget
- Impedance control precision
- Manufacturing considerations:
- Compatibility with standard processes
- Drilling and plating requirements
- Layer count and overall thickness
- Cost constraints
- Environmental factors:
- Operating temperature range
- Humidity exposure
- Thermal cycling requirements
- Expected lifetime
A structured selection approach includes:
- Determine the highest frequency/fastest edge rate in your design
- Calculate maximum acceptable losses for your longest traces
- Identify materials meeting these electrical requirements
- Evaluate manufacturing compatibility and cost implications
- Consider hybrid stackups to optimize performance vs. cost
- Consult with your fabricator regarding material availability and processability
For most high-speed digital designs below 10 Gbps, high-performance FR-4 or mid-range specialized materials offer a good balance. For higher speeds or RF applications, premium materials become necessary despite their higher cost.
Signal Integrity in High-Speed PCB Design
Understanding Signal Integrity
Signal integrity refers to a signal’s ability to reliably transmit information from source to destination while maintaining sufficient quality to be correctly interpreted by the receiver. In high-speed digital systems, this means preserving the timing relationships and voltage levels necessary for proper circuit operation.
The fundamental goal of signal integrity engineering is to ensure that signals arrive at their destinations with:
- Sufficient amplitude (voltage margin)
- Correct timing (timing margin)
- Minimal distortion (shape fidelity)
- Adequate noise immunity (noise margin)
As speeds increase, achieving these goals becomes increasingly challenging due to physical effects that can be largely ignored in slower designs.
Signal Reflections, Crosstalk, and Skew
Signal Reflections: Reflections occur when signals encounter impedance discontinuities along transmission paths. These discontinuities can result from:
- Changes in trace width
- Vias and layer transitions
- Component pads and connections
- Branches and stubs
- Improperly terminated traces
Reflections can cause:
- Voltage overshoots and undershoots
- Ringing and oscillation
- False triggering
- Reduced noise margins
Crosstalk: Crosstalk represents unwanted coupling between adjacent signal paths through:
- Capacitive coupling (electric field interaction)
- Inductive coupling (magnetic field interaction)
Crosstalk severity increases with:
- Faster edge rates
- Longer parallel run lengths
- Closer spacing between traces
- Weaker driver impedances
Skew: Skew refers to timing differences between related signals, including:
- Length skew: Different physical path lengths
- Propagation skew: Variations in signal velocity due to material inconsistencies
- Loading skew: Different capacitive loading on related signals
- Driver skew: Timing variations in driver circuitry
For parallel interfaces, excessive skew reduces timing margins. For differential pairs, skew degrades common-mode rejection and can cause mode conversion.
Techniques to Maintain Signal Integrity
Impedance Control:
- Maintain consistent trace geometries
- Use continuous reference planes
- Implement proper termination schemes
- Minimize vias and transitions
Reflection Management:
- Match trace impedance to source and load impedances
- Apply appropriate termination strategies
- Avoid stubs and unnecessary branches
- Use gradual transitions rather than abrupt changes
Crosstalk Reduction:
- Increase spacing between critical traces
- Minimize parallel run lengths
- Use guard traces or ground planes between sensitive signals
- Route orthogonally on adjacent layers
Timing Management:
- Implement length matching for parallel buses
- Use serpentine routing (controlled meandering) for delay equalization
- Account for propagation velocity in different materials
- Consider clock distribution techniques (H-trees, star routing)
Power Integrity Improvements:
- Use adequate decoupling capacitors
- Implement low-inductance power distribution networks
- Minimize current loop areas
- Employ proper ground plane design
Simulation Tools and Modeling
Modern high-speed design relies heavily on simulation and modeling tools:
- Time-domain simulators: SPICE and its derivatives model circuit behavior in the time domain, showing waveforms, reflections, and crosstalk.
- Frequency-domain analysis: S-parameter modeling reveals frequency-dependent behavior, essential for loss analysis.
- Field solvers: Electromagnetic field simulation tools provide accurate impedance calculations and field visualization.
- Signal integrity analyzers: Specialized tools in EDA software perform eye diagram analysis, jitter estimation, and pre/post-emphasis optimization.
- IBIS models: Industry-standard behavioral models capture I/O buffer characteristics without revealing proprietary circuit details.
Modern PCB design workflows integrate pre-layout simulation for feasibility assessment, in-design validation for ongoing verification, and post-layout analysis for final verification. This multi-stage approach helps identify and resolve signal integrity issues throughout the design process.
Electromagnetic Interference (EMI) Control
How EMI Affects High-Speed Circuits
Electromagnetic interference (EMI) represents unwanted electromagnetic energy that degrades system performance. In high-speed designs, EMI challenges manifest in two primary forms:
- Emissions: Unwanted electromagnetic energy radiating from your circuit that might interfere with other systems or violate regulatory standards.
- Susceptibility: Your circuit’s vulnerability to external electromagnetic fields that can corrupt signals or disrupt operation.
High-speed circuits are particularly prone to EMI issues because:
- Fast edge rates contain significant high-frequency energy
- Digital signals include harmonics extending far beyond the fundamental frequency
- Signal paths can inadvertently function as antennas
- Power distribution networks can propagate noise throughout the system
- Ground bounce and power plane resonance can amplify interference
Beyond regulatory compliance, effective EMI control directly improves system reliability by:
- Reducing bit error rates in communication interfaces
- Preventing sporadic system resets or lockups
- Eliminating mysterious performance degradation
- Improving noise margins and timing stability
Layout and Routing Strategies to Reduce EMI
Effective PCB layout represents your first line of defense against EMI:
- Component placement:
- Group related functions together
- Separate noisy circuits (switching power supplies, oscillators) from sensitive analog sections
- Place connectors strategically to minimize interference entry/exit points
- Orient oscillators and crystals to minimize radiation in critical directions
- Signal routing:
- Keep high-speed traces short and direct
- Route sensitive signals away from board edges
- Avoid routing high-speed signals under crystals or oscillators
- Implement routing “moats” around noisy sections
- Layer allocation:
- Dedicate inner layers to power and ground planes
- Avoid routing high-speed signals on outer layers when possible
- Use solid reference planes rather than patchwork ground pours
- Implement proper stackup with signal-ground layer pairing
- Current return paths:
- Ensure every signal has a clear, low-impedance return path
- Avoid crossing splits in reference planes
- Add stitching capacitors where plane changes are necessary
- Use sufficient ground vias for layer transitions
Filtering, Grounding, and Shielding Techniques
Beyond layout, additional EMI control techniques include:
Filtering:
- Add ferrite beads to power inputs for high-frequency noise suppression
- Implement PI filters (capacitor-inductor-capacitor) on noisy power rails
- Place common-mode chokes on differential pairs entering/exiting the board
- Use feedthrough capacitors at enclosure penetrations
Grounding:
- Implement a single-point ground strategy for mixed-signal designs
- Avoid ground loops in multi-board systems
- Use star grounding for sensitive analog sections
- Ensure low-impedance connections between ground planes
Shielding:
- Apply board-level shields over sensitive circuits
- Use shield cans with proper grounding at regular intervals
- Implement chassis grounding with low-impedance connections
- Consider conductive gaskets for enclosure seams
Edge Treatment:
- Implement guard traces around board edges
- Use ground vias along edges to stitch top and bottom planes
- Consider edge plating for critical applications
- Keep high-speed traces at least 3H distance from edges (where H is the height above the ground plane)
Effective EMI control requires a comprehensive approach integrating multiple techniques. Rather than applying a single solution, combine complementary strategies to address both common-mode and differential-mode interference across the frequency spectrum of concern.
High-Speed Routing Guidelines
Trace Width and Spacing
Trace dimensions critically impact high-speed signal performance:
Width Considerations:
- Wider traces reduce DC resistance and conductor losses
- Narrower traces allow higher routing density
- Width directly affects impedance (wider traces = lower impedance)
- Maintain consistent width throughout a signal path
Typical Width Guidelines:
- High-speed digital (up to 10 Gbps): 5-8 mils for inner layers, 6-10 mils for outer layers
- RF signals: Calculated based on impedance requirements
- Power distribution: Sized according to current requirements
Spacing Requirements:
- Minimum spacing determined by manufacturing capabilities (typically 3-5 mils)
- Critical high-speed signals often need greater spacing (3-5× trace width)
- Differential pairs require precise spacing for impedance control
- Greater spacing reduces crosstalk but consumes board space
Practical Recommendations:
- Calculate optimal trace widths based on impedance requirements
- Maintain consistent width throughout signal paths
- Use wider traces for long runs to reduce losses
- Increase spacing between critical signals beyond manufacturing minimums
Via Design and Placement
Vias represent necessary evils in high-speed design, introducing impedance discontinuities and parasitic effects:
Via Types:
- Through-hole: Spans entire board thickness
- Blind: Connects outer layer to inner layer
- Buried: Connects inner layers without reaching outer surfaces
- Microvias: Small-diameter vias typically formed by laser drilling
Performance Considerations:
- Inductance: ~0.5-1nH for standard through-hole vias
- Capacitance: ~0.1-0.5pF depending on via structure and planes
- Stub effects: Unterminated via portions act as resonant stubs
- Impedance discontinuity: Introduces signal reflections
Best Practices:
- Minimize via usage in critical high-speed paths
- Use backdrill or blind/buried vias to eliminate stubs
- Employ via stitching near high-speed traces for controlled return paths
- Add ground vias near signal vias to reduce loop inductance
- Use multiple vias in parallel for power connections to reduce inductance
- Maintain adequate spacing between vias to prevent coupling
Return Path Management
Every signal current requires a corresponding return current path, following the path of least impedance:
- At DC and low frequencies, return current follows the path of least resistance
- At high frequencies, return current follows the path of least inductance, typically directly beneath the signal trace
Critical Guidelines:
- Provide continuous reference planes under high-speed traces
- Avoid crossing splits or gaps in reference planes
- Add stitching capacitors where reference plane changes are unavoidable
- Use sufficient ground vias for layer transitions
- Keep signal loop areas minimal
- Ensure proper decoupling near driver and receiver components
Common Mistakes:
- Routing high-speed signals over split planes
- Insufficient return vias near signal vias
- Neglecting return path during layer transitions
- Assuming a distant ground connection is sufficient
Differential Pair Matching
Differential signaling provides superior noise immunity and reduced EMI, but requires careful implementation:
Matching Requirements:
- Length matching: Typically within 5-10 mils for most interfaces
- Intra-pair skew: Minimize timing differences between positive and negative signals
- Inter-pair skew: For multi-pair interfaces like PCI Express, maintain consistent timing across pairs
- Coupling: Maintain consistent spacing throughout the route
Routing Techniques:
- Route differential pairs together with consistent spacing
- Use symmetrical meandering for length matching
- Maintain consistent reference plane relationships
- Avoid excessive serpentine traces that increase crosstalk susceptibility
- Keep differential pairs away from single-ended signals
- Maintain minimum spacing from other pairs (typically 3× the intra-pair spacing)
Advanced Considerations:
- Balance the tradeoff between tight coupling (better common-mode rejection) and crosstalk to adjacent pairs
- Consider using specialized topologies like broadside coupling in complex designs
- Implement via optimization for differential pairs to maintain impedance control
High-Speed PCB Layout Techniques
Component Placement for Optimal Signal Flow
Strategic component placement forms the foundation of successful high-speed design:
- Signal flow orientation:
- Arrange components to minimize signal path lengths
- Orient parts to facilitate natural signal flow direction
- Consider data movement patterns across the board
- Critical component grouping:
- Keep related components close together
- Place driver-receiver pairs with minimal separation
- Position termination components near signal endpoints
- Special considerations:
- Place clock generators centrally to their loads
- Position termination resistors at the end of transmission lines
- Locate bypass capacitors as close as possible to IC power pins
- Place connectors strategically to minimize long high-speed runs
- Thermal management integration:
- Consider airflow patterns when placing heat-generating components
- Allow adequate spacing for thermal management solutions
- Account for thermal expansion effects in sensitive circuits
A systematic approach to component placement might include:
- Place connectors and mechanical features dictated by form factor
- Position critical ICs with attention to signal flow
- Arrange supporting components around primary ICs
- Add bypass capacitors as close as possible to power pins
- Incorporate termination components near signal endpoints
- Verify spacing requirements and mechanical constraints
Power and Ground Plane Considerations
Proper power distribution network (PDN) design is essential for high-speed performance:
- Plane allocation:
- Dedicate entire layers to power and ground planes when possible
- Position power planes adjacent to their corresponding ground planes
- Keep high-speed signal layers adjacent to continuous reference planes
- Plane segmentation:
- Separate analog and digital power domains
- Use moating techniques to isolate sensitive circuits
- Provide sufficient isolation between different voltage domains
- Implement proper bridging between planes where necessary
- Decoupling implementation:
- Use multiple capacitor values to address different frequency ranges
- Position bulk capacitors near power entry points
- Place local decoupling capacitors close to IC power pins
- Add planar capacitance through tight power-ground plane spacing
- Special considerations:
- Avoid narrow constrictions in power planes that create current bottlenecks
- Implement star routing for sensitive analog supplies
- Consider resonance frequencies of power plane structures
- Use stitching vias to enhance plane connectivity
Best Practices for Multilayer Board Layout
Multilayer boards require special attention to layer stackup and utilization:
- Layer count determination:
- Based on routing density requirements
- Influenced by signal integrity needs
- Affected by power distribution complexity
- Constrained by manufacturing and cost considerations
- Layer assignment strategy:
- Inner layers for sensitive high-speed signals
- Outer layers for less critical signals or components
- Dedicated plane layers for power and ground
- Routing layers paired with adjacent reference planes
- Signal layer pairing:
- Route orthogonally on adjacent signal layers
- Maintain consistent reference plane relationships
- Consider dual-stripline configurations for critical signals
- Use good layer-to-layer alignment to control impedance
- Manufacturing considerations:
- Design symmetrical stackups to prevent warping
- Specify controlled dielectric thickness for impedance control
- Consider material transitions in hybrid stackups
- Account for manufacturing tolerances in design margins
Clock Signal Routing
Clock signals deserve special attention due to their system-wide impact:
- Topology selection:
- Point-to-point for highest performance
- Star distribution for balanced delays
- H-tree for minimal skew across multiple loads
- Daisy-chain only for less critical applications
- Isolation practices:
- Route clock traces away from sensitive analog signals
- Maintain increased spacing from parallel digital traces
- Consider dedicated clock layers in complex designs
- Use guard traces or shielding for critical clock signals
- Termination approaches:
- Implement source termination for most clock distributions
- Use distributed termination for multi-load topologies
- Consider specialized termination schemes for differential clocks
- Match termination values to measured trace impedance
- Skew management:
- Equalize trace lengths to balanced loads
- Account for propagation velocity in delay calculations
- Consider driver output and receiver input delays
- Implement controlled meandering for length matching
Design Tool Tips: Altium and KiCad High-Speed Design
Using Altium Designer for High-Speed Design
Altium Designer offers comprehensive high-speed design capabilities:
- Stackup management:
- Use the Layer Stack Manager to define materials and thicknesses
- Utilize the Impedance Calculator for trace dimension calculations
- Import dielectric material libraries from manufacturers
- Generate stackup reports for fabricator communication
- Constraint-driven design:
- Implement high-speed design rules in the PCB Rules and Constraints Editor
- Define specific rules for differential pairs, matched lengths, and spacing
- Create net classes to apply rules to related signal groups
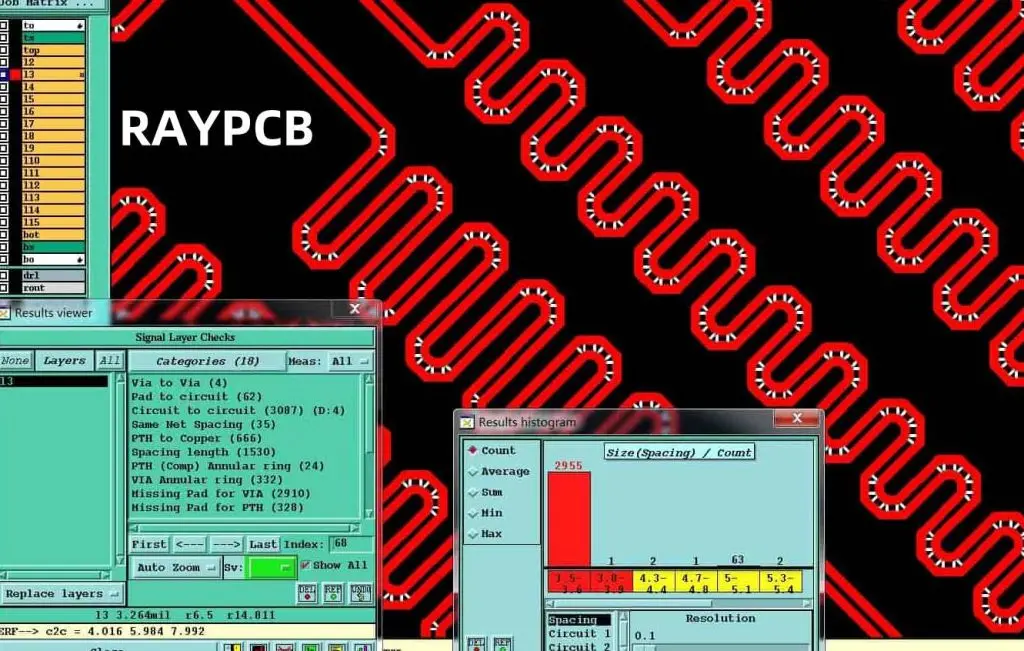
- Use design rule checking (DRC) to verify constraint compliance
- Advanced routing tools:
- Interactive differential pair routing with automated width/gap control
- Length tuning with visual feedback and automated meandering
- Trace glossing to optimize path geometry
- Teardrop insertion to strengthen pad-trace connections
- Signal integrity tools:
- Xpedition xSignal for constraint management and verification
- Signal Integrity extension for simulation and analysis
- PDN Analyzer for power integrity assessment
- Layer stack impedance simulation
- Practical tips:
- Use rooms to define and manage board regions
- Leverage the multi-channel design features for repeated circuits
- Set up custom design rules for specific high-speed interfaces
- Use polygon pours with shelving for enhanced thermal management
KiCad Capabilities and Workarounds
While KiCad offers fewer built-in high-speed design features than commercial tools, effective high-speed design is still possible:
- Stackup definition:
- Use the Layer Setup dialog to define board layers
- Create text documentation of material specifications
- Calculate impedance values using external tools
- Communicate stackup details to fabricators via notes
- Constraint implementation:
- Use design class settings to define trace widths and clearances
- Implement net classes for different signal types
- Set up track width presets for different impedance requirements
- Leverage KiCad’s DRC system to enforce spacing rules