Introduction
Welcome to the world of ESP32! If you’re stepping into the exciting realm of Internet of Things (IoT) and embedded systems, you’ve come to the right place. This comprehensive guide will walk you through everything you need to know about the ESP32, from its basic features to programming tips and beginner-friendly projects.
What is the ESP32?
The ESP32 is a powerful, low-cost microcontroller that has taken the maker community by storm. It’s the successor to the popular ESP8266 and packs a punch with its dual-core processor, built-in Wi-Fi and Bluetooth capabilities, and extensive GPIO options. Whether you’re building a smart home device, a wearable gadget, or an industrial sensor network, the ESP32 provides a versatile platform for your projects.

Why is it so popular for IoT and embedded projects?
The ESP32’s popularity stems from its perfect balance of features, cost, and ease of use. Here’s why makers and professionals alike love it:
- Powerful processing: Dual-core processor up to 240MHz
- Built-in wireless: Wi-Fi and Bluetooth in one chip
- Low power consumption: Ideal for battery-operated devices
- Rich peripherals: ADC, DAC, touch sensors, and more
- Affordable: High-end features at a budget-friendly price
- Strong community support: Abundant resources and libraries
What this guide covers
In this guide, we’ll dive deep into the ESP32, covering everything from basic setup to advanced programming tips. You’ll learn about the ESP32’s pinout, how to set up your development environment, and how to bring your ideas to life with practical projects. Whether you’re a complete beginner or looking to expand your ESP32 skills, this guide has something for everyone.
Let’s embark on this exciting journey into the world of ESP32!
What is ESP32?
A Brief History
The ESP32 is the successor to the widely popular ESP8266, both developed by Espressif Systems. While the ESP8266 revolutionized the IoT landscape with its low-cost Wi-Fi capabilities, the ESP32 takes it a step further by addressing many of its predecessor’s limitations and adding new features.
Introduced in 2016, the ESP32 quickly gained traction in the maker community and professional circles alike. Its combination of powerful processing, wireless connectivity, and affordability made it an instant hit for a wide range of applications.
Key Features
The ESP32 boasts an impressive array of features that set it apart:
- Dual-core processor: Two Xtensa 32-bit LX6 microprocessors that can be controlled separately
- Clock speed: Up to 240 MHz
- Wi-Fi: 2.4 GHz Wi-Fi (802.11 b/g/n)
- Bluetooth: Bluetooth v4.2 BR/EDR and BLE (Bluetooth Low Energy)
- Memory: 520 KB SRAM, 448 KB ROM
- GPIO: Up to 36 pins
- Peripherals:
- 12-bit ADC (Analog to Digital Converter)
- 8-bit DAC (Digital to Analog Converter)
- Touch sensors
- Temperature sensor
- Hall effect sensor
- Security: Hardware encryption (AES, SHA, RSA, ECC)
- Low power modes: Deep sleep mode consuming only 10µA
Popular Variants
The ESP32 comes in several variants to suit different project needs:
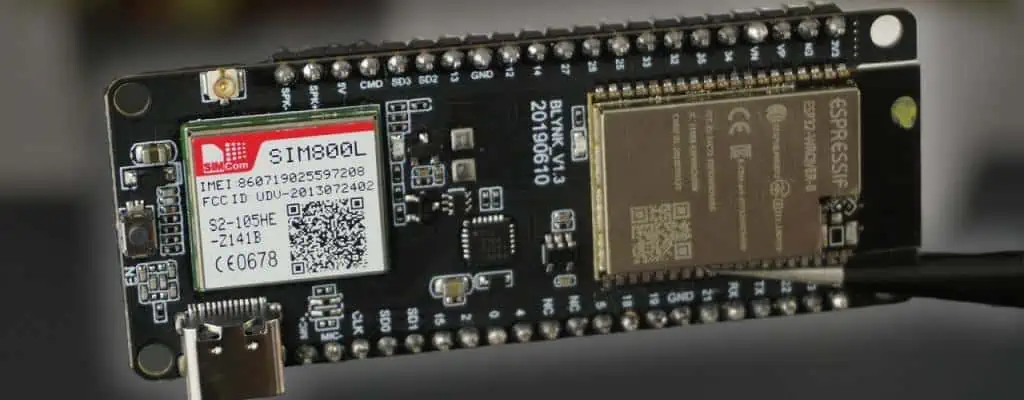
- ESP32-WROOM: The most common module, featuring Wi-Fi and Bluetooth
- ESP32-WROVER: Similar to WROOM but with additional PSRAM
- ESP32-CAM: Includes a camera module, perfect for video streaming projects
- ESP32-S2: A single-core variant with enhanced security features
- ESP32-C3: RISC-V based variant with Wi-Fi and Bluetooth LE
Each variant has its strengths, making the ESP32 family versatile enough to cater to a wide range of project requirements.
ESP32 Pinout Overview
Understanding the ESP32’s pinout is crucial for connecting sensors, actuators, and other components to your projects. Let’s break down the most important pins and their functions.
Standard Pinout Diagram
[Insert image of ESP32 pinout diagram here]
Important Pins Explained
Power Pins
- 3V3: 3.3V power output
- GND: Ground
- VIN: Input voltage (5V typically)
GPIO (General Purpose Input/Output)
The ESP32 has up to 36 GPIO pins, but not all are available on every module. Some key points:
- GPIO 0-39 are available (with some exceptions)
- Some pins have special functions (e.g., GPIO 0 is used for booting)
- Not all pins support PWM (Pulse Width Modulation)
ADC and DAC
- ADC (Analog to Digital Converter): GPIO 32-39
- DAC (Digital to Analog Converter): GPIO 25 and 26
Communication Interfaces
- UART (Universal Asynchronous Receiver/Transmitter):
- UART0: GPIO 1 (TX), GPIO 3 (RX)
- UART1: GPIO 10 (TX), GPIO 9 (RX)
- UART2: GPIO 17 (TX), GPIO 16 (RX)
- SPI (Serial Peripheral Interface):
- HSPI: GPIO 14 (CLK), 12 (MISO), 13 (MOSI), 15 (CS)
- VSPI: GPIO 18 (CLK), 19 (MISO), 23 (MOSI), 5 (CS)
- I2C (Inter-Integrated Circuit):
- GPIO 21 (SDA), GPIO 22 (SCL)
Notes on Pin Limitations
- Some pins are input-only (GPIO 34-39)
- GPIO 6-11 are typically used for connecting the onboard flash, avoid using these
- Be aware of the default boot states of pins to prevent unintended behavior
Understanding these pin functions and limitations will help you design your projects more effectively and avoid common pitfalls when working with the ESP32.
Setting Up Your ESP32 for the First Time
Getting started with the ESP32 is straightforward, but there are a few key steps to follow. Let’s walk through the process of setting up your development environment.
What You Need
- ESP32 development board (e.g., ESP32-WROOM or ESP32-DevKitC)
- Micro-USB cable
- Computer with Arduino IDE or PlatformIO installed
Installing Arduino IDE
- Download Arduino IDE from the official website
- Install the IDE following the instructions for your operating system
Adding ESP32 Board Manager URL
- Open Arduino IDE
- Go to File > Preferences
- In the “Additional Board Manager URLs” field, add:
https://raw.githubusercontent.com/espressif/arduino-esp32/gh-pages/package_esp32_index.json - Click “OK” to save the settings
Installing ESP32 Board Support
- Go to Tools > Board > Boards Manager
- Search for “esp32”
- Find “ESP32 by Espressif Systems” and click “Install”
- Wait for the installation to complete
Connecting Your ESP32
- Connect your ESP32 board to your computer using the Micro-USB cable
- In Arduino IDE, go to Tools > Board and select your ESP32 board model
- Select the correct port under Tools > Port
First-time Connection Issues and Troubleshooting
If you’re having trouble connecting to your ESP32, try these steps:
- Ensure you’re using a data-capable USB cable, not just a charging cable
- Some ESP32 boards require you to press and hold the “BOOT” button while uploading
- Install the CP210x or CH340 drivers if your computer doesn’t recognize the board
- Try different USB ports on your computer
Read more about:
Programming the ESP32: First Sketch
Now that your ESP32 is set up, let’s write your first program to blink an LED. This simple project will confirm that everything is working correctly.
Hello World: Blink an LED
Here’s a simple sketch to blink the onboard LED on most ESP32 development boards:
cpp复制const int ledPin = 2;  // Most ESP32 boards have an onboard LED on GPIO 2

void setup() {
  pinMode(ledPin, OUTPUT);
}

void loop() {
  digitalWrite(ledPin, HIGH);
  delay(1000);
  digitalWrite(ledPin, LOW);
  delay(1000);
}
Uploading Code
- Copy the above code into a new Arduino sketch
- Select your board and port in the Tools menu
- Click the “Upload” button (right arrow icon)
- Wait for the upload to complete
Serial Monitor Basics
The Serial Monitor is a useful tool for debugging and communicating with your ESP32:
- Add
Serial.begin(115200);to yoursetup()function - Use
Serial.println("Your message here");to print messages - Open the Serial Monitor (Tools > Serial Monitor)
- Set the baud rate to 115200
Example:
cpp复制void setup() {
  Serial.begin(115200);
  Serial.println("ESP32 is ready!");
  // Rest of your setup code
}
Essential Beginner Projects
Now that you’re comfortable with the basics, let’s explore some essential projects to expand your ESP32 skills.
1. Wi-Fi Scan Project
This project demonstrates how to use the ESP32’s Wi-Fi capabilities to scan for nearby networks.
#include <WiFi.h>

void setup() {
  Serial.begin(115200);
  WiFi.mode(WIFI_STA);
  WiFi.disconnect();
  delay(100);
  Serial.println("Setup done");
}

void loop() {
  Serial.println("Scanning for Wi-Fi networks...");
  int n = WiFi.scanNetworks();
  Serial.println("Scan done");
  if (n == 0) {
    Serial.println("No networks found");
  } else {
    Serial.print(n);
    Serial.println(" networks found");
    for (int i = 0; i < n; ++i) {
      Serial.print(i + 1);
      Serial.print(": ");
      Serial.print(WiFi.SSID(i));
      Serial.print(" (");
      Serial.print(WiFi.RSSI(i));
      Serial.print(")");
      Serial.println((WiFi.encryptionType(i) == WIFI_AUTH_OPEN)?" ":"*");
      delay(10);
    }
  }
  Serial.println("");
  delay(5000);
}
2. Web Server on ESP32
Create a simple web server that displays sensor data or controls an LED:
#include <WiFi.h>
#include <WebServer.h>

const char* ssid = "YourWiFiSSID";
const char* password = "YourWiFiPassword";

WebServer server(80);

void setup() {
  Serial.begin(115200);
  WiFi.begin(ssid, password);
  while (WiFi.status() != WL_CONNECTED) {
    delay(1000);
    Serial.println("Connecting to WiFi...");
  }
  Serial.println("Connected to WiFi");
  Serial.print("IP address: ");
  Serial.println(WiFi.localIP());

  server.on("/", handleRoot);
  server.begin();
  Serial.println("HTTP server started");
}

void loop() {
  server.handleClient();
}

void handleRoot() {
  String html = "<html><body><h1>ESP32 Web Server</h1><p>Hello from ESP32!</p></body></html>";
  server.send(200, "text/html", html);
}
3. Basic Bluetooth Communication
Implement a simple Bluetooth Low Energy (BLE) server:
#include <BLEDevice.h>
#include <BLEUtils.h>
#include <BLEServer.h>

#define SERVICE_UUID        "4fafc201-1fb5-459e-8fcc-c5c9c331914b"
#define CHARACTERISTIC_UUID "beb5483e-36e1-4688-b7f5-ea07361b26a8"

void setup() {
  Serial.begin(115200);
  Serial.println("Starting BLE work!");

  BLEDevice::init("MyESP32");
  BLEServer *pServer = BLEDevice::createServer();
  BLEService *pService = pServer->createService(SERVICE_UUID);
  BLECharacteristic *pCharacteristic = pService->createCharacteristic(
                                         CHARACTERISTIC_UUID,
                                         BLECharacteristic::PROPERTY_READ |
                                         BLECharacteristic::PROPERTY_WRITE
                                       );

  pCharacteristic->setValue("Hello World");
  pService->start();
  BLEAdvertising *pAdvertising = BLEDevice::getAdvertising();
  pAdvertising->addServiceUUID(SERVICE_UUID);
  pAdvertising->setScanResponse(true);
  pAdvertising->setMinPreferred(0x06);  // functions that help with iPhone connections issue
  pAdvertising->setMinPreferred(0x12);
  BLEDevice::startAdvertising();
  Serial.println("Characteristic defined! Now you can read it in your phone!");
}

void loop() {
  delay(2000);
}
4. Reading Sensor Data
Here’s an example of reading data from a DHT22 temperature and humidity sensor:
#include <DHT.h>

#define DHTPIN 4     // Digital pin connected to the DHT sensor
#define DHTTYPE DHT22   // DHT 22 (AM2302)

DHT dht(DHTPIN, DHTTYPE);

void setup() {
  Serial.begin(115200);
  dht.begin();
}

void loop() {
  delay(2000);  // Wait a few seconds between measurements

  float h = dht.readHumidity();
  float t = dht.readTemperature();

  if (isnan(h) || isnan(t)) {
    Serial.println("Failed to read from DHT sensor!");
    return;
  }

  Serial.print("Humidity: ");
  Serial.print(h);
  Serial.print("%  Temperature: ");
  Serial.print(t);
  Serial.println("°C");
}
These projects provide a solid foundation for understanding key ESP32 features. As you become more comfortable, you can combine these concepts to create more complex and interesting applications
Programming Tips and Best Practices

To make the most of your ESP32 projects, consider these programming tips and best practices:
Using Deep Sleep to Save Power
The ESP32’s deep sleep mode is crucial for battery-operated projects. Here’s how to implement it:
#define uS_TO_S_FACTOR 1000000  // Conversion factor for micro seconds to seconds
#define TIME_TO_SLEEP  5        // Time ESP32 will go to sleep (in seconds)

RTC_DATA_ATTR int bootCount = 0;

void setup() {
  Serial.begin(115200);
  delay(1000);

  ++bootCount;
  Serial.println("Boot number: " + String(bootCount));

  esp_sleep_enable_timer_wakeup(TIME_TO_SLEEP * uS_TO_S_FACTOR);
  Serial.println("Going to sleep now");
  delay(1000);
  esp_deep_sleep_start();
}

void loop() {
  // This is not going to be called
}
Choosing the Right GPIOs
- Use input-only GPIOs (34-39) for sensors and switches
- Avoid GPIOs 6-11 as they’re connected to the onboard flash
- Remember that some GPIOs have special functions (e.g., GPIO 0 for boot mode)
Managing Wi-Fi Reconnections
Implement a robust Wi-Fi reconnection strategy:
#include <WiFi.h>

const char* ssid = "YourWiFiSSID";
const char* password = "YourWiFiPassword";

void setup() {
  Serial.begin(115200);
  WiFi.begin(ssid, password);
}

void loop() {
  if (WiFi.status() != WL_CONNECTED) {
    Serial.println("Reconnecting to WiFi...");
    WiFi.disconnect();
    WiFi.reconnect();
    delay(5000);
  }
  // Your main code here
}
OTA (Over-the-Air) Updates Basics
OTA updates allow you to upload new code to your ESP32 wirelessly:
#include <WiFi.h>
#include <ESPmDNS.h>
#include <WiFiUdp.h>
#include <ArduinoOTA.h>

const char* ssid = "YourWiFiSSID";
const char* password = "YourWiFiPassword";

void setup() {
  Serial.begin(115200);
  WiFi.mode(WIFI_STA);
  WiFi.begin(ssid, password);
  while (WiFi.waitForConnectResult() != WL_CONNECTED) {
    Serial.println("Connection Failed! Rebooting...");
    delay(5000);
    ESP.restart();
  }

  ArduinoOTA.onStart([]() {
    String type;
    if (ArduinoOTA.getCommand() == U_FLASH)
      type = "sketch";
    else
      type = "filesystem";
    Serial.println("Start updating " + type);
  });
  ArduinoOTA.onEnd([]() {
    Serial.println("\nEnd");
  });
  ArduinoOTA.onProgress([](unsigned int progress, unsigned int total) {
    Serial.printf("Progress: %u%%\r", (progress / (total / 100)));
  });
  ArduinoOTA.onError([](ota_error_t error) {
    Serial.printf("Error[%u]: ", error);
    if (error == OTA_AUTH_ERROR) Serial.println("Auth Failed");
    else if (error == OTA_BEGIN_ERROR) Serial.println("Begin Failed");
    else if (error == OTA_CONNECT_ERROR) Serial.println("Connect Failed");
    else if (error == OTA_RECEIVE_ERROR) Serial.println("Receive Failed");
    else if (error == OTA_END_ERROR) Serial.println("End Failed");
  });
  ArduinoOTA.begin();
  Serial.println("OTA Ready");
  Serial.print("IP address: ");
  Serial.println(WiFi.localIP());
}

void loop() {
  ArduinoOTA.handle();
  // Your main code here
}
Common Problems and How to Solve Them
ESP32 Not Connecting to Wi-Fi
- Double-check SSID and password
- Ensure the Wi-Fi network is 2.4GHz (ESP32 doesn’t support 5GHz)
- Try moving closer to the router
- Check if the network has a captive portal
Flashing Errors
- Hold the BOOT button while uploading
- Ensure you’re using a data-capable USB cable
- Install or reinstall USB drivers
- Try a different USB port
Pin Conflicts
- Review your wiring and code for any conflicting pin assignments
- Avoid using pins connected to onboard components (e.g., BOOT button, onboard LED)
- Be aware of input-only pins (34-39) when trying to use them as outputs
Resources and Where to Learn More
Official Espressif Documentation
Best Forums and Communities
Recommended YouTube Channels
Conclusion
The ESP32 is a powerful and versatile microcontroller that opens up a world of possibilities for IoT and embedded projects. This guide has covered the basics of getting started with the ESP32, from understanding its pinout to programming your first projects.
We encourage you to try out the projects we’ve discussed and experiment with your own ideas. The ESP32’s flexibility makes it an excellent platform for learning and innovation. As you grow more comfortable with the basics, you can explore more advanced topics like:
- Using FreeRTOS for multitasking
- Implementing Micropython on ESP32
- Creating mesh networks with ESP-NOW
- Integrating ESP32 with cloud platforms like AWS IoT or Google Cloud IoT
Remember, the best way to learn is by doing. Start small, build on your successes, and don’t be afraid to ask for help in the ESP32 community. Happy coding!
FAQ: Quick Answers for ESP32 Beginners
- Q: Can ESP32 run on 5V? A: While the ESP32 chip operates at 3.3V, many development boards have a voltage regulator that allows you to power them with 5V via USB or VIN pin.
- Q: How much memory does ESP32 have? A: The typical ESP32 has 520 KB of SRAM and 448 KB of ROM. Some variants may have different amounts.
- Q: Can ESP32 connect to 5GHz Wi-Fi? A: No, the standard ESP32 only supports 2.4GHz Wi-Fi. Some newer variants like the ESP32-C6 support 5GHz.
- Q: How many GPIO pins does ESP32 have? A: The ESP32 chip has up to 36 GPIO pins, but the number available on development boards may vary.
- Q: Can ESP32 run Arduino code? A: Yes, the ESP32 can be programmed using the Arduino IDE and most Arduino libraries.
ESP32 vs ESP8266: A Comparison
| Feature | ESP32 | ESP8266 |
|---|---|---|
| CPU | Dual-core 32-bit | Single-core 32-bit |
| Clock Speed | Up to 240 MHz | Up to 160 MHz |
| RAM | 520 KB SRAM | 160 KB RAM |
| Wi-Fi | 2.4 GHz b/g/n | 2.4 GHz b/g/n |
| Bluetooth | Classic and BLE | None (BLE on ESP32-C3) |
| GPIO Pins | Up to 36 | 17 |
| ADC Channels | 18 | 1 |
| Hardware Interfaces | SPI, I2C, I2S, CAN, UART | SPI, I2C, I2S, UART |
| Price | Slightly higher | Lower |
While the ESP8266 is still a capable and cost-effective option for simpler projects, the ESP32’s additional features and processing power make it the better choice for more complex applications, especially those requiring Bluetooth or advanced GPIO functionality.