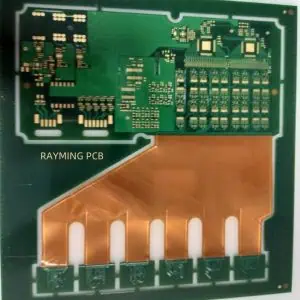
Designing and manufacturing a Rigid-Flex Circuit Board with 6 layers in the rigid section and 2 layers in the flexible section is a complex process that requires careful planning and execution.
1. Design Phase
1.1 Layer Stack-up
- Determine the layer stack-up for both rigid and flex sections
- Rigid section: 6 layers (e.g., 4 signal layers, 2 power/ground planes)
- Flex section: 2 layers (typically signal layers)
1.2 Material Selection
- Rigid section: FR-4 or high-performance laminates
- Flex section: Polyimide or other flexible substrate
- Adhesives: Acrylic or epoxy-based adhesives for bonding layers
1.3 Component Placement
- Place components on rigid sections only
- Avoid placing components near transition areas between rigid and flex
1.4 Routing Considerations
- Use tear-drop pads for improved flexibility and reliability
- Avoid 90-degree angles in trace routing on flex sections
- Route critical signals on inner layers of the rigid section for better protection
1.5 Transition Area Design
- Gradual transition between rigid and flex sections
- Use curved traces in transition areas to reduce stress
1.6 Flex Circuit Design
- Limit the number of layers in flex circuits (2 in this case)
- Design for neutral bend axis to minimize stress during flexing
- Consider using crosshatched copper planes for improved flexibility
2. Manufacturing Process
2.1 Material Preparation
- Cut rigid and flexible materials to size
- Clean and prepare surfaces for lamination
2.2 Inner Layer Processing
- Print and etch inner layer circuits
- Perform automated optical inspection (AOI)
2.3 Lamination
- Stack and align all layers (rigid and flex)
- Use special flex-rigid bonding films between layers
- Laminate under heat and pressure
2.4 Drilling
- Drill holes for vias and component mounting
- Use special drill bits designed for flex-rigid PCBs
2.5 Plating and Outer Layer Processing
- Electroless copper plating of holes
- Print and etch outer layer circuits
2.6 Solder Mask and Surface Finish
- Apply solder mask to rigid sections
- Apply surface finish (e.g., ENIG, immersion tin)
2.7 Profiling and Scoring
- Route the board outline
- Score or V-cut for panel separation, if applicable
2.8 Final Inspection and Testing
- Perform electrical testing (continuity, impedance)
- Conduct flex testing to ensure durability
3. Quality Control
- Implement strict quality control measures throughout the process
- Perform regular inspections and testing at each stage
- Use X-ray inspection for hidden features and layer alignment
4. Considerations for Improved Reliability
- Use strain relief features in the design
- Consider stiffeners for additional support in high-stress areas
- Implement selective flex stiffening where needed
5. Documentation
- Create detailed documentation including:
- Layer stack-up diagrams
- Material specifications
- Manufacturing notes and special instructions
- Test requirements and acceptance criteria
Remember that designing and manufacturing rigid-flex PCBs is a specialized process. It’s recommended to work closely with a PCB manufacturer experienced in rigid-flex technology to ensure the best results.