In the era of smart homes and Internet of Things (IoT), the ability to control and monitor our living environment has become increasingly important. This article explores how to use the Raspberry Pi Pico to manage temperature and humidity, while also demonstrating how to control electrical sockets using the Energenie Pi-mote system. By combining these technologies, we can create a powerful and flexible home automation system that enhances comfort, energy efficiency, and convenience.
We’ll dive into the technical details of setting up the Raspberry Pi Pico for climate control, integrating sensors, and programming the device to respond to environmental changes. Additionally, we’ll explore the Energenie Pi-mote system and how it can be used to automate electrical devices in your home. By the end of this article, you’ll have a comprehensive understanding of how to implement these systems and the potential applications for your smart home projects.

2. Understanding the Components
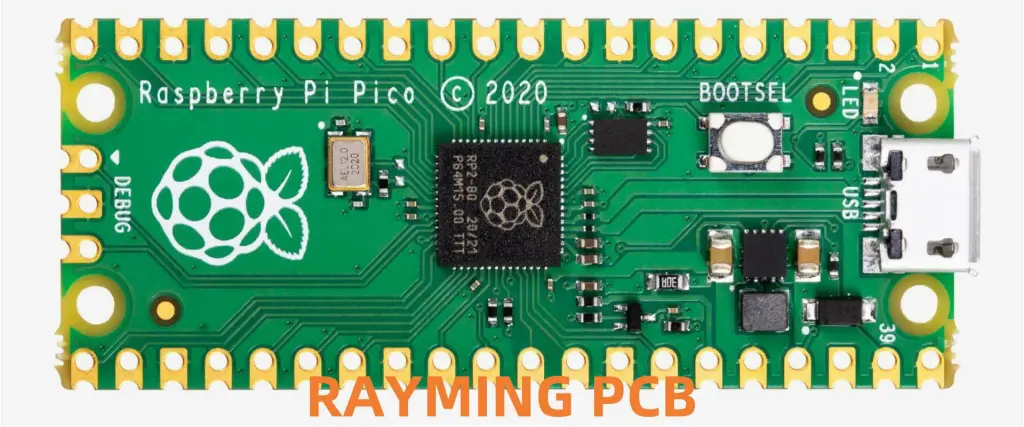
2.1 Raspberry Pi Pico
The Raspberry Pi Pico is a powerful microcontroller board based on the RP2040 chip. Its features make it ideal for IoT and home automation projects:
| Feature | Specification |
| Processor | Dual-core Arm Cortex-M0+ @ 133MHz |
| RAM | 264KB |
| Flash Memory | 2MB |
| GPIO Pins | 26 |
| ADC Channels | 3 |
| Operating Voltage | 3.3V |
2.2 Temperature and Humidity Sensors
For our climate control system, we’ll use the DHT22 (also known as AM2302) sensor. It’s a popular choice for its accuracy and reliability:
| Feature | Specification |
| Temperature Range | -40 to 80°C |
| Humidity Range | 0-100% RH |
| Accuracy (Temp) | ±0.5°C |
| Accuracy (Humidity) | ±2-5% RH |
| Resolution | 0.1°C / 0.1% RH |
2.3 Energenie Pi-mote
The Energenie Pi-mote system allows you to control electrical sockets remotely. It consists of:
- Energenie Pi-mote control board
- Radio-controlled sockets
Key features include:
- Control up to 4 sockets independently
- 433MHz radio frequency
- Compatible with Raspberry Pi GPIO
3. Setting Up the Raspberry Pi Pico for Climate Control
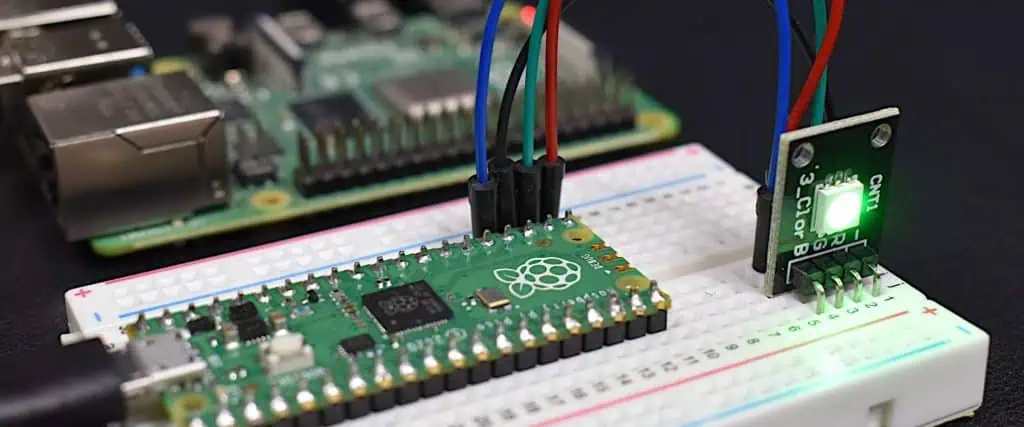
3.1 Hardware Setup
To set up the Raspberry Pi Pico for climate control:
- Connect the DHT22 sensor to the Pico:
- VCC to 3.3V
- GND to GND
- Data to GPIO 28
- (Optional) Add an OLED display for real-time readings:
- VCC to 3.3V
- GND to GND
- SDA to GPIO 4
- SCL to GPIO 5
3.2 Software Setup
- Install MicroPython on the Raspberry Pi Pico.
- Install necessary libraries:
dht.pyfor the DHT22 sensorssd1306.pyfor the OLED display (if used)
3.3 Basic Code Structure
Here’s a basic code structure for reading temperature and humidity:
pythonCopyimport machine
import utime
from dht import DHT22

sensor = DHT22(machine.Pin(28))

while True:
    try:
        sensor.measure()
        temp = sensor.temperature()
        hum = sensor.humidity()
        print('Temperature: %3.1f C' % temp)
        print('Humidity: %3.1f %%' % hum)
    except OSError as e:
        print('Failed to read sensor.')

    utime.sleep(2)
4. Implementing Climate Control Logic
4.1 Defining Comfort Zones
Establish comfortable temperature and humidity ranges:
| Condition | Range |
| Temperature | 20-25°C |
| Humidity | 30-60% |
4.2 Control Logic
Implement control logic based on sensor readings:
pythonCopydef control_climate(temp, hum):
    if temp < 20:
        # Activate heating
        pass
    elif temp > 25:
        # Activate cooling
        pass

    if hum < 30:
        # Activate humidifier
        pass
    elif hum > 60:
        # Activate dehumidifier
        pass
4.3 Implementing Hysteresis
To prevent rapid cycling of devices, implement hysteresis:
pythonCopyTEMP_HYSTERESIS = 1.0
HUM_HYSTERESIS = 5.0

def control_climate(temp, hum):
    global heating_on, cooling_on, humidifier_on, dehumidifier_on

    if temp < 20 - TEMP_HYSTERESIS and not heating_on:
        heating_on = True
        # Activate heating
    elif temp > 20 + TEMP_HYSTERESIS and heating_on:
        heating_on = False
        # Deactivate heating

    # Similar logic for cooling, humidifier, and dehumidifier
5. Setting Up Energenie Pi-mote
5.1 Hardware Setup
- Connect the Energenie Pi-mote board to the Raspberry Pi:
- Ensure the board is properly seated on the GPIO pins
- Set up radio-controlled sockets:
- Plug devices into the sockets
- Assign each socket a unique code (1-4)
5.2 Software Setup
Install the required libraries:
bashCopysudo apt-get update
sudo apt-get install python3-rpi.gpio
sudo pip3 install energenie
5.3 Basic Control Script
Here’s a basic script to control Energenie sockets:
pythonCopyfrom energenie import switch_on, switch_off
import time

# Turn on socket 1
switch_on(1)
time.sleep(5)

# Turn off socket 1
switch_off(1)
6. Integrating Climate Control with Energenie Pi-mote
6.1 Assigning Devices to Sockets
Assign climate control devices to specific sockets:
| Socket | Device |
| 1 | Heater |
| 2 | Air Conditioner |
| 3 | Humidifier |
| 4 | Dehumidifier |
6.2 Updated Control Logic
Modify the control logic to activate Energenie sockets:
pythonCopyfrom energenie import switch_on, switch_off

def control_climate(temp, hum):
    if temp < 20:
        switch_on(1)  # Turn on heater
        switch_off(2)  # Turn off AC
    elif temp > 25:
        switch_off(1)  # Turn off heater
        switch_on(2)  # Turn on AC

    if hum < 30:
        switch_on(3)  # Turn on humidifier
        switch_off(4)  # Turn off dehumidifier
    elif hum > 60:
        switch_off(3)  # Turn off humidifier
        switch_on(4)  # Turn on dehumidifier
7. Advanced Features and Optimizations
7.1 Scheduling and Time-based Control
Implement time-based control for energy efficiency:
pythonCopyimport time

def time_based_control():
    current_hour = time.localtime().tm_hour

    if 22 <= current_hour or current_hour < 6:
        # Night-time settings
        set_temperature(18)  # Lower temperature at night
    else:
        # Day-time settings
        set_temperature(22)
7.2 Remote Monitoring and Control
Set up a simple web server for remote monitoring:
pythonCopyimport socket
import network

def setup_webserver():
    wlan = network.WLAN(network.STA_IF)
    wlan.active(True)
    wlan.connect('YOUR_SSID', 'YOUR_PASSWORD')

    addr = socket.getaddrinfo('0.0.0.0', 80)[0][-1]
    s = socket.socket()
    s.bind(addr)
    s.listen(1)

    while True:
        cl, addr = s.accept()
        # Handle client request
        cl.close()
7.3 Data Logging and Analysis
Implement data logging for long-term analysis:
pythonCopyimport ujson

def log_data(temp, hum):
    data = {'timestamp': time.time(), 'temperature': temp, 'humidity': hum}
    with open('climate_log.json', 'a') as f:
        ujson.dump(data, f)
        f.write('\n')
8. Troubleshooting and Maintenance
8.1 Common Issues and Solutions
| Issue | Possible Cause | Solution |
| Inaccurate readings | Sensor calibration | Recalibrate or replace sensor |
| Unresponsive sockets | Signal interference | Check for obstacles, adjust antenna |
| System crashes | Memory leaks | Implement watchdog timer, optimize code |
8.2 Regular Maintenance Tasks
- Calibrate sensors every 6 months
- Check and replace batteries in wireless devices
- Update firmware and software regularly
- Clean air filters in HVAC devices
9. Future Expansions and Integrations
Consider these potential expansions for your system:
- Integration with smart home platforms (e.g., Home Assistant, OpenHAB)
- Voice control through virtual assistants
- Machine learning for predictive climate control
- Energy consumption monitoring and optimization
10. Conclusion
By combining the Raspberry Pi Pico for climate sensing and control with the Energenie Pi-mote system for device automation, we’ve created a powerful and flexible home automation solution. This system not only enhances comfort but also has the potential to improve energy efficiency and provide valuable insights into your home’s climate patterns.
As you implement and expand upon this system, remember to prioritize safety, regularly maintain your devices, and stay informed about the latest developments in home automation technology. With creativity and continuous improvement, your smart home can become more intelligent, efficient, and tailored to your specific needs.
11. Frequently Asked Questions (FAQ)
- Q: Can this system work with other types of sensors besides the DHT22? A: Yes, the Raspberry Pi Pico is compatible with various sensors. You can use alternatives like the BME280 or SHT31 for temperature and humidity sensing. You’ll need to modify the code to work with the specific sensor’s library and pinout.
- Q: How many Energenie sockets can I control with one Pi-mote board? A: The standard Energenie Pi-mote board can control up to 4 individual sockets. However, there are advanced versions that can control more sockets or even work with Energenie’s smart home ecosystem for expanded control.
- Q: Is it possible to control the system remotely when I’m away from home? A: Yes, you can set up remote access by creating a web server on your local network and using port forwarding on your router. Alternatively, you can use cloud-based solutions like MQTT to send commands to your system from anywhere with an internet connection. Always ensure you implement proper security measures when setting up remote access.
- Q: How accurate is the temperature and humidity control with this setup? A: The accuracy depends on several factors, including the sensor quality, placement, and the responsiveness of your heating/cooling devices. With proper setup and calibration, you can achieve accuracy within ±0.5°C for temperature and ±2-5% for humidity. Implementing hysteresis and proper control logic helps maintain stable conditions.
- Q: Can this system help reduce energy consumption? A: Yes, by maintaining optimal temperature and humidity levels and implementing features like scheduling and occupancy-based control, this system can potentially reduce energy consumption. However, the actual savings depend on various factors such as your home’s insulation, climate, and previous usage patterns. Monitoring energy consumption before and after implementation can help quantify the savings.
