Introduction
Circuit boards and breadboards are both platforms used to build and prototype electronic circuits. However, they have important differences in their design, capabilities, and applications.
This article will examine the key distinctions between printed circuit boards (PCBs) and breadboards. We’ll explore their construction, use cases, advantages, and disadvantages. We’ll also look at some hybrid solutions that combine aspects of both technologies.
Understanding the unique roles of circuit boards and breadboards is helpful for anyone involved in electronics design and prototyping. Let’s dive in and compare these fundamental circuit building tools.
Overview of Printed Circuit Boards
A printed circuit board (PCB) is a flat platform for mounting and interconnecting electronic components. The board itself is a laminated sandwich composed of insulating and conductive layers “printed” with copper traces to form the circuits. Here are the key elements of a PCB’s construction:
- Substrate – The base material is an insulating dielectric layer such as FR-4 fiberglass. This forms the core foundation to build up from.
- Copper layers – Thin copper foils are laminated onto the substrate to create conductive traces for power and signals.
- Dielectric layers – Additional insulating prepreg or film layers separate the copper foil layers.
- Vias – Plated through-holes connect traces between layers to form multilayer circuits.
- Solder mask – A polymer coating protects copper traces and defines solderable areas.
- Silkscreen – Painted legends display components, logos, and board information.
- Finish – The exposed copper is plated with solder, gold, or other surface finishes.
- Components – Passive parts are soldered directly onto pads/traces. ICs mount to sockets or directly solder.
This layered construction allows complex, multi-layer circuitry to be integrated into a compact printed board. The PCB serves as the wiring foundation for an electronic device or product.
Applications of Printed Circuit Boards
PCBs are used ubiquitously across all electronics devices and products:
- Consumer Electronics – Phones, laptops, TVs, gaming systems.
- Computing – Servers, network gear, routers.
- Automotive – Engine control units, infotainment, sensors.
- Industrial – Programmable controllers, test equipment, process control.
- Medical – Patient monitors, imaging systems, analyzers.
- Aerospace/Defense – Avionics, guidance systems, communications.
- IoT Devices – Environmental sensors, home automation, wearables.
Any application with complex circuitry requires a professionally fabricated PCB as the base platform. The board integrates the various ICs and components into a functioning electronic system.
Advantages of Printed Circuit Boards
PCBs provide many benefits for permanent electronic products:
- Reliable – Laminated PCB construction is highly stable and durable. Traces are tightly bonded to the substrate.
- Efficient power – Large copper planes/traces have low impedance for power distribution.
- Compact – Multi-layer boards allow dense component mounting and routing.
- Automated manufacturing – High volumes can be produced using specialized PCB processes.
- Sophisticated circuits – Multilayer boards enable complex, high-speed, or RF circuits.
- Component mount options – Through-hole or surface mount parts can be used.
- Design software – PCB layout tools allow efficient circuit and form factor design.
- Cost-effective – Economies of scale make PCBs inexpensive for mass production.
For these reasons, every modern electronic product relies on a printed circuit board as the core of its circuit implementation.
Disadvantages of Printed Circuit Boards
The limitations of printed circuit boards include:
- Design iteration – Modifying PCB layouts requires board revisions and fabrication time.
- Prototyping cost – Low-volume PCB production has high NRE costs.
- Soldering – Manual soldering of fine-pitch parts can be challenging.
- Rework difficulty – Desoldering and replacing BGA/CSP parts is hard.
- Fabrication time – Even rush PCB production takes days to weeks.
- Supply chain – Global logistics delays can impact PCB procurement.
For prototyping and low-volume production, PCBs have longer design cycles and higher costs. Soldering issues can also make iterating board designs troublesome compared to breadboards.
Construction of Breadboards
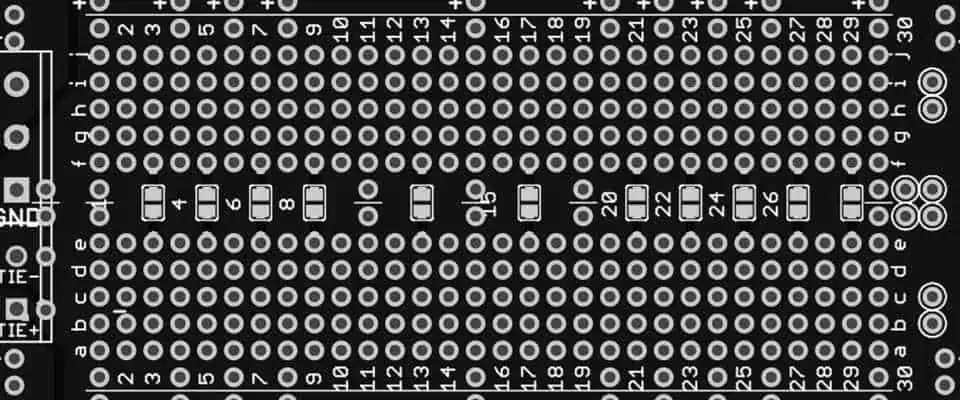
A breadboard provides a temporary platform for assembling and testing circuits. Breadboards consist of an array of connection points wired together underneath to form nodes. Here are the basic construction elements:
- Base – Typically a plastic molded block with an array of holes.
- Metal clips – Spring clips line the walls of each hole to make electrical contact.
- Rails – Strips of common nodes along the edges supply power.
- Jumper wires – Short lengths of solid core wire link components.
- Binding posts – Screw terminals allow external wiring connections.
- Adhesive back – Some breadboards have an adhesive bottom for mounting.
This simple construction allows components and jumper wires to be plugged in and reconfigured. Power buses along the edges provide common voltage rails.
Applications of Breadboards
Breadboards have several typical use cases:
- Education – Learning electronics in classrooms and hobbyist environments.
- Prototyping – Iterating circuit operation, testing new concepts.
- Verification – Validating PCB designs before fabrication.
- Custom circuits – One-off experimental or test setups.
- Field service – Temporary circuit modifications or troubleshooting.
For education, design verification, and temporary circuits, breadboards provide an indispensable tool. Their plug-and-play nature accelerates experimentation with circuit concepts.
Advantages of Breadboards

Key advantages of using breadboards include:
- Reusable – Components can be plugged in and rearranged as needed.
- Adjustable – No soldering allows circuits to be changed.
- Low cost – Inexpensive component platform.
- Fast setup – Circuits can be assembled and modified quickly.
- Visual – Components and connections are easily visible.
- Educational – Hands-on learning of electronics fundamentals.
- Verification – Allows testing circuits before PCB fabrication.
- Ad-hoc circuits – Custom arrangements for one-off uses.
For temporary prototyping, teaching environments, and custom projects, breadboards enable adjustable circuit building.
Disadvantages of Breadboards
Limitations of breadboards include:
- Impermanent – Components and wires can disconnect if disturbed.
- Messy – Jumper wires can create tangled arrangements.
- No enclosure – Lacks structural housing for products.
- Power limitations – Copper rails not designed for high currents.
- Parasitics – Excess capacitance and inductance affect signals.
- Size constraints – Larger circuits may not physically fit.
- No automated assembly – Production use requires manual wiring.
- Not rugged – Vibration can disconnect component contacts.
For permanent circuits and robust products, breadboards lack the integration, power handling, and reliability of a soldered PCB.
Hybrid Breadboard-PCB Solutions
Some solutions combine aspects of breadboards and printed circuit boards:
- Prototyping boards – Pre-made boards with solderless component footprints speed up breadboarding integrated circuits and other complex components.
- PCB solderless sockets – Solder-down footprints for ICs allow selective use of breadboardable components on a PCB.
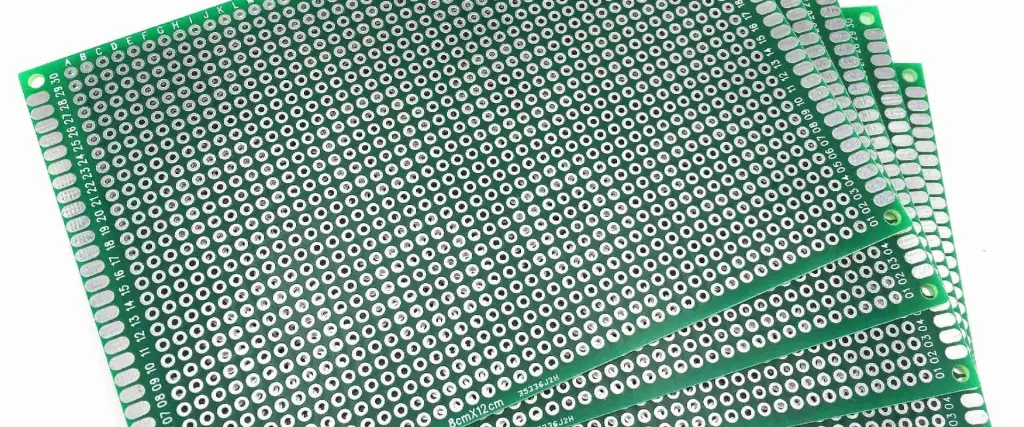
- Perfboard – Boards with a matrix of drill holes allow freeform wire wrapping of soldered components.
- Wire-wrap boards – PCBs with long plated wrap posts enable high reliability wire-wrapped connections.
These hybrid approaches provide more flexibility when a complex PCB is still needed. The goal is to maximize the advantages of both technologies in an optimized design flow.
Summary Comparison of Attributes
| Parameter | Printed Circuit Board | Breadboard |
|---|---|---|
| Construction | Laminated layers with copper traces | Molded plastic with internal clips and contacts |
| Circuit Connections | Soldered joints | Component leads plugged into clips |
| Use Cases | Permanent products, mass production | Prototyping, education, custom setups |
| Iteration Speed | Days to weeks for layout revisions | Adjustments can be made instantly |
| Reliability | Very high, joints are soldered | Contacts can disconnect when disturbed |
| Visual Inspection | Limited after assembly | Wiring arrangement clearly visible |
| Power Handling | Large copper planes handle high currents | Small clips limited to low power |
| Parasitics | Controlled impedances, minimal parasitics | Excess capacitance and inductance |
| Cost | Higher NRE cost, lower piece cost | Low cost for individual units |
| Design Software | CAD tools for schematic capture and PCB layout | Minimal software, hand wiring |
| Enclosure | Can be enclosed in a case | Typically used without enclosure |
This summarizes the key differences between the permanent printed circuit board and impermanent breadboard platforms.
Conclusion
In summary, the core distinctions come down to:
Breadboards are best for impermanent prototyping, education, and one-off circuits where modification is required. Their pluggable nature provides a fast way to build and iterate on electronic circuits.
Printed circuit boards enable compact, reliable, mass-produced electronic products and devices. A PCB provides the robust wiring foundation for any application requiring complex, permanent circuitry.
Understanding when to apply each technology, or combine them, allows users to maximize their usefulness during the electronics design process.
Frequently Asked Questions
Can breadboards be used for any type of electronic circuit?
Breadboards work well for simpler circuits but have limitations handling high frequencies, power levels, or complex multi-stage circuits. Dense integration is also challenging on a breadboard.
How accurate is a breadboard for predicting PCB performance?
The excess parasitics of a breadboard can affect signal integrity, so performance validation should still occur after final PCB fabrication. Breadboards are best for functional testing.
What are some tips for using breadboards effectively?
Using short jumper wires, keeping high-frequency traces short, providing adequate power busing, using IC sockets, and applying off-boardfiltering can improve breadboard circuits.
When is it advisable to transition from a breadboard to a PCB?
Moving to a PCB is advised when circuits are complex, mission-critical, space constrained, high power, or ready for permanent installation in a product.
Can solderless breadboards withstand vibration environments?
Excessive vibration can cause intermittent disconnects as component leads shift in breadboard holes. PCBs would provide much more robust performance under vibration.