Designing Rigid-Flex Boards for Robot Connecting Uses
Rigid-flex printed circuit boards (PCBs) are an innovative solution that combines the best features of rigid and flexible PCBs. These hybrid boards are particularly useful in robotics, where space constraints, weight considerations, and the need for dynamic movement are critical factors. This guide will walk you through the process of designing rigid-flex boards specifically for robot connecting uses.
Understanding Rigid-Flex PCBs
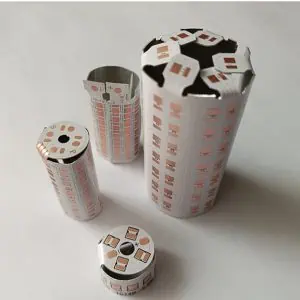
Rigid-flex PCBs consist of rigid sections interconnected by flexible sections. The rigid areas provide stability and support for components, while the flexible sections allow for bending and folding, making them ideal for applications with space constraints or moving parts.
Advantages for Robotics:
- Space-saving: Can be folded into compact 3D configurations
- Weight reduction: Eliminates the need for multiple boards and connectors
- Reliability: Fewer interconnections mean fewer potential points of failure
- Flexibility: Can withstand repeated bending and flexing
Design Considerations
1. Layer Stack-up
- Start with a simple stack-up and increase complexity as needed
- Typical stack-up: Rigid section (4-6 layers) + Flexible section (2-4 layers)
- Use symmetrical layer stack-up to prevent warping
2. Material Selection
- Rigid sections: FR-4 or high-Tg materials for stability
- Flexible sections: Polyimide for durability and flexibility
- Adhesives: Acrylic or epoxy-based, depending on application requirements
3. Copper Weight and Thickness
- Use thinner copper (0.5 oz or 1 oz) in flex areas for better flexibility
- Consider heavier copper (2 oz or more) in rigid sections for power distribution
4. Component Placement
- Place components on rigid sections only
- Avoid placing components near transition areas between rigid and flex
5. Transition Zone Design
- Use gradual transitions between rigid and flex areas
- Implement teardrop-shaped pads for better stress distribution
6. Flex Circuit Design
- Minimize the number of layers in flex areas
- Use hatched polygons instead of solid copper pours for better flexibility
- Implement curved traces instead of 90-degree angles
7. Mechanical Considerations
- Define bend radius and number of flex cycles required
- Use strain relief features like anchor points or support bars
- Consider using stiffeners in areas of high stress
Design Process
- Requirements Gathering
- Determine the robot’s specific needs (space constraints, movement requirements)
- Define environmental factors (temperature, humidity, vibration)
- Establish electrical requirements (power, signal integrity, EMI/EMC)
- Conceptual Design
- Create a rough 3D model of the board’s shape and folding pattern
- Define rigid and flexible zones
- Plan component placement and signal routing
- Detailed Design
- Create a detailed layer stack-up
- Place components on rigid sections
- Route traces, giving special attention to flex areas
- Implement design rules specific to rigid-flex (e.g., minimum bend radius)
- Design for Manufacturing (DFM)
- Consult with your PCB manufacturer early in the design process
- Implement manufacturer-specific design rules
- Consider panelization for efficient production
- Simulation and Analysis
- Perform thermal analysis to identify potential hot spots
- Conduct signal integrity simulations, especially for high-speed signals crossing flex sections
- Use FEA (Finite Element Analysis) to simulate mechanical stress during flexing
- Prototyping and Testing
- Create a prototype to verify design
- Perform mechanical tests (bend tests, cycle tests)
- Conduct electrical tests to ensure signal integrity across flex sections
Common Challenges and Solutions
- Delamination
- Challenge: Separation of layers due to repeated flexing
- Solution: Use adhesiveless flex materials, implement proper strain relief
- Signal Integrity Issues
- Challenge: Signal degradation across flex sections
- Solution: Use impedance-controlled routing, minimize layer transitions
- Solder Joint Reliability
- Challenge: Cracking of solder joints near flex areas
- Solution: Use smaller components, implement teardrop pads
- Cost Management
- Challenge: Higher cost compared to traditional PCBs
- Solution: Optimize design for manufacturability, consider volume production
By following these guidelines, you can create robust and efficient rigid-flex boards for your robotic applications. Remember that successful rigid-flex design requires a balance between electrical, mechanical, and manufacturing considerations. Always work closely with your PCB manufacturer and conduct thorough testing to ensure your design meets all requirements for your specific robotic application.